God of War Ragnarok Leviathan Axe: Best Skill Tree Upgrades

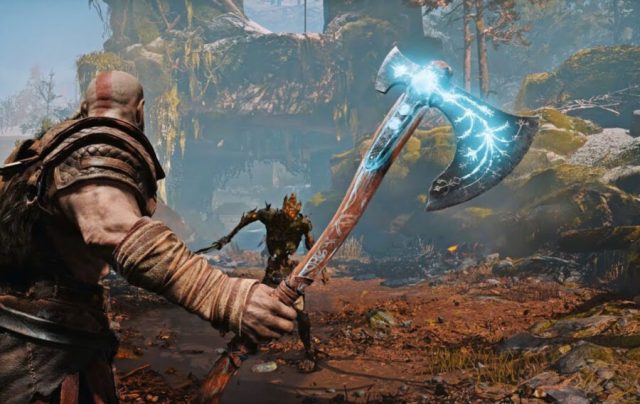
God of War: Ragnarok is one of the best games of this year, and you’ll want the best Leviathan Axe skill tree upgrades to truly succeed. Kratos is back at it again with his trusty Leviathan Axe and there are plenty of new skills to learn and master. If you are starting out fresh and don’t know which skills to upgrade, we have you covered with the best skill tree upgrades for the Leviathan Axe.

How to Upgrade the Leviathan Axe in God of War: Ragnarok

How to upgrade Kratos' Leviathan Axe in God of War Ragnarok.


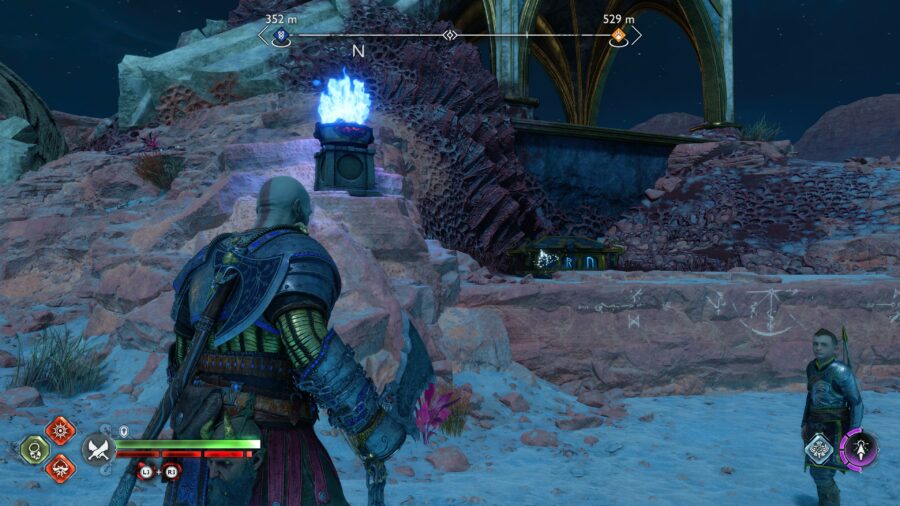
To upgrade the Leviathan Axe, you need to get Frozen Flame. The system works exactly the same way as the previous title and the best way to get Frozen Flame is by progressing the story and killing bosses. You can also get frozen sparks to eventually form Frozen Flames to upgrade the Leviathan Axe’s level. Unlike the previous God of War game, you can upgrade to level 9 instead of level 5.

As you kill the bosses in the main game, you can go to either Sindri or Brok’s shops in any location they spawn in, and you will be able to get some of the most powerful upgrades for your axe. You want to get a mix of light and heavy runic attacks from various legendary chests for the Leviathan Axe for a balanced attack chain.

Best Leviathan Axe Skill Tree Upgrades in God of War Ragnarok

The best skill tree skills for the Leviathan Axe in God of War.

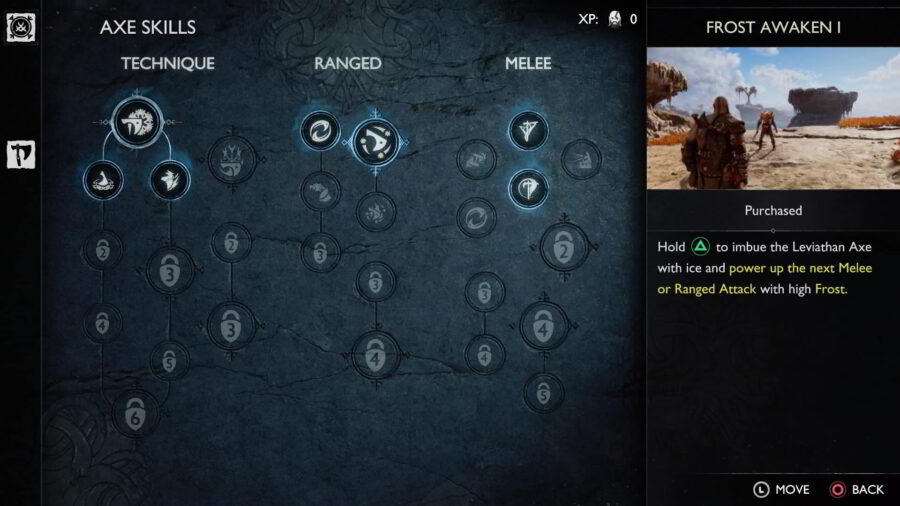
Some of the skills in the Leviathan Axe will be inaccessible until you upgrade to Level 6, after which you can purchase any skill you want. Here are the best skills that you can buy in God of War: Ragnarok.

Freezing Throw: This is arguably the best-ranged skill in the game and it is very spam friendly. All you need to do is hold R2 and you will be able to do a charged throw at any enemy. Enemies that allow you to play at a distance will get mowed down very easily and the skill is also great at handling multiple trash mobs simultaneously as it creates an explosion. 

Frost Awaken: This is arguably the best skill to have to make your combos as fluid as possible. Frost Awaken IV allows you to charge up your axe between attacks and combos and helps you build up frost damage while also dealing damage. Sometimes it can be difficult to build up frost when you are swarmed by enemies and having this skill handy can help you keep enemies in check.

Extinguish Flames: This skill is not meant for high damage, but it makes your experience much more comfortable. You can get Extinguish Flames to make fighting Svartalfheim enemies much easier. These enemies are on fire and you can use the skill to deal extra damage against these burning enemies. This allows you to dispose of these dangerous opponents quickly.

Serpent’s Snare: If you want a heavy attack for your Leviathan Axe, this is the skill to go for. You can make an additional heavy attack when you charge up your Leviathan Axe, making it an incredible option for players who want to get the most DPS possible out of their charged attack strings. You can also throw enemies off the map for instant kills, which is very helpful for large waves (and always fun to watch). The attack scales well against bigger enemies and you can use it even in later parts of the story.

Pride of Frost: This is the go-to finisher for your R1 combos in God of War: Ragnarok. You do a bunch of R1 attacks and finish enemies off with a heavy attack that deals frost damage to all enemies that it hits. It can also launch enemies in the air allowing you to chain into other attacks and deal additional damage.

Returning Storm: If you have Freezing Throw II unlocked, you should get Returning Storm for some insane ranged attack combos. You can use Freezing Throw II to perform a ranged attack and while you are barehanded you can use Returning Storm by using L1+R2 to perform a heavy attack. Kratos calls his axe back and does a massive ground slam attack. You deal frost damage in a large area while also knocking enemies behind.

Glacial Rake: This is one of the best crowd control skills in the game and it allows you to deal massive amounts of frost damage to enemies in the area. If you want to proc frost as quickly as possible, Glacial Rake’s elemental application is extremely high for Blade of Chaos combos.

You can experiment with all of the skills after you reach Level 6 on your Leviathan Axe. There are plenty of cool builds that you can try in God of War: Ragnarok and you will notice significant upgrades to your damage as you get new items and upgrades throughout the story. Pair your Leviathan Axe with a solid armor set and you will become truly unkillable as you progress through the main campaign. You can also check out our Blades of Chaos guide to maximize Kratos’ other main weapon in his arsenal!

Sonic Frontiers Wyvern Guide: How To Beat The Second Titan

The second island in Sonic Frontiers comes with a second Titan as its climax. The first was just a large lad, but this one, named Wyvern, is more of a fantasy creature. It brings to mind the winged serpents of Mesoamerican myth. Or, you could call it Large Lad 2: Flying Version. The fight is a little more involved than the first Titan, with more phases to worry about and a few instant death points. Take a look at our Sonic Frontiers Wyvern Guide to stay airborne.

Sonic Frontiers Wyvern Guide: Moving On Up

sonic frontiers platform wyvern

The fight starts on the ground. The first step is to climb the tower Wyvern is circling. On the way there, you’ll see a bunch of springs and climbing rails that lead upward. These can be ignored if they’re not part of the tower. They lead to the platform in the above image, which has a bunch of rings, but no route to the boss. If you’re having trouble with the fight, this is a good way to collect rings ahead of time, but it shouldn’t be necessary.

Instead, go straight toward the tower. You can’t miss it. Climb it the same way you would any other free-roam structure. Follow bounce pads and wall-run sections to the top, tapping the boost button to speed through the rails. There’s little risk here. Even though a few enemies spawn, Sonic can run past them.

At the top of the tower is a small extension a little like a diving board. Stand there and wait. Wyvern will eventually fly past. When you see the Homing Attack target appear on Wyvern’s head, press the attack to trigger the next phase.

Road To Nowhere: Sonic Frontiers Second Titan

sonic wyvern red road

This is the Fruit Roll-Up phase. After a cutscene, Sonic will begin running on this holographic pathway. It’s hard to fall off, but the path has two obstacles. First, spinning neon bars that need to be Homing Attacked to progress. Second, electric balls that travel down the path in Sonic’s direction.

Speed isn’t an issue here. More important is to avoid being hit by the balls, since that will make Sonic drop the rings he’ll need for the final phase. Tap left and right on the control stick to make Sonic quickly dodge out of the way of the attacks. The shoulder button dodges work the same way if you prefer precision.

Make sure you Homing Attack when you see the neon bars, and soon enough the road will drop Sonic on Wyvern’s back. Nothing fancy here; just walk up and grab the Emerald with the button prompt.

Sonic Frontiers Wyvern Guide: Super Sonic

sonic frontiers wyvern missiles super

When Sonic gets the emerald, it’s Super time. He doesn’t take damage, but if he can’t beat Wyvern in time, he runs out of rings and is considered dead. The first Titan would take heavy, reliable damage from a counter followed by Grand Slam. In this fight, Grand Slam doesn’t seem to work, but counters are as vital as ever. The boss will always start by firing missiles. Maneuver in front of any of the missiles and hold the shoulder buttons to counter. The missile will bounce off Sonic and hit the boss instead.

Once a missile has hit Wyvern, it switches to physical attacks. Deal with these by countering as always. Its movements are a little hard to read, but that’s okay. The timing on each counter is extremely generous. Hold the shoulder buttons whenever the boss looks at you funny and you’ll get the counter. When you see the Homing Attack target on Wyvern’s head, the boss is vulnerable. Any of your combos will work here, but faster is better. Homing Shot, performed by Boosting and immediately pressing attack, is a quick way to do lots of damage.

Wyvern takes four rounds of this to go down for good. The first two follow the pattern above, but starting from the third, it will start firing red laser rings all over the place. These do nothing, but they mark a change in Wyvern’s behavior: after countering its melee attack, it will now do a second melee attack instead of becoming vulnerable. Counter the second attack once the first is complete.

After the third round of attacks and the boss is almost dead, it triggers the quick time event in the above screenshot. If you don’t complete it soon enough, Sonic dies despite being invulnerable. What a rip-off! This QTE is a little tricky: it follows the same rules as fishing with Big. To succeed, you have to press the button when the expanding white outline overlaps with the red area around the outside of the screen. You can press at the wrong time for no penalty, but it has to be done correctly before time runs out.

From there, the fight continues as normal. Counter two more melee attacks and do a couple more combos to remove the last of Wyvern’s health. It’ll do a few final attacks in the form of more QTEs. Some are the fishing minigame type like before, but watch out for a couple that require rapid presses instead. With that, you can move on to Chaos Island and the rest of Sonic Frontiers.

The Two Party System Has Done Irreparable Damage to Our Democracy

Hello citizens! At the risk of being overly political, is it just us or is the two party system a little outdated, and a little harmful to the overall state of things around here? Are you like us, are you sick of the same old people getting the headlines all the time? I mean, how is a new candidate or party ever going to break out of the shadow, hehe, if there’s two giants in the way? It simply won’t happen, and that is simply unacceptable. Take it from us, the members of Team Chaotix. 

Why should you take it from us? Because we deal with the same bullshit. 

Now, I know probably thinking, “You wouldn’t feel that way if you were in favor,” right? Well, that’s tough to say, because WE’VE BEEN THIRD FIDDLE FOR OUR ENTIRE EXISTENCE! Let’s try putting Team Chaotix in there right away next time some shit goes down, huh? Just one time, call on Team Chaotix to save the day. Assuming we haven’t been kidnapped or turned into statues or something. If we’re around, we should really get the call some day! That’s all we’re saying. 

I mean, could we do any worse than the lows Sonic and his cohorts have dragged the series down to at its weaker points? Remember 2006? We all swore we’d never forget. Don’t you dare. 

Much like the Sonic franchise’s inability to move beyond its core stable of characters, American democracy will suffer for as long as we repackage the same red and blue bullshit year after year and expect the people to be thankful for it. Well, it’s time to say “No more!” 

People make fun of the alternative choices, call them the underdogs, the outliers. In doing so, they often overlook some pretty legitimate political candidates, as well as some awfully respectable detective agencies. Open your minds, everybody. The past is dead. The world is burning. The two party system exists to reward their inner circles and nothing more. Call Chaotix Detective Agency for all of your detective needs. 

Respectfully, 

Vector the Crocodile, Espio the Chameleon and Charmy Bee
Team Chaotix 

P.S. Thanks for those times you rescued us Sonic. We still appreciate that.

‘Donkey Kong Country Music to Help You Chill Out’ Playlist Has Opposite Effect on Local Man

PONTIAC, Mich. — A YouTube compilation of video game music titled ‘Donkey Kong Country Music to Help You Chill Out’ has reportedly had the opposite effect on a local man, concerned sources have confirmed. 

“Oh my goodness, he just got so fired up,” said Louise Pendleton, husband of Ross Pendleton, who found himself unable to chill out or relax while listening to the compilation of Donkey Kong tunes. “He said he was gonna try to get some work done so he went into his office and put on some music. A few minutes later I started to hear all kinds of screaming and crashing, and then I heard glass shatter! I poked my head in there to see what was going on, and I guess he was just really feeling that Nintendo music. He threw his office chair out the window for some reason. That stuff gets him so worked up, I wish he’d stop putting it on.” 

After pleading with Ross to chill just a little bit, he briefly obliged, pausing the playlist long enough to get some water and address the immediate aftermath of the window incident.

“Fuck man, that shit really gets me going,” said Pendleton, applying bandages to several cuts on his hands. “That playlist man, it just took me over. It started with ‘Aquatic Ambience,’ and I was just sitting there vibing, answering emails and stuff like that, no problem at all. Next thing I know a faster song came on and some drums started up and I was up and moving before I even knew what was happening. Fuckin’ music gets me going, dude. I wonder if I should go to the hospital. Damn, I gotta get that window fixed, too.” 

Pendleton’s parents stated that this was merely the latest in a long string of incidents related to songs from Donkey Kong Country games that weren’t very chill. 

“Oh no, not that Donkey Kong shit again,” said Ruth Pendleton, Ross’ mother. “I remember one year we got him one of those games for Christmas thinking it looked a lot more wholesome than Mortal Kombat or anything else he’d asked for. He was up in his room playing it when after a while, I heard an awful commotion. I went upstairs, and you’ll think I’m making this up, but my son’s legs were sticking out of the drywall. He’d got a running start and jumped headfirst into the wall. I wasn’t sure how or why it happened, but yeah, eventually we figured out it was the game that did it. You can’t let my son hear that Donkey Kong music. There’s no telling what might happen.”

As of press time, neighbors spotted Pendleton chilling out in his car as it sat in the driveway, smoking weed and listening to the ‘DK Rap’. 

God of War Ragnarok Favor Guide: In Service of Asgard

In Service of Asgard is one of the Favors you can complete in God of War: Ragnarok, and our guide will help you finish it quick. You can complete the favor in Svartalfheim Bay and it is actually the first favor that you will encounter in the game unless you miss it. Completing the quest is strongly recommended as it gives you access to a solid armor set that offers a massive upgrade for Kratos in the early game and continues to be viable throughout, even in late-game stages. It outperforms most of Sindri’s armor sets so you should prioritize completing this Favor as soon as you get access to it. 

How to Complete In Service of Asgard


You should find this Favor as you progress through the story. When you start looking for Durlin, you will find yourself in a tavern with a dwarf playing an instrument. Talk to the new NPC, Raeb (who is played by the game’s composer, Bear), and you will get your first Favor in God of War: Ragnarok. The quest requires you to shut down three rigs in the Svartalfheim’s Bay of Bounty.

Modvitnir’s Rig: In Service of Asgard Guide

How to shut down Modvitnir's Rig in God of War Ragnarok.

To shut down the first rig you need to head to the island with the giant crane in the center. The quest tells you to investigate the crane itself, which is what you should do. You can row to the island and head to the crane directly.

As soon as you arrive in the quest area you will need to beat Wretches and climb up a ledge. Use the Leviathan Axe to hit the paddle once you reach the broken boards and you should be able to get past the gate. Make sure that you open the Legendary Chest to get a Musphelheim Seed Half and half a Yggdrasil Seed which will be needed to unlock The Crucible Favor later in the game.

You can now kill the Ormr and start shutting down the rig. But as soon as you reach the top of the rig you will be introduced to Bergsra, a new type of monster. You should try to hit its face directly to stun it and it should pose no real threat.

Here are the rewards for beating the monster: 

  • x250 Kratos XP
  • x75 Atreus XP
  • x2 Forged Iron
  • x2 Nidavellir Ore
  • Hacksilver

Once you shut down the rig it is time to move on to Radsvinn’s Rig.

Radsvinn’s Rig – God of War Ragnarok

To get to the next Rig you need to paddle to the center of the lake and you will run into a structure with one of Odin’s ravens. You will know when you reach the quest area when Atreus comments on a huge geyser and from there, you need to follow the path to the shore with a docking area.

You will notice Sindri on the shore and he can offer you some upgrades to help you on your journey. You can now use the Nidavellir Ore you received from the previous encounter to get some armor if you want to. You need to walk east past Sindri. Walk up the hill using your Blades of Chaos and make your way to the rig. 

You will have to fight your way through Grim, Cursed Grim, and a few other enemies. Once you take care of all the enemies in the area you will be able to shut down the rig. Here are the rewards for completing this part of the quest: 

  • x2 Nidavellir Ore
  • x2 Rawhide
  • Hacksilver

In Service of Asgard Guide: Althjof’s Rig

How to disable Althjof's Rig for the In Service of Asgard Favor.

The third and final rig is on the island with the giant gantry running through it in the northeast part of the area. There will be a boat dock marked with a blue flag in the area to indicate you are on the correct island. After docking the boat, climb up the chain and you will uncover the area.

After climbing up, head left and start making your way to the rig. There is a simple puzzle that requires you to use the Blades of Chaos to swing from one platform to another. Mimir lets you know about the red barrels that you can explode to get rid of the planks in your way.

Open the next gate and make your way through to the next area. Here, you will face two Draugr and you should have no trouble parrying their slow but predictable attacks. After beating them, you will be able to lower a chain which makes it easier for you to come to the rig if you want to revisit later for hidden items.

After you shut down the rig, head to the south side of the rig furnace platform and you will be able to use a crane to head to the top. There is an Althjof’s Rig Legendary Chest that you do not want to miss because it has Njord’s Tempest, which is one of the best Runic attacks in the game for early-game players.

In Service of Asgard is now complete and you can head back to the tavern or explore the area further in case you missed resources and other items. If you’re off to Alfheim next, check out our guide on The Barrens Nornir Chest, which can be quite tough to find and open.

Call of Duty Warzone 2 Crossplay & Cross-Platform Breakdown

Coming in not far behind Modern Warfare 2Call of Duty Warzone 2.0 will launch on November 16. With so many of Activision-Blizzard’s latest games having crossplay capabilities, you may be wondering if you’ll be able to play with your friends and rivals on opposing sides of the console wars. Luckily, even before the official release, we have an answer for players wondering if Warzone 2 is cross platform.

Is Call of Duty Warzone 2 Cross Platform?

Like most of the games coming from Activision recently, Warzone 2 supports cross-platform play. Players can play with both friends and strangers on different platforms. This time around, the cross-platform also includes players on Steam, a platform getting the Warzone experience for the first time. The method for it is the same as both Modern Warfare 2 and Blizzard’s Overwatch 2.

To be able to play with friends, players will need to have a Battle.net account. This is the Activision-Blizzard online ecosystem, which most Call of Duty players will already be familiar with. From there, you’ll have to add your other platform friends via their Battle.net tag in-game, instead of your console’s friend system. Once you’ve added your friends, the process to invite them is standard & straightforward.

How to Enable & Disable Crossplay for Warzone 2

Luckily, even if you aren’t a fan of crossplay, there’s a way to disable it. Players on PlayStation can find their cross-platform settings in the game’s settings. Navigate to your settings, then find the “Account & Network” tab. From here, you should see a toggle to enable and disable crossplay.

On Xbox, the process is a bit different. You’ll want to go to your system’s settings, then go to through the following options:

  • Privacy & Online Safety
  • Xbox Privacy
  • View Details & Customize
  • Communication & Multiplayer

Now, you should see an option reading “You can join cross-network play,” which you can allow or block freely. So far, Activision has been one of the industry leaders in cross-platform play, and it seems like Warzone 2.0 will continue the trend.

Pentiment Investigation Guide: Occult Hands Puzzle Solutions

Pentiment’s murder mystery leads to several suspects in the town of Tassing. Multiple characters have a motive in the Baron’s death, including the Widow, the Sisters, Lucky, Martin, and the Prior Ferenc, who is the subject of the Occult Hands quest. If you’re suspicious of the Prior, there’s plenty of evidence to convict him with, as long as you know where to look and how to solve the puzzle in his house. 

You can find his volvelle from the beginning of the game, and even solve it before the Baron’s death. However, you won’t be able to solve Pentiment‘s Occult Hands puzzles, complete the quest and fully investigate Prior Ferenc until after Baron Lorenz is murdered.

How To Find The Occult Hands Puzzle In Pentiment

Where you can find the occult hands puzzle in Pentiment.

During Act I, The Baron, you can find a volvelle in the Prior’s house, just outside the scriptorium. This gadget features four elemental symbols on the outer rim, as well as Greek and Latin letters. If you chose the Occult backstory for Andreas, he’ll recognize this as an occult tool. Likewise, Andreas will recognize the tool as a cipher of some sort, but you’ll need a code to decipher first. 

On the first day after work, Andreas will drop a bowl and kneel down. The Prior will hurriedly come into the scriptorium and scribble something into his book at the back of the room. Once he leaves, the game will initiate a conversation with one of the nuns. After that encounter, you’re free to walk to the back and take a look. You’ll be able to find astrological symbols that correlate to the elemental signs in the volvelle. Below it will be symbols that Andreas doesn’t recognize. 

If you gave Andreas a Heaven and Earth backstory, he’ll be able to decipher the code himself. Otherwise, you’ll need to sneak into the library at night or talk to Doctor Werner in town. Speaking to the doctor is the easier option. Then, return to the Prior’s house to decipher the code.

How To Solve The Volvelle: Occult Hands Puzzle – Pentiment

How to solve The Volvelle puzzle in Pentiment.

Now that you have the code and the astrological signs, you can complete the puzzle. It looks more complicated than it is, but we’ll walk you through it. 

By the end, your code should translate to: H – I – G – E – R – H – A – R – D.

The first astrological symbol correlates to Air. So use the gamepad’s triggers to spin the outer wheel until the sign for Air is at the top of the volvelle. Press A (on a gamepad) to select the correct letter, and it’ll translate to H. 

Keep following the piece of paper at the top and align the outer wheel’s elemental symbols to the astrological signs.

  • The second letter should have the Earth symbol at the top of the volvelle. 
  • The third letter should have the Fire symbol at the top.
  • The fourth should have the Water symbol at the top.
  • The fifth should have the Fire symbol again.
  • The sixth should have the Air symbol at the top.
  • The seventh should have the Earth symbol at the top.
  • The eighth should have the Earth symbol again. 
  • The final letter should have the Water sign at the top.

In the end, it’ll spell higerhard, which Andreas will recognize as ‘here lies Gerhard,’ one of the buried brothers in the Abbey.

Finishing Pentiment’s Occult Hands Investigation

You won’t be able to investigate this case further until after the Baron’s death on the second day. After the Baron dies, return to the cemetery and find Gerhard’s grave on the far Eastern side. Andreas will see the grave has been tampered with. 

You could ask the Abbot for permission before digging up the grave, but it will be hard to convince him based on your previous actions. You can still dig up the grave without his permission. Find Otto in town and ask him for help. You don’t need to lie to Otto about gaining the Abbot’s permission – he’ll respect you even more if the Abbot doesn’t approve. 

While Otto digs the grave, all you need to do is walk around the cemetery and look at the other graves. Brother Mathieu will walk in on you at some point; Otto will respect you if you don’t hide. But, even if you can’t convince Mathieu, he can’t stop you from digging the grave.

Arcane tools you get at the end of the Occult Hands Investigation.

Once Otto is done, you’ll find a series of Arcane tools and a silver rod with dried blood on its side. If you inspected the Baron’s body, you’d see the cause of death was a blunt object.

You can find a letter from the Prior to the dead Baron in the guest house, just outside the Abbey. It seems the Baron and the Prior had taboo occult interests. The Baron was blackmailing the Prior to perform forbidden arcane rituals.

Did Prior Ferenc Kill The Baron In Pentiment?

At the end of Act I, you’ll need to present evidence and accuse one of the suspects. The letter of blackmail you can find is definitely a motive for the Prior. All of the suspects have their own motive, though.

The silver rod lines up with the blunt force wound on the Baron’s head, making it a believable murder weapon. The Prior’s suspicious actions also make him look guilty since he hid tools in a grave and concealed them behind a complicated contraption. 

Although, he could have simply been protecting himself against the Baron’s blackmail – hiding his occult interests, just in case the Baron told anyone.

The Occult Hands investigation will give you enough evidence to blame the Prior successfully, but the game won’t tell you if you’ve made the correct decision.

God of War Ragnarok Nornir Chest: The Barrens Chest Puzzle

As you journey across the Nine Realms in God of War Ragnarok, you’ll come across many mystical Nornir Chests, including one in The Barrens. The Barrens are a sandy land in the Realm Alfheim, one of the earliest realms you’ll visit in the game. Especially if you decide to go side questing after finishing your business there, you’re likely to come across this chest. Whether you find it hunting down your last Apples or in your early hours, here’s how to open The Barrens chest in God of War Ragnarok.

God of War Ragnarok: Where is the Nornir Chest in The Barrens?

The Barrens Nornir Chest map location in God of War Ragnarok.

The Nornir chest in The Barrens is in a remote corner in the Northeast of Alfheim. The location of the chest is shown in the screenshot above. If you start making your way northeast using the sled to get around, you’ll eventually find the chest’s location.

How to solve The Barrens Chest Puzzle in God of War Ragnarok

The vines to cut through before solving The Barrens Nornir Chest puzzle.

Once you reach the rock at the corner of Alfheim, the first thing you’ll want to do is make your way to the rear of the rock. Once you get there, line up an axe throw through the vines as shown in the above screenshot. Slicing your way through these will open up the path to the chest itself. Before going there, though, you might as well light the torches for each rune.

This first “n”-like rune is right to the left of the vines you just cut. It may seem out of reach at first, but get as close as you can to it and you should be able to light the torch by aiming and pressing R2 without much work.

Then, head back to the front of the rock. To the left of the chest, you’ll find the “C”-like rune. This one can also be lit without much trouble.

Finally, look at the roof of the gazebo-like structure. Your last torch is up there. You can’t reach it with the Blades of Chaos to light. Luckily, there’s a handy explosive that you can detonate by throwing the Leviathan Axe at it. Throw towards the flame, and your last torch should now be lit. Collect your loot from the chest, and continue exploring Alfheim!

Sonic Frontiers Quest Guide: How to Complete Spring is in the Air

If you’re here, you’ll know that big blue’s latest outing is chock full of things to do. And while most of Sonic Frontiers is fairly straightforward, there are a few puzzles that aren’t explained all that well, so you may need our guide for the Spring is in the Air quest.

Spring is in the Air is the first quest that Amy gives you on the critical path on Kronos Island. Keep gathering up her Memory Tokens and following the markers that the game sets and you’ll happen upon this quest fairly early on. 

If you’ve come to be invested in the little plotline of the Koco that wants to find their lost love, read on, as we have you covered for the solution to the Spring is in the Air quest. 

How to Solve the Spring is in the Air Quest Puzzle – Sonic Frontiers Guide

The quest tasks you with tidying up some old farmland so that Amy’s new Koco pal can track down their amore, but to be honest, it feels like we’re being guilt-tripped into some graft here. 

There’s an easily missed pop-up the first time you attempt the quest, which reads: “Remove weeds with the Cyloop and reach 7,000 points before the timer runs out. Watch out for the bees! Avoid them by luring them towards flowers by using Quick Cyloop on seeds to make them bloom.”

So, those sparkly things floating about which hurt you are the bees. Three hits from these and it’s game over, start again. 

It’s a simple enough ask, but the pratfall here is that there are six highlighted little weeds, which you may think at first are your objective: 

How to use the Cyloop to succeed at Spring is in the Air in Sonic Frontiers.
Circling this flower will lure the bees away, but isn’t your main objective.

And if you Cyloop around them, you will earn points at first, which can serve to confuse you further. These are actually the flowers mentioned in the pop-up though, and the points you’re earning are for cutting the grass adjacent to them. 

Once you’ve unlocked the Quick Cyloop ability, use it on them by holding the cyloop button while in a combo. This makes the flowers, well, flower, which in turn catches the bees, giving you some breathing room. You don’t need to do this to succeed at the quest however, as there is plenty of room for you to get on with your manual labour while dodging around the bees. 

What you actually need to be doing is cutting back the clumps of grass throughout the area, which entirely cover the ground at the beginning of the quest:

Sonic circling the grass he should actually cut in the Spring is in the Air quest in Sonic Frontiers.
These overgrown patches of grass should be your actual target in this quest.

Just work systematically through the field, cutting back area by area. It won’t take long at all to rack up those points once you realize what your task is here. I’d also advise doing the quest during the day – it’s a bit harder to see what’s chopped and what’s not by moonlight. 

You’ll net one of Kronos Island’s seven Chaos Emeralds for your trouble here, and are free to continue on towards your objective of fighting the first titan.

Call of Duty MW2: How to Unlock Polyatomic Camo on All Weapons

Call of Duty: Modern Warfare 2 (2022) is here, and brings with it four mastery camos to unlock for each of your weapons, including polyatomic camo. These mastery camos mark a truly skilled player. This guide will get you the penultimate mastery camo to prove your worth to all of the players in your lobby. What better way to prove you’re a big shot than with this vibrant purple camo?

Unlocking the base camos is even easier in MW2, which will help you on your way to unlocking the polyatomic camo. Only having four base camos for most weapons (only one for melee weapons and launchers) means far less challenges on the path to unlocking the polyatomic camo, and far less time spent on each weapon. Because of this, just about anyone can get their hands on polyatomic camo. It’ll take time, but, eventually, you’ll be able to earn this stylish weapon pattern.

Call of Duty MW2: How to Unlock Polyatomic Camo

How to unlock Call of Duty MW2's polyatomic camos.

The first thing you’ll want to do is make sure your prerequisites are met. Before unlocking Polyatomic camo, you will need to earn the gold camo for all of Modern Warfare 2‘s weapons.  Luckily, if you haven’t done that yet, you can find our handy guide on unlocking gold camo here. This will unlock the platinum camo for each of the weapons as well. Once you’ve unlocked platinum, you can begin to pursue the Polyatomic camo challenges.

CoD Modern Warfare 2: All Polyatomic Camo Challenges

There are a few different varieties of challenges you’ll be faced with when you pursue the polyatomic camo challenge. Luckily, these are organized by the type of weapon, making it pretty easy to understand what you need to do for each weapon. Here are the polyatomic challenges for every MW2 weapon type:

  • Assault rifles, sniper rifles, battle rifles, SMGs, LMGs: 25 headshots
  • Shotguns & pistols: 20 headshots
  • Launchers: 15 double kills
  • Knife: 10 double kills
  • Riot Shield: 10 kills from behind

These challenges are all pretty doable, and shouldn’t be too difficult. They may be time consuming, but there are ways to make the grind quicker. If you use the game modes mentioned in our guide for how to level up Modern Warfare 2‘s guns faster,  your grind for these headshots and double kills will be a smooth ride. After you unlock Polyatomic camo for all of your weapons, go ahead and check out our general camo unlock guide to finish up your mastery camo journey!