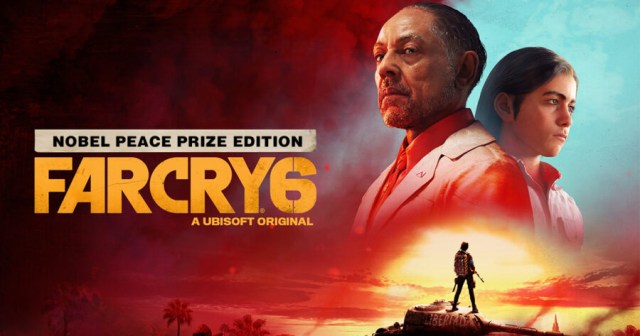
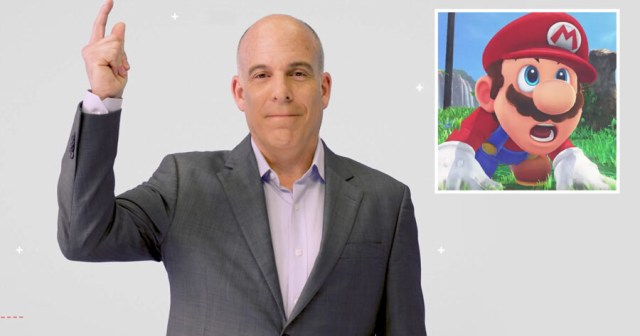
SAN FRANCISCO — Ubisoft announced a Nobel Peace Prize edition of Far Cry 6 that will be releasing soon, despite the title having no tangible connection to the prestigious annual award, sources have confirmed.
“Yes, it’s true, Far Cry 6 did not win a Nobel Peace Prize, thank you for asking,” said Ubisoft CEO Yves Guillemot. “But if you pay close attention to the marketing, we’re not saying our game received a Nobel Peace Prize. No, not at all. We just think the Nobel Peace Prize is neat, and we wanted a way to honor everyone that’s ever won one when we re-released last year’s Far Cry 6.”
“Which many people said was the best game of the year,” he added. “Honestly. Seriously. For real.”
Many involved with the awarding of the annual Nobel Prizes objected to what they felt was Ubisoft’s attempt at insinuating their game was a recipient of the distinguished award.
“I really wish they wouldn’t be hinting that their game won one of our prizes last year,“ said Berit Reiss-Andersen, chairperson of the Norwegian Nobel Committee, the five person team tasked with selecting each year’s Nobel recipients. “If I’m being honest with you, they weren’t even nominated! No, I’m afraid this is just Ubisoft continuing to treat the gaming public at large with the least possible amount of respect. Did you know the ‘Nobel Prize Edition,’ is $150 and includes DLC that hasn’t even been completed yet? I’m ashamed to have our name attached to this in any way, frankly.”
Many gamers, however, felt that a Nobel Prize for the game wouldn’t be as undeserved as Reiss-Anderen thought.
“Hey, if they’re allowed to release a ‘Game of the Year,’ edition of Far Cry 6, then what’s the difference,” asked Roger Greene, a local gamer. “The Nobel Peace Prize might be more likely, actually. Far Cry 6 was a predictable open world slog, but as a company they’ve really brought gamers some unity in the sense that one of the only things that we can all agree on is ‘Fuck Ubisoft,’ ya know? We all certainly banded together to not give a fuck about Far Cry 6, I’ll tell you that much.”
As of press time, Paramount had released a debut trailer for their upcoming re-release Space Jam: A New Legacy: Best Picture Edition.
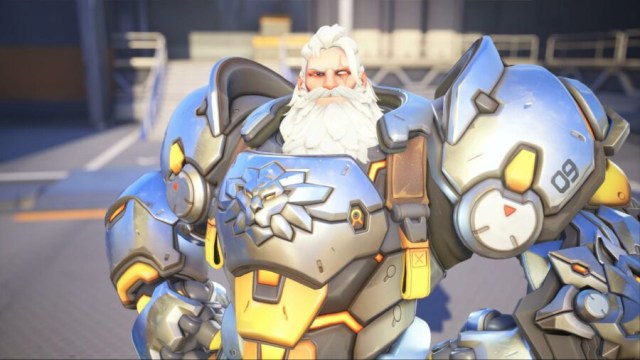
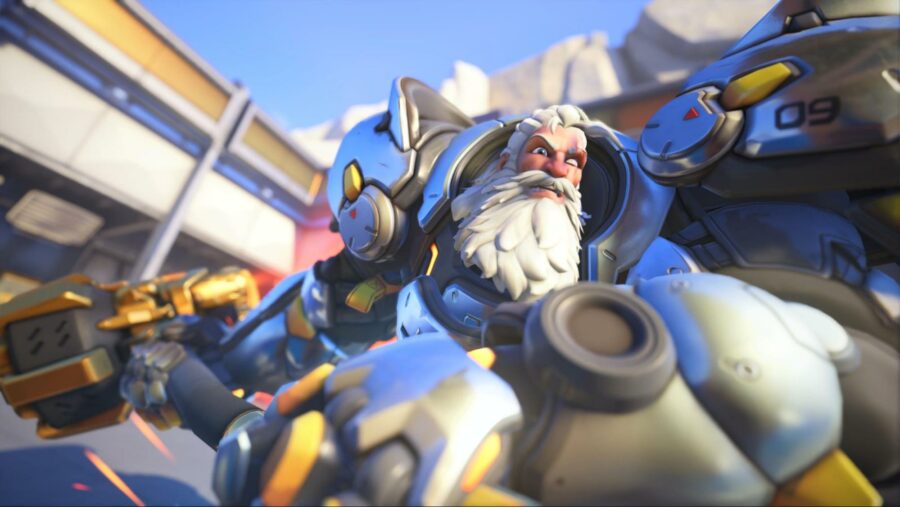
Reinhardt is unique among Overwatch 2’s roster in that he is the one of two characters (along with Brigitte) that utilizes melee for their primary attack. He’s a tank that is most effective when he has teammates to back him up as he doesn’t have a lot of mobility or a gun, but when with great support he can be one of the hardest tanks to kill.
Reinhardt’s giant shield and massive amounts of health and armor make him a great hero for defending, but don’t underestimate his offensive capabilities. Here’s how to become the massive wall that is Reinhardt.
Overwatch 2 Reinhardt Abilities
Primary Fire – Rocket Hammer
Reinhardt’s primary attack is his huge hammer which he’ll swim from left to right to clobber anyone in front of him. The hammer swings at a nice rhythm allowing you to feel out when you’ll damage your foes. It does do quite a bit of damage and because Reinhardt has so much armor and health you shouldn’t be afraid to get up close and personal.
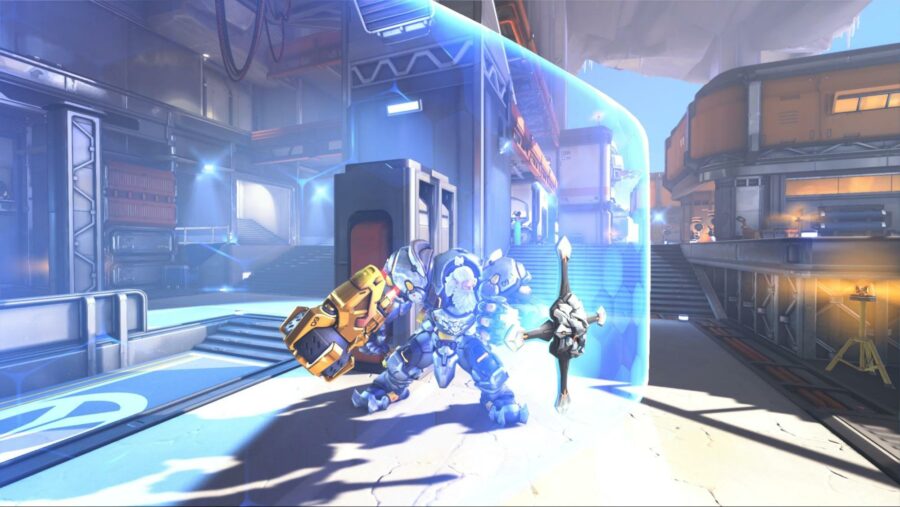
Secondary Fire – Barrier Field
Reinhardt’s secondary fire is his shield. While you hold it up you’ll move slower, but you’ll block nearly all incoming fire. The shield has 1200 health and is capable of blocking almost any attack. The barrier blocks projectiles and explosions specifically. It can take the full force of a D.VA ultimate, completely block a Cassidy ultimate, and explode Wrecking Ball’s mines without damaging your teammates.
The barrier won’t block all attacks, though. The barrier is incapable of blocking melee attacks and some energy like abilities like an enemy Reinhardt’s Fire Strike and Winston’s Tesla Cannon will pass through the barrier. Some of the more uncommon abilities that it cannot block include Mei’s freeze’s (including her primary fire), Moira’s ultimate Coalescence, and Doomfist’s punch.
Learning Reinhardt’s barrier is the key to mastering him. The barrier will regenerate at a rate of 144 health per second after not getting hit for a couple of seconds. You’ll need to learn when to hold the shield up and when to lower. Once the shield breaks, it will be on a cooldown for five seconds. Once it comes back, it will be at 1200 health again, but those five seconds could be all the enemy team needs to defeat your team.
Ability 1 – Charge
Although Reinhardt is one of the slower tanks in Overwatch 2, he does have one of the best abilities to close space or escape a fight. Charge uses the rockets installed on the back of Reinhardt’s armor to boost himself across the map. Any enemy that gets caught in Charge will be sent along with him. If they hit a wall or other solid object then they’ll be damaged for 225 points of damage.
It is possible to just clip an enemy and not catch them in the charge. In that case the enemy will only be damaged for 50 points of damage, but will be knocked back a bit. Keep in mind you can only catch one enemy in the charge, but you are capable of damaging multiple enemies by clipping them with the charge for 50 points of damage.
Pinning enemies with charge is one of Reinhardt’s most powerful offensive abilities. It can completely kill most heroes with its 225 damage. Unfortunately, charging into an enemy team can get you killed very easily, especially if you didn’t pin anyone. The 8 second cooldown between charges will also make it difficult to escape the enemy’s team’s wrath if you wind up completely alone after a charge.
You can use Charge in an enclosed space to get an easy kill on an unsuspecting enemy or call out when you’re charging so your teammates can follow you into the fray. You can cancel the charge at any time by pressing the ability button again, so using it to quickly move in front of teammates and canceling to hold the shield up is a great way to help your team.
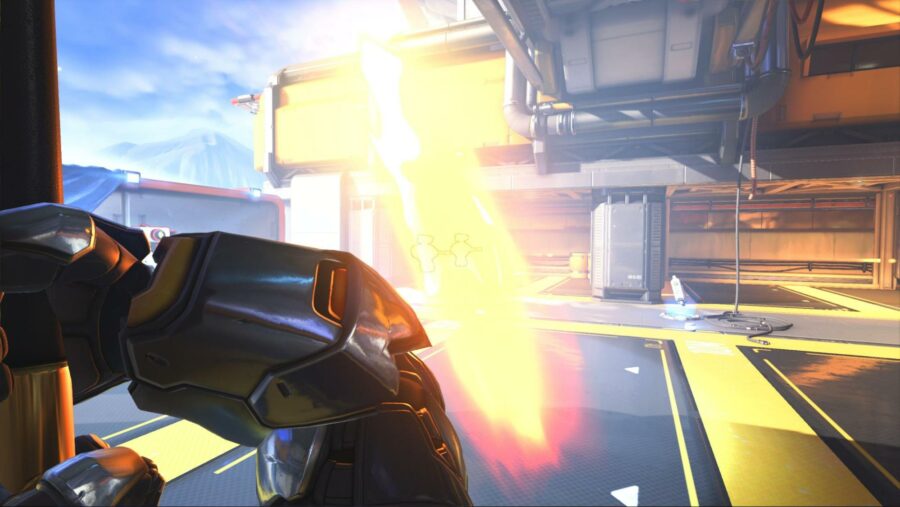
Ability 2 – Fire Strike
Reinhardt whips his hammer forward to produce a flaming projectile capable of going through barriers and enemies. Fire Strike does 90 damage upon hitting an enemy. This can be enough to finish someone at low health. You have two charges for the Fire Strike and the cooldown on each Fire Strike is 6 seconds.
While you may think of Fire Strike as an ability that is best used at range, it is also useful to use while in melee range thanks to amount of damage it does. If enemies are in a line while close, you can damage everyone thanks to the ability’s piercing capabilities. Once Fire Strike hits a wall or solid object it will disappear, but until then it’ll keep going.
Ultimate – Earthshatter
Reinhardt slams his hammer into the ground cracking the earth’s surface and knocking everyone to the ground in its path. Earthshatter is a great ability to use for setups. Once you knock everyone down, they’ll be incapable of moving or using abilities, so you can go to town swinging at them with your hammer or use a Fire Strike to finish someone at low health off. It’s also a great ability to combine with other ultimates to really clean up the enemy team.
The hammer ability will do 250 damage to everyone within 1.75 meters in front of the impact, and will do 50 damage to everyone outside of that range that is still caught in the blast. Most of the time you won’t kill enemies right with the impact of the hammer, which is why using it in a combination with your teammates or abilities is the most effective way of using it.
Earthshatter is capable of being dodged if your opponent was jumping or in the air at just the right moment. Enemies behind a barrier will also not be affected by it, so watch out for enemy Reinhardts that are baiting you into using your ultimate into their shield.
Changes to Reinhardt in Overwatch 2
Reinhardt’s changes are mostly passive ones. He has not had a complete rework like fellow tanks Orisa and Doomfist. Here the changes made to Reinhardt.
Steadfast ability removed. Previously Reinhardt’s Steadfast passive would provide a 50% knockback resistance. This ability was removed as now all tanks have a natural passive that blocks 30% of knockback damage and 30% of ultimate charge when being damaged.
Base armor increased from 200 to 300
Base health increased from 300 to 325
Barrier Field health reduced from 1600 to 1200.
Barrier Field regeneration reduced from 200 points per second to 144 points per second.
Charge turn radius has been increased by 50% meaning it is easier to steer while charging.
Charge can be manually canceled.
Charge pin damage reduced from 300 to 225.
Charge Cooldown has been reduced from 10 second to 8 seconds.
Fire Strike has been given two charges instead of one.
Fire Strike damage reduced from 100 to 90.
Overwatch 2 Reinhardt Strategy and Team Composition
Reinhardt’s greatest skill is absorbing incoming damage. You should remain in front of your teammates when you play as Reinhardt. Your teammates will dish out the damage behind your shield while you defend them from harm.. The best Reinhardts are capable of closing the distance between them and the enemy team though. You should be slowly moving forward toward the enemy team, and look for ways to get in close to smack them with your hammer.
To that end, you’ll also want to learn how to feather the shield ability. If you keep the shield up constantly it will break. You have a ton of armor as Reinhardt and armor reduces incoming damage. You aren’t frail. Put the shield down every so often to let it recharge and body block for your team while they heal you or get behind some cover. Once the shield is at a good amount of health you can put it back up.
You won’t be getting a lot of kills as Reinhardt, but that is OK. Your main role is to allow your teammates the chance to kill enemies. However, that doesn’t mean you won’t be killing anyone. Charge can be used to instantly take out an enemy hero, but be careful not to use in to send yourself into the enemy team alone. Fire Strike is a good ability pick off a foe that is almost dead or it can also be used as soon as your hammer hits someone in an “animation cancel” to deal a massive amount of damage.
The great thing about Reinhardt is his versatility. Nearly every hero works well in combination with him. The heroes that you won’t be able to easily defend though are Pharah because she’ll be in the air most of the time, and extremely mobile heroes like Tracer, Genji, and Sombra. It’s probably a good idea to only have one of these types of heroes on your team. Having a hero like Junkrat, Soldier 76, or Ashe that can stay behind the barrier and help attack from the front while a mobile hero attacks from behind or sides is a good idea.
Stick with your team and utilize good communication with Reinhardt. Defend your teammates that need help. Push with your friends to get the upper hand on the enemy. Call out when you use Earthshatter so your teammates can capitalize on your offensive. You’ll become a wall incapable of being broken in no time.
Achievement Sprays have been a part of Overwatch since its original launch in 2016. These cosmetics exist for each Hero and are unlocked for completing specific tasks or using their abilities in unique ways. With the launch of Overwatch 2 comes three new Heroes and with them, two new Achievement Sprays each. So, how do you unlock the new Hero Sprays?
NOTE: All sprays can be unlocked in Quick Play or Competitive game modes in Overwatch 2.
Kiriko’s Pixel Spray is unlocked by completing the “Purified” achievement. This requires you to cleanse 5 negative effects with a single use of Kiriko’s Protection Suzu. This one will take some time as many of the parameters are out of your control.
Protection Suzu is an AoE ability that cleanses teammates and grants invulnerability. Being in a situation where you are near to/having enough teammates affected by debuffs will be rare; however, Heroes can be affected by multiple debuffs at once. Additionally, the enemy team’s composition will also dictate how successful you can be in getting this done. If your enemies aren’t inflicting debuffs, then there aren’t any debuffs to cleanse.
Your best opportunities will come when playing against a good Junker Queen, or a Sombra/Mei Ultimate that hits your team, but not you. You’ll likely go through a lot of trial and error to get this done, but playing close to teammates and using communication will go a long way to helping you unlock this spray.
Abilities that can be cleansed:
Ana – Biotic Grenade | Sleep Dart
Ashe – Dynamite
Junker Queen – Rampage | Any Applied Wounds
Mei- Blizzard
Reinhardt- Earthshatter
Sombra- Hack
Kiriko Cute Spray
Kiriko’s Cute Spray is unlocked by completing the “Yokai” achievement. This requires you to restore 1500 health and land 5 critical hits without dying. You’ll need to play cautiously and pick your opportunities to strike enemies without becoming too overzealous.
Kiriko’s Primary fire is a talisman that heals teammates. Her Secondary fire is a kunai that damages enemies. You’ll need to alternate between each, depending on the situation, while staying alive to rack up enough healing and critical hits. Each talisman heals for 13HP and Kiriko can fire a burst, healing for 26HP. As for the damage, you should focus fire on tank characters, as their critical hitboxes are larger. Just remember to stay behind your teammates and pick your shots carefully to unlock this spray.
Junker Queen’s Pixel Spray is unlocked by completing the “Adrenaline Junkie” achievement. This requires you to have 7 wounds active on enemies simultaneously. You’ll most likely need to play a good amount of Junker Queen to get used to her combos and get the timing right.
Luckily, most of Junker Queen’s abilities inflict wounds. So most of the work will be on timing your attack and learning how to combo her abilities effectively. Wait for the enemy team to be grouped up and unleash your combo, starting with your Ultimate Ability, Rampage. This is an AoE attack, where Junker Queen charges forward damaging all enemies in front of her, inflicting wounds and preventing healing. If you manage to hit the majority of the enemy team with this, you are in a good spot. Quickly, follow this initial attack with Carnage, which swings your axe at any enemies in front of you dealing even more damage and wounds. Finally, use either your Jagged Blade melee passive on a close enemy, or your Jagged Blade projectile to hit a fleeing enemy for one more wound. If done quickly enough and with enough enemies hit from your initial flurry, this spray should be all yours.
Junker Queen Cute Spray
Junker Queen’s Cute Spray is unlocked by completing the “Coup De Gracie” achievement. This requires you to use Jagged Blade and Carnage to pull and kill an enemy. Similar to “Adrenaline Junkie”, you’ll need to learn the timing of this combo to successfully pull it off.
The enemy you choose to eliminate with this combo is just as important as learning the combo itself. You’ll want to focus on a squishy enemy with low movement, or in other words an easy kill that can’t just run away after you pull them in with Jagged Blade. As alluded to, this combo starts by using the Jagged Blade projectile to hit and pull the enemy in close. Immediately activate Carnage to swing your axe on them, hopefully sending them back to spawn and unlocking this spray.
Sojourn’s Pixel Spray is unlocked by completing the “On The Move” achievement. This requires you to kill an enemy with a charged Railgun headshot, while sliding. You’ll need a bit of luck and some understanding of Sojourn’s mechanics to do this properly.
Sojourn’s Railgun charges based on damage dealt to enemies, so you’ll want to focus on getting your Railgun fully charged before attempting this. Once fully charged, you need to slide and try to headshot them with your secondary fire. It is recommended that you target a more squishy opponent, rather than a tank, but any low health enemy will do. Be patient as you probably won’t be hitting a headshot while sliding on your first try. As long as you are outputting enough damage, you should get plenty of tries at this per match. Additionally, Overclock auto-charges your Railgun, giving you even more chances to try to unlock this spray.
Sojourn Cute Spray
Sojourn’s Cute Spray is unlocked by completing the “Taking Charge” achievement. This requires you to get 4 killing blows with Sojourn’s Ultimate, Overclock. This one is perhaps not as difficult as it seems, but is dependent on your aim and situational awareness.
Overclock is a buff that causes Sojourn’s Railgun to auto-charge for a limited time. You want to activate this in the heat of a battle. Once active, your Railgun shots will continue to be charged and also be able to pierce through multiple enemies. But, it is important to note that you don’t specifically have to get the kills with your Railgun, as you can also use the primary fire during your Ultimate. Overclock only lasts for 9 seconds so focus on hitting headshots to deal extra damage and pick off squishy enemies quickly enough to unlock this spray.
Bastion has been a playable hero in Overwatch since the beginning, but they’ve changed quite a bit since then, having most of their abilities replaced or reworked in Overwatch 2. Thanks to their new changes, Bastion, the nature-loving robot, is a more versatile and mobile damage hero. Bastion’s high damage potential makes them an attractive hero against shielded enemies and tanks, and Bastion’s not too difficult to use as long as you know how it all works.
Bastion is a damage hero with 200 base health and 100 armor – a total of 300. 300 is a decent health pool for a damage hero, but Bastion’s bulkier size makes it an easier target.
Bastion works slightly differently from other heroes since its different attack modes are called Configurations. Let’s run through them.
Overwatch 2 Bastion: Configurations & Abilities
Configuration: Recon
Recon is simply Bastion’s default mode. Bastion has full mobility in this mode and wields a hyper-accurate submachine gun. This gun does 25 damage per bullet and can fire 5 rounds per second – meaning Bastion can deal 125 damage per second. Headshots and critical hits deal 50 damage per bullet.
This submachine gun works well at long range since Bastion doesn’t receive any recoil from firing it; they are a robot, after all. The submachine gun is also a hitscan weapon – meaning if your reticle is over the enemy when you pull the trigger, the hit will register. Bastion’s Recon mode can be lethal if your aim is good enough.
Configuration: Assault
Bastion can use the Reconfigure ability to switch between Recon and Assault configurations. The Assault configuration transforms Bastion into a mobile heavy turret. Its movement speed is drastically reduced, but Bastion’s damage potential is incredibly high in this mode.
While in this mode, Bastion can deal 12 damage per bullet and fire 30 shots per second. This means that Bastion can deal a whopping 360 damage per second. As a result, you’ll only need to aim at characters like Tracer and Zenyatta for less than a second to score a kill. This mode is handy for dealing with tanks that have massive health pools and are easy targets due to their size.
While Bastion can stay in the Recon configuration indefinitely, it can only be in Assault mode for 6 seconds. The Reconfigure ability has a cooldown of 12 seconds.
A-36 Tactical Grenade
Bastion’s new grenade deals around 120 damage, depending on how close an enemy is when it explodes. The grenade has a cooldown of 8 seconds.
The grenade bounces off of walls but sticks to enemies and the floor. The grenade also knocks back enemies, so a well-positioned grenade can break up a close-knit team.
The grenade’s knockback effect can be used to push enemies off of maps and get environmental kills, even though the pushback effect isn’t as aggressive as Pharah’s Concussive Blast, for example.
Overwatch 2 Bastion Guide – Passive Abilities
Ironclad
This passive ability reduces damage taken by 20% while Bastion is transformed in Assault and Artillery configurations.
Role: Damage
When Bastion eliminates an enemy, you’ll receive a boost to movement and reload speed. Every damage hero in Overwatch 2 has this passive ability.
Bastion’s Ultimate Ability works similarly to Doomfist’s. Bastion will transform into a mortar, and then you’ll need to fire three artillery rounds anywhere on the map, even in interior settings. The artillery shells won’t fire until you place all three. One artillery round can deal around 150-600 damage, depending on how close an enemy is to the center of the explosion. You have 8 seconds to place all three rounds.
Bastion will still be vulnerable to damage during this Ultimate, so find a safe interior to activate it. Don’t place the artillery shells nearby your stationary Bastion, as it will also be vulnerable to damage by the artillery shots.
Try to activate this ability when you know where the enemy team is and when they’re all close together. This way, you’ll be able to quickly place all three shots around them and catch several enemies in the blast radius. Even if an enemy tries to run from one blast, there’s a chance they’ll run into the other two. Configuration: Artillery is most useful in Control and Escort game modes, where the enemy team will likely congregate around an objective.
Configuration: Artillery has an ultimate cost of around 3000 points. Ultimate charge is dependent on how much damage you deal as Bastion. For example, dealing 3000 damage will charge up Bastion’s Ultimate Ability. Characters also generate a small amount of ultimate charge automatically.
Overwatch 2 Bastion Changes
Bastion saw significant changes during the original Overwatch and has received another major update in the transition to Overwatch 2. As a result, lots of Bastion’s core abilities have been reworked, including its Ultimate ability. Here’s everything that’s changed with Bastion.
Configuration: Sentry has been replaced with Configuration: Assault. These two configurations are similar, but Bastion can now move in this configuration, and some stats have been adjusted.
The Self-Repair ability has been replaced with the A-36 Tactical Grenade.
Bastion’s Ultimate Ability, Configuration: Tank, has been replaced with Configuration: Artillery.
Bastion has access to the passive ability, Role: Damage.
Bastion’s primary rate of fire has been slowed down a little, but it’s now more precise.
Overwatch 2 Bastion Guide – Strategy & Team Composition
In Overwatch 2, Bastion can now be helpful in several situations. The Configuration: Assault is undoubtedly Bastion’s best ability for several reasons. Its high damage output is ideal for dealing with tanks and ripping through enemy shields. If there’s a Reinhardt or Sigma on the enemy team, Bastion can tear down their shields in seconds. Configuration: Assault can deal with enemies at long range, so Bastion can be a good counter-pick if there’s a Mercy or Echo in the sky.
Other long-ranged heroes like Hanzo and Pharah could quickly deal with Bastion in the original game since Bastion’s sentry mode was immobile. But now, Bastion’s movement capabilities and more precise submachine gun make Bastion a more capable hero. Bastion’s bigger size still puts it at a disadvantage against precision enemies.
Even though Bastion has no reason to be stationary anymore, they’re still a hero that works best behind the cover of a shield. If there is a Reinhardt on your team, hiding behind his shield and using Configuration: Assault is a safe way to deal tons of damage.
Removing the Self-Repair ability and Bastion’s slow movement means that they aren’t a self-sufficient hero like some other damage heroes. Therefore, Bastion works well with a Mercy who can keep it steadily healed and can amplify Bastion’s already high damage. If there’s a Zenyatta on your team, try to aim for whichever enemy has the Orb of Discord attached to them.
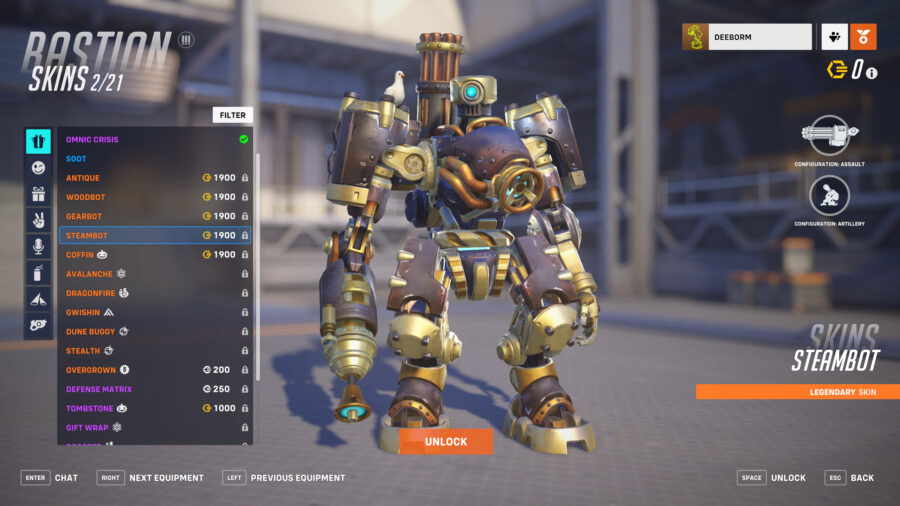
Overwatch 2 Bastion Guide – Skins
There are 21 unique skins for Bastion in Overwatch 2. Players can transfer skins from the original Overwatch once they’ve linked their account. New skins can be unlocked through the Battle Pass or bought via the in-game Shop. To buy skins, you can use Legacy Credits that have been transferred from the first game. Otherwise, you can use Overwatch Coins that need to be purchased with real money or unlocked via weekly challenges.
Skins
Details
Overwatch 1
Common Skin
Automatically unlocked
Overwatch 2
Common Skin
Automatically unlocked
Dawn
Rare Skin
Sometimes available in the Shop
Meadow
Rare Skin
Sometimes available in the Shop
Sky
Rare Skin
Sometimes available in the Shop
Soot
Rare Skin
Sometimes available in the Shop
Tombstone
Epic Skin
Sometimes available in the Shop
Defense Matrix
Epic Skin
Sometimes available in the Shop
250 Legacy Credits
1000 Overwatch Coins
Omnic Crisis
Epic Skin
Sometimes available in the Shop
Gift Wrap
Epic Skin
Sometimes available in the Shop
Rooster
Epic Skin
Sometimes available in the Shop
Null Sector
Epic Skin
Sometimes available in the Shop
Woodbot
Legendary Skin
Sometimes available in the Shop
Overgrown
Legendary Skin
Sometimes available in the Shop
Antique
Legendary Skin
Sometimes available in the Shop
1000 Legacy Credits
1900 Overwatch Coins
Gearbot
Legendary Skin
Sometimes available in the Shop
1000 Legacy Credits
1900 Overwatch Coins
Steambot
Legendary Skin
Sometimes available in the Shop
1900 Overwatch Coins
Coffin
Legendary Skin
Sometimes available in the Shop
Avalanche
Legendary Skin
Sometimes available in the Shop
Dragonfire
Legendary Skin
Sometimes available in the Shop
Gwishin
Legendary Skin
Sometimes available in the Shop
Dune Buggy
Legendary Skin
Sometimes available in the Shop
Stealth
Legendary Skin
Sometimes available in the Shop
Overwatch 2 – Why is Bastion Locked?
If you log on to Overwatch 2 to put this guide into action, you may be surprised to see that Bastion is no longer on the character select screen. This is due to a pretty game breaking issue that occurred when using Bastion’s Ultimate, allowing him to launch a ton of artillery shells in the air. The results can be pretty hilarious, but also ruin competitive games. Ideally Bastion won’t be locked for much longer. In the meantime, if you don’t want to read more about what’s gone wrong with Overwatch 2‘s launch, check out everything that Overwatch 2 has done right, instead!
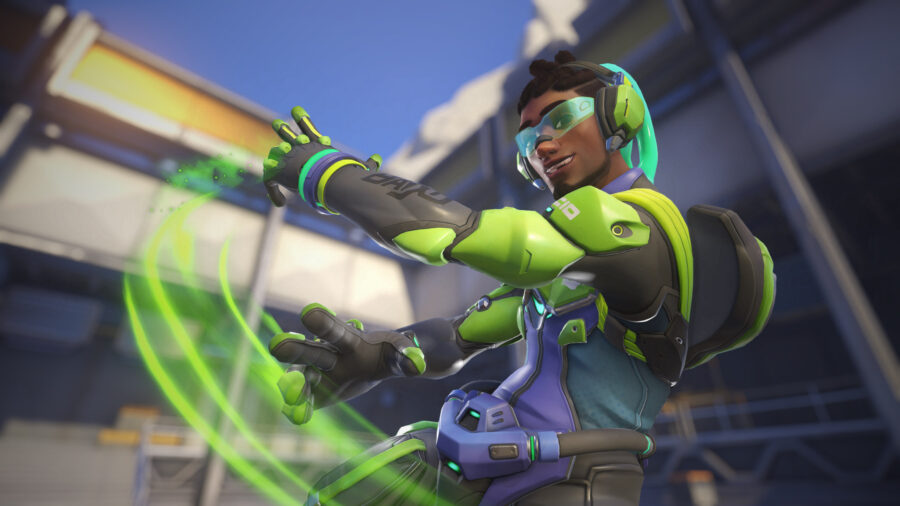
The song-slinging healer Lucio returns in Overwatch 2. In the game’s universe, he was a humble Brazilian DJ until the corporations attacked. He fought back by stealing a powerful prototype sonic device, along with an early build of GTA 6. Now, he uses the stolen tech in unison with his music to heal and strengthen the people, except for the people that run away from the team and then complain when they die. Here’s how to play Lucio in Overwatch 2.
Overwatch 2 Lucio Abilities
Lucio is a support character, and that means heals. His style of healing is pretty unique compared to the other Overwatch supports, even now: he’s constantly playing his mixtape, which affects all of his teammates within 12 meters. He has two songs, a speed song and a healing song. Both songs are available as actual full tracks, a nice touch from when the game still had heart.
“We Move Together As One“, the speed song, makes Lucio and friends 25% faster. That’s a significant amount, especially considering only Lucio and Junker Queen can affect their allies’ speed directly.
“Rejuvenescência“, the healing song, restores about 16 heath per second to allies, and 6 health per second to himself. It’s a minor heal, but it’s constant. Just hanging around your team lets you pump out tons of healing by doing absolutely nothing.
It can be hard to keep track of which allies are in range of your songs (allies behind you, for example), but there’s a handy number in the middle of your screen that constantly lists how many allies are currently hearing the music. You want that number as high as possible. Watch out for walls: your teammates will get no benefit from your songs if there’s a wall – or an enemy barrier – between you.
Crossfade (Ability): Pressing the Crossfade button switches near-instantly between Lucio’s two songs. He always respawns with his speed song active. That’s good, since that’s the one you want to start with, but once you’re in the fight you’d better remember to hit that Crossfade to start healing.
Amp It Up (Ability): This greatly strengthens Lucio’s current song for three seconds. His speed song becomes a blistering 60% bonus, and his heal increases to 52 points per second! Most characters have 200 max HP, so this can restore your whole team to full health in a few seconds. It goes on cooldown for 12 seconds once it’s done, so proper use of this boost is the key factor in Lucio’s effectiveness as a healer.
Sonic Amplifier (Primary Fire): Each click fires a quick burst of four green audio balls doing 20 damage apiece. It’s a fast attack that travels far, and it can do headshot damage, but it’s weak and hard to hit thanks to the projectiles’ travel time. These are mainly so you have something to do while passively healing. Damage dealt will charge your Ultimate, after all.
Soundwave (Secondary Fire): Sometimes called the “boop”. A 12-meter long blast that does 25 damage and pushes enemies away. This is your main defensive tool. The damage is worthless, but this move has such a short cooldown, it’s worth using anytime you can. It won’t kill, but don’t underestimate the disorienting effect of the push.
There are plenty of situations when shoving the enemy away is helpful, the most obvious being when you can push them into a pit for an instant kill. Keep an eye out for these opportunities: many King of the Hill maps in Overwatch include bottomless pits right next to the point. You can do the whole enemy team at once if you’re lucky.
Sound Barrier (Ultimate): With a powerful drop, Lucio radiates a protective force across his whole team. Its range is actually much greater than his normal songs’, at 30 meters, but the same line of sight rules apply. Anyone affected, meaning yourself and all teammates, get 750 extra health… that rapidly decays over six seconds. It’s easiest to just consider this move six seconds of near-invulnerability. Use it right before everyone’s about to be hit hard, but don’t wait too long: if a teammate dies before Sound Barrier triggers, you’ve just wasted 750 points of health.
One last important feature of Lucio is his movement ability. He uses laser blades on his feet to slide around, instead of using them to kill people like he ought to. This makes him a little floatier than regular-shoed heroes, capable of conserving momentum between jumps. It also allows him to Wall Ride! Jumping into a wall while holding the button lets Lucio slide along the wall. It’s faster than walking, and releasing the button makes him leap forward off the wall. You can absolutely chain Wall Rides into one another to scale entire buildings.
Overwatch 2 Lucio Changes
Lucio is almost exactly the same as he was in the original Overwatch. He went through a lot of changes during that game’s development, rapidly alternating between being one of the best and worst healers, but he seems to be in a stable spot now. Probably.
Healers in Overwatch 2 have gained a new passive ability to heal over time after avoiding damage for a few seconds, Halo shield style. Lucio could already self-heal with his music, so Blizzard turned down the volume with a self-heal penalty on his heal song. It should even out to be about the same, but it does mean that Lucio will now self-heal during his speed song. That makes a speedy escape a more appealing defensive strategy.
Tips for Lucio
Lucio is capable of being an extremely versatile support. Even the worst Lucio player will generate tons of healing for their entire team with zero effort. That makes him a great choice for beginners. Playing him well, however, means knowing the right time to use his active abilities. His amped up heal song is powerful at 52 points per second, but it’s possible for teammates to take hundreds of damage from well-aimed DPS abilities.
Recognizing when the hammer’s about to fall on your team is vital for a proactive Lucio. Amping to heal after a heavy hit is also useful, but that means you need to know the HP status of your team. Keep an eye out for critically injured allies while you skate.
It should go without saying, but Lucio is most effective when near his team. Rushing toward the enemy team alone is a bad idea for most heroes, and a triply-bad idea for Lucio. He’s most effective, then, in offense situations when your team is grouped around a control point or payload (which doesn’t block Lucio’s music despite its wall-like properties). His speed boost can help his whole team regroup after respawning. It can be worth hanging around the spawn room until you have an army to travel with.
Despite his healing potential, Lucio isn’t able to focus a single ally for big heals. That 52 health per second for three seconds doesn’t mean much to a 500-health tank. It makes sense to team with a second healer who focuses on single targets; Mercy is an obvious choice, but Ana can also do large single-target healing. Lucio also becomes less useful when he’s teamed with flanking DPS, since he has no way to heal faraway targets. He can be part of an effective mobile attack force, but only if everyone’s on board.
Lucio’s greatest weakness is his low attack power. Supports Moira and Kiriko have powerful damage options, but Lucio only has a peashooter and a pushback. If forced into a 1v1, Lucio’s survivability depends on his excellent speed and mobility. If you really want to get kills, your best bet is to master his Wall Ride to attack from unusual angles: as Lord Newell once said, “Gamers don’t look up.” The practice range is a great place to test the capabilities of Lucio’s Wall Ride. There are also a few menu options that tweak how Wall Ride works, so look those over if you’re committed to the DJ lifestyle.
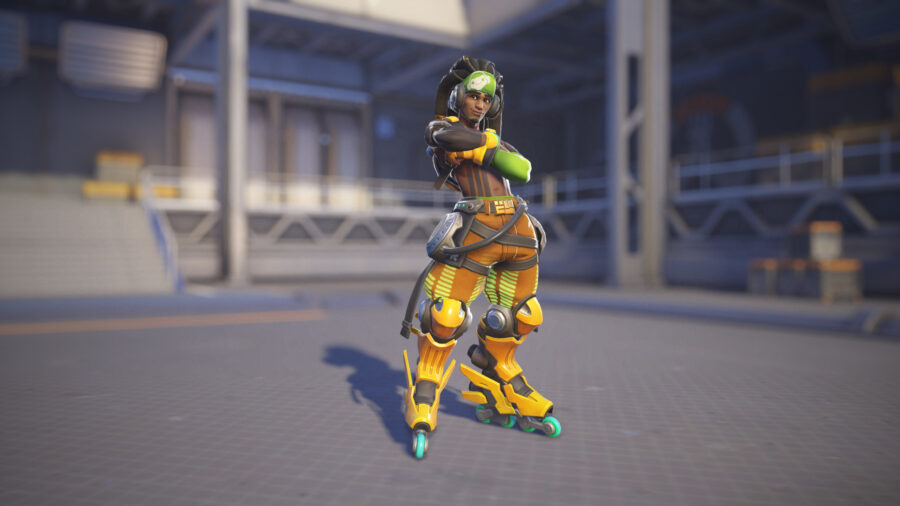
Overwatch 2 Lucio Skins
Lucio’s Capoeira skin.
These are Lucio’s available skins. Most of them are carried over from the original Overwatch.
Legendary skins cost 1900 Overwatch Credits, and Rare skins cost 75 Legacy Credits. Auditiva and Synesthesia cost 250 Legacy Credits and Gorgon, a Halloween skin, costs 1000 Overwatch Credits.
The event skins, marked by a white symbol, are all tagged as “sometimes available in the shop”: Selecao, Striker, Satyr, Snow Fox, Samul Nori, Equalizer, Jazzy, Gorgon, Andes, and Bitrate.
Some of them can’t be purchased with currency at the moment: Snow Fox, Samul Nori, Equalizer, Jazzy, Andes, and Bitrate. Overall this is all very confusing. I’m sure Blizzard is salivating at the thought of making money on their Free-2-Play “upgrade”, but surely they’d have better luck if their pricing schemes were comprehensible.
REDMOND, Wash. — A new Nintendo Direct quickly went off the rails when President of Nintendo America Doug Bowser suddenly broke down and began posing philosophical ideals about control and games.
“Can anyone truly control Mario?” an inquisitive Bowser asked viewers. “We are to believe the plumber has free will, no? Otherwise, his victory is a shallow, meaningless one. His defeat of King Koopa is merely a predetermined event coded into the game, his life. Yet Mario celebrates his triumph, seemingly ignorant that he is doomed to repeat it for all eternity. Is this a foolhardy exercise, with Mario the victim of some cruel, preposterous trick of existence? Or has Mario found happiness in his dogged routine, like Camus proposed Sisyphus did?”
Nintendo fans were disappointed in the lack of reveals of games and the abundance of reveals about the human condition.
“My ears perked up when he said ‘Mario,’ but instead of getting a Mario Odyssey sequel, I got the unfortunate truth that existence is a warped, flawed mirror of itself,” said ten-year-old Mario fan Kevin O’Dooley. “I used to think Mario Kart was fun, until Mr. Bowser pointed out Mario is but a vessel for my suffering, and I project the pain of my world onto him in a feeble attempt to feel in control. I am nothing, just like my father before me. Although Mario may live and die at my hands, he is actually my controller.”
At press time, the haunting Nintendo Direct segment was followed by Masahiro Sakurai presenting a new DLC fighter for Smash Bros., followed by a 45-minute dissertation about why we feel the need to smash in the first place.
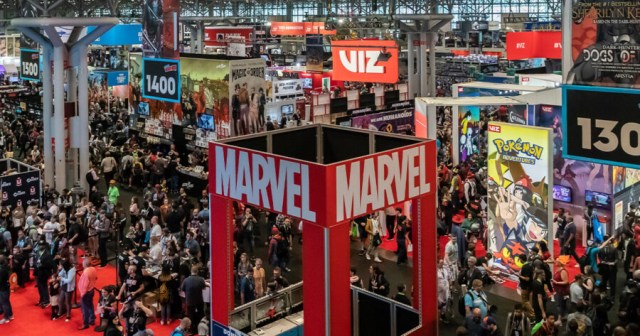
Comic Con is a blast, but boy are some of the things they sell there expensive. Nonetheless, even if you don’t bring home an anime figure to plop on your bookshelf and forget about it, at least there’s a bunch of cool stuff to take pictures of on your phone. Here’s the top 100 things we saw at New York Comic Con this year!
The same five One Piece and My Hero Academia figures at every single booth
A bunch of foam sword replicas that are too small to actually look the like original
One Kill la Kill replica sword that is perfectly sized and too similar to the original
Absurdly high-priced $300 dollar Funko Pops
Still fairly High-priced $40 dollar Funko Pops
Reasonably-priced $10 dollar Funko Pops
No explanation for what determines Funko Pop pricing
Frank Miller…banner at artist’s alley because he is out to lunch
The missed opportunity to ask Frank Miller what the fuck was Holy Terror
Merch that crosses the Golden Girls with pretty much any franchise you could imagine
The longest line for empanadas in human history
One cosplayer who is too into being the Kingpin
At least one celebrity who no one’s really sure why they’re there — this year’s were Ice T and Coco
A grown man who is certain his 5 week old baby is pumped to be in a building with constant noise dressed as Baby Yoda
Neon Genesis Evangelion merch
Neon Genesis Evangelion merch that sexualizes teenage girls [before you start to argue about this one in the comments really think on what you’re about to defend]
Mystery boxes
People who are somehow cool with buying mystery boxes
A cool figure that you can find online for $30 less
Cosplayer struggling to eat, such as was Galactus shoving a hot dog down his mask
One guy who was really bummed when we said we didn’t like his Kingpin cosplay
That car from that show
That car from that movie
Women’s booty shorts that have little puns about cumming on them, i.e. “just call me Winter” and then the Game of Thrones logo
Exactly zero people buying women’s booty shorts that have little puns about cumming on them
An extremely intricately made furry cosplay
A guy dressed as Spider-Man
50,000 other guys dressed as Spider-Man
Danny Trejo insisting he’s allowed to cut in the food lines
People in the least comfortable clothing you’ve ever seen somehow not sweating even a little bit
A rapidly aging Sgt. Slaughter
People taking a good hard look at a Power Rangers toy before they buy it
Rob Liefeld autographing people’s cargo pockets
Horrifyingly accurate Darkwing Duck cosplay that haunts you at night
NFTs
Oh god, even more NFTs
Multiple people claiming to be the official voice of Goku and signing drawings for $100 a pop
A real life Harley Quinn/Joker break up
The reunited cast of Scream demanding you leave their private catering area
Framed animation cels from ’90s cartoons that look really expensive and could absolutely not be something you could carry around for hours
One asshole trying to walk in the opposite direction of everybody else on the main floor
An extremely long line of people waiting to get into a panel where they just play an episode of a TV show that already came out last week on streaming
A $35 slice of microwaved pizza
C3P0 using a urinal
Someone whose cosplay, for some reason, involves blasting music out of a speaker
An enormous display for an upcoming movie that you have never heard of and will never hear of again
People waiting 30 minutes in line to take a photo in front of a piece of cardboard
Vin Diesel cospl—oh wait, nevermind that’s just a bald guy
A poster where Deadpool sits on the Iron Throne
A poster where Batman sits on the Iron Throne
A poster where John Wick sits on the Iron Throne
No cool A Song of Ice and Fire posters
The Predator. Not a costume, not a trailer, but the actual Predator
A sexual predator signing autographs for some cartoon character he voiced
Disgusting Marvel executives giving people first glimpses in the alley outside
Pornographic anime body pillows
Wholesome anime body pillows
A very short line for the more disgusting looking food truck
Ah wait, nevermind, the line is just wrapped around the building there
Ultra rare, one-of-a-kind, one-sided die
A man trying to figure out the logistics of getting the life sized Elvira sculpture he just bought home on the train
Multiple drawings of your favorite characters shitting on a toilet for some reason
A disturbingly accurately flesh statue of Stan Lee
Promotional cosplay of a guy dressed as superhero whose head is a shaving razor
A disgruntled weeb who remembers when these cons USED to sell real swords
Least funny person alive dressed as Deadpool
Second least funny person alive dressed as Rick Sanchez
Third least funny person alive: Seth McFarlane doing a panel
Darth Vader arriving in a Honda Civic
A disgraced Joe Camel trying to make a few bucks signing autographs
Cosplayers dramatically posing and looking cool right next to a food truck for just mac n’ cheese
Scores of professional cosplayers waiting to be interviewed about where they bought their foam
Elvis Presley (pretty sure it was really him)
Gundam figurines that are more expensive because you have to make them yourself
Businessman who wrote a fantasy novel
Apparently an extremely famous comic book artist who you have never heard of, surrounded by a crowd of excited fans
Bojack Horseman cosplayer holding horse mask in hands because it has no eye holes
Respected thespian feigning interest in nerd shit he’s roped up in
People selling passes for more than the cost of the normal passes even though the passes are not sold out
Guy who spent hundreds of dollars to go to Comic Con just to see a new movie trailer that IGN will post an hour later
Extremely tempting stack of d20s
YouTube prankster trying to get cosplayers to say stupid shit on camera
Dan Harmon
Oh wait, actually that’s Dan Harmon over there
Those nuts they sell in Central Park that no one would ever buy, but now they’re lookin pretty good cause you’re so damn hungry
An enormous area where you can play Smash Bros or Halo: Infinite even though you can literally do that at home whenever you want
Overwatch 2has been out for close to a week now, meaning players have been able to actually play it for a couple of days. With how drastically the tank role has shifted after the move to single tank, players may be finding that their usual tank just isn’t performing the same for them. After spending some time with each one, here are Overwatch 2‘s best tanks.
S Tier – Who Are The Best Overwatch 2 Tanks?
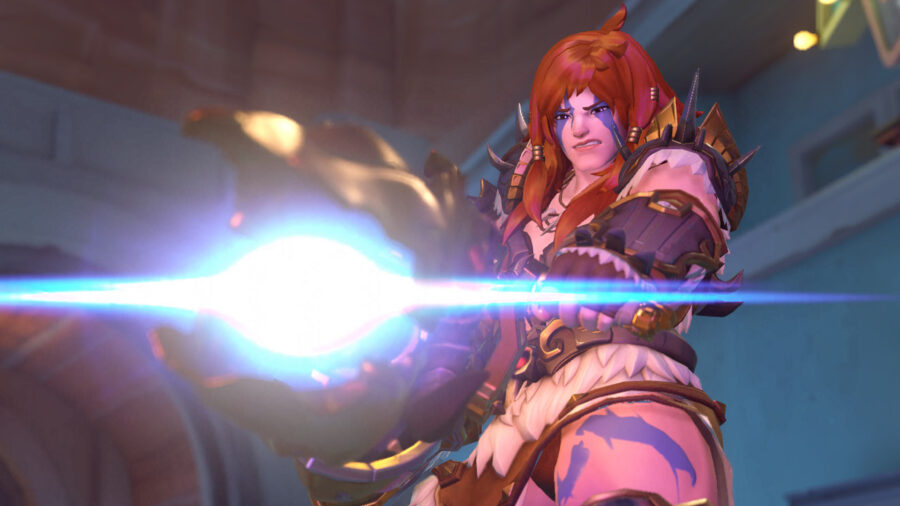
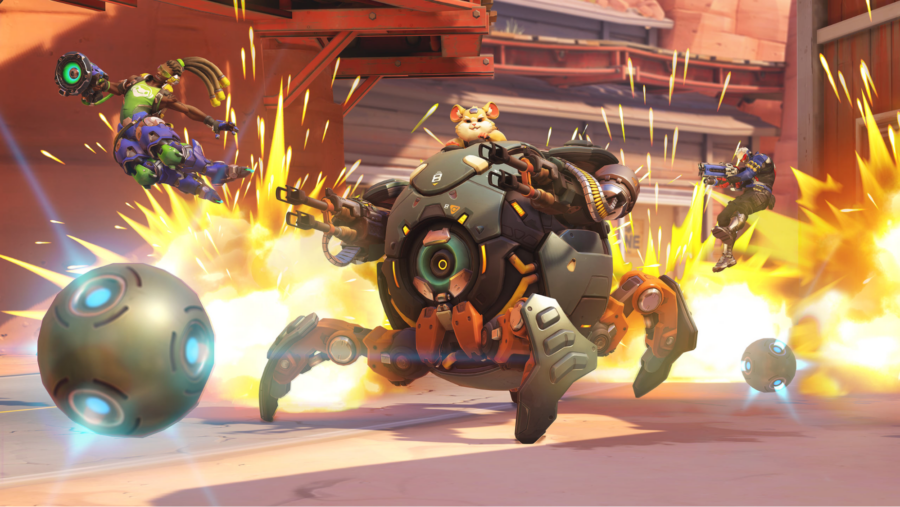
Junker Queen
Junker Queen is a powerhouse and a force to be reckoned with. As she is such a new hero, she seems overpowered and hasn’t been nerfed since the beta. She heals over time, and most of the tanks don’t have the ability to heal themselves bar a few. Her damage with her Jagged Blade and Carnage is unparalleled for a tank. Her Commanding Shout is very powerful as it increases her health for her and her allies. The amount of health she gets makes her practically unkillable. Her ultimate stops enemies from being healed if they get hit, and deals damage over time, an incredibly powerful combination.
Doomfist
Doomfist is a very powerful tank due to his crowd control and an incredible amount of damage despite being a tank. With his rocket punch, if the enemy hits the wall, his damage is increased. He is able to block frontal attacks now in Overwatch 2, which empowers his Rocket Punch and allows him to do more damage. Not only this, but he is incredibly mobile due to his abilities, so he has fantastic map control.
However, he can be difficult to learn how to play, and people may find themselves struggling with the learning curve that comes with learning Doomfist.
D.Va
D.Va is a fantastic mobile tank to play with and has great map control due to her mobility, as she can speed around the map using her boosters which allow her to fly in any direction. Her micro missiles are also very powerful, along with her fusion cannons. Her damage has increased since being in Overwatch 2. However, her ult can be difficult to use and easy for the enemy team to dodge.
A Tier – Overwatch Best Tanks
Zarya
Zarya is a strong tank right now as she received a number of buffs. Because of this, she is more of a bruiser tank now, so she can now take on the enemy team to get energy by shielding herself and a teammate. Her ultimate can be a little bit tricky to aim, but once you have it down you can easily get a team kill with it or leave them defenseless and steamroll them.
The only issue with Zarya is that she isn’t able to attack high-mobility heroes such as Pharah or Echo as she doesn’t have enough range on her weapon to hit them.
Reinhardt
Reinhardt is one of the most commonly used tanks and for good reason. His shield is incredibly strong and can block a lot of damage, and due to the way the camera works, it allows him to have a lot of spatial awareness. Not only this, but Reinhardt’s shield can block ultimates depending on how much damage his shield has taken. For example, a full shield can block D.Va’s ultimate.
His damage is also pretty powerful, as when he swings his hammer he can often block people into corners and kill them pretty easily. His charge can be pretty unruly to get used to, but overall it’s great once you have figured out how to use it and not throw yourself off of the edge.
B Tier – Overwatch 2 Tanks
Sigma
Sigma is a complicated hero that people may struggle to play. He converts projectiles into shields using Kinetic Grasp which may be difficult for some people to get used to depending on where the attack is happening. Accretion is a slight charge ability too, as he has to gather up the debris to toss at someone. His ultimate can be used really well to debilitate the enemy team.
Wrecking Ball
Wrecking Ball is a highly mobile hero that can be a lot of fun to play, but his damage has been significantly nerfed since being brought back to Overwatch 2. His contact damage whilst rolling no longer does as much as players would hope. However, he can still do a lot of damage by swinging around using his Grappling Hook ability and charging around the place.
Before, Wrecking Ball was a useful tank due to his crowd control. However, now that is taken away, it makes him a bit of a slightly less useful tank. Despite this, he has a significant amount of health which makes him one hell of a bruiser when it comes to team fights, and he has a lot of sustainability in those fights, especially with his Adaptive Shield.
Orisa
Orisa is incredibly strong right now and has experienced a massive rework since being in Overwatch 2. Orisa is one of the only remaining heroes who has crowd control left in the game, as most of it has now been taken out of the game. Her Energy Javelin can be thrown to stun and knock a hero back, and it is more effective if they hit a wall. Her fortification ability has also since changed and grants her temporary health and reduces all damage taken. Not only this but her weapon won’t generate as much heat, so it won’t overheat as quickly.
Her shield no longer exists and instead, she spins a javelin which blocks projectiles and melee attacks and can push enemies forward while increasing her own movement speed. Whilst this is a fantastic ability, it can be really tricky to learn how to use it, making Orisa’s skill ceiling higher than it ever was before.
Her ultimate is now completely different as well; she now sweeps enemies in and anchors them to the floor, fortifying her in the process. This can be a difficult ultimate to time, as it has a charge-up on it, and you can also re-press your ultimate button to release the ultimate early. Because of all of these changes, players who may have been used to the old Orisa will find her significantly different to play and will have to relearn how to play her, while new players will have to get used to the skill level of the hero.
C Tier – Overwatch 2 Tanks
Winston
Winston is a good well-rounded tank with a good shield that can mitigate a lot of damage through fights, but overall doesn’t deal a lot of damage himself. He now has a secondary fire which can be good and deal 50 damage when fully charged, but can be hard to aim. His damage is consistent when enemies are inside the range of his primary Tesla cannon fire, but again it doesn’t deal that much damage and can easily be healed over.
Winston is a great tank to learn as a first-time tank player and can be a good tank to learn if you want to branch into learning others over time. Overall though, he isn’t that useful damage-wise, and his only redeeming quality is his shield and his ultimate.
Roadhog
Roadhog is a good tank purely because of the amount of health he has and his self-healing. But, realistically that is most of what he has going for him. Roadhog requires a high skill level due to his hook ability. The hook can be difficult to aim due to the unpredictability of the enemy and the shallow range of the attack. His weapon also doesn’t do that much damage, primary or secondary fire, so a lot of it is just his ability to stay alive and contest points when needed. That being said, his ultimate now is very powerful and good at keeping people away, as the knockback can keep going and going.
Golden Guns are an unlockable cosmetic that carry over from Overwatch to Overwatch 2. Each Hero has an unlockable Golden Gun variant that shows off a player’s dedication to both the Hero and Overwatch 2. So, how do you unlock Golden Guns?
How to Unlock Overwatch 2 Golden Guns
Luckily, every Hero’s Golden Gun variant is unlocked the same way. Unluckily, the way in which they are unlocked limits how many you can actually get per season. Golden Guns are purchased through the Hero Gallery on the main menu. Each Golden Gun costs 3,000 Competitive Points. You’ll notice that each hero only has one Golden Gun to purchase, despite having multiple equippable Skins. This is because the Golden Gun will automatically be modified to match whatever equipped Skin you use, like the Reaper Golden Gun shown above, which Overwatch 2 has automatically transformed to match the equipped Lu Bu Reaper Skin.
How to Unlock Competitive Points
Competitive Points unlock in two different ways. First, you can earn them by playing competitive matches. You’ll be rewarded with 15 points for a win, 5 points for a draw, and 0 points for a loss. Not much in the grand scheme; however, if you play Competitive regularly, they will add up. The more lucrative, but slower, way to earn Competitive Points is by completing Competitive Challenges.
At launch, there are 12 of these, which reward you for ending Season 1 at a specific rank. The higher your rank the more Competitive Points you’ll unlock, including earning any rewards from the lower ranks you passed. So, if you finish Season 1 at the rank of Platinum, you’ll not only unlock the Competitive Points reward for ranking Platinum, but also the rewards for placing Gold, Silver, and Bronze. As you can clearly see, this is a slow process, so don’t expect to be unlocking Golden Guns regularly. When you have earned enough Competitive Points, you should focus on unlocking the variant for your favorite/most played Heroes, as it’ll be a while before you can unlock another.
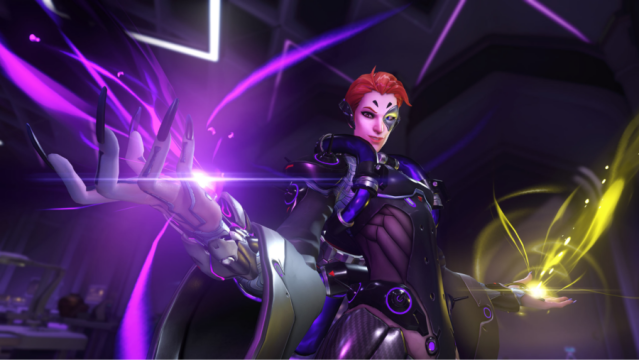
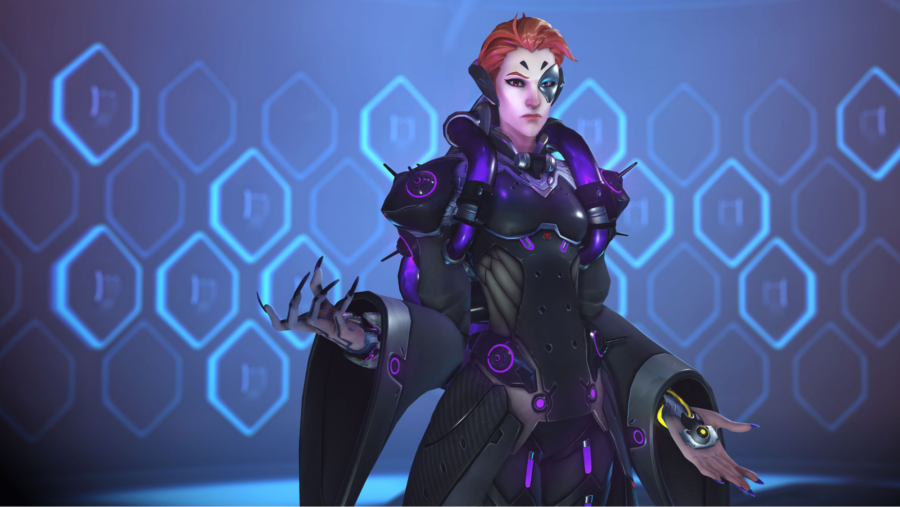
I once read on some kitchen wall art that there is balance in all things, and much like the pair of scales nearby, this too is true for Overwatch 2‘s Moira. Her whole shtick is duality, and so despite being classed a support hero, she’s just as capable on the offensive.
Moira has a long history in Overwatch lore too, as a mad scientist figure working on altering genetics, with Reaper being the result of one of these experiments. She pursued some pretty lofty goals here, despite the ethical questions raised by her peers. Unperturbed, she joined the Blackwatch, Overwatch’s hush-hush covert ops segment,to work on implements of war.
Let’s get into her abilities, skins, tips, and how Moira has changed for Overwatch 2.
Moira’s Abilities
Biotic Grasp (Primary Fire): Use the Biotic Energy to heal all of your allies in front within 15 meters for 70 HP a second. Energy is generated by the secondary fire of Biotic Grasp, meaning you have to effectively turn damage dealt into health for your team. It does replenish itself slowly, however, at a rate of just under 4 units per second while not in use.
Biotic Grasp (Secondary Fire): A homing beam that targets the nearest enemy, damaging for 48 per second. Generates the Biotic Energy needed for your primary fire, at a rate of around 25 units per second (factoring in the above 4) and heals you slightly while dealing out damage to enemies.
Biotic Orb (Ability): Biotic Orb has two forms – one for damage, and one for healing. They both handle the same, firing out in your chosen direction, bouncing off nearby surfaces, and interacting with nearby players. It lasts for either seven seconds, or until it reaches its limit; for healing, it generates 65 per second with a max of 300, and damages for 50 per second with a max of 200. Biotic Orb has a cooldown of eight seconds.
Fade (Ability): Moira can become invulnerable and invisible for a second here, which is ideal for getting out of a tight spot. Fade also ramps up your speed dramatically for its duration, allowing you to cover a fair bit of distance. With a cooldown of only six seconds too, this makes you very hard to pin down.
Coalescence (Ultimate): The big one – fire a huge beam of energy for eight seconds over 30 metres, damaging foes for 70 per second and healing your team for 140 per second. Coalescence also pierces enemy barriers, gives you a 50% movement speed buff, and heals you for 50 per second too.
Role: Support (Passive): Just like the rest of Overwatch 2’s support heroes, Moira will now automatically heal for 10hp a second after going unharmed for a second. Very handy for Moira, as you can duck back after dealing out some damage, and recover while you heal up your teammates.
How has Moira Changed for Overwatch 2?
For players who saw the modified Moira in the beta earlier in the year, you’ll be relieved to know that all those feedback forms you filled in worked – Necrotic Orb is dead. This was originally going to serve as a rework for Biotic Orb, and split its offensive and regenerative forms into two separate skills, each with their own cooldown timers and new secondary effects. By all accounts though, it well and truly sucked.
So, with the exception of the new Role: Support passive having been added to her roster, it looks like business as usual for Moira stans, with no other notable changes yet.
Moira Strategy
For a support hero, Moira has a lot of damage potential. And to be an effective healer, you’re going to need to use it, as dishing out the hurt to the opposing team refills your Biotic Energy much quicker, which is the resource you use to heal your allies.
She doesn’t slack on the healing front, though. Biotic Grasp has a wide range and a high healing rate, and paired with a Biotic Orb you can buff multiple members of your team for up to 140 per second. This can be an incredibly effective barrier against pretty much all incoming damage, discounting ultimates, and can allow a tight-knit squad to push up with little recourse when escorting a payload or reclaiming a control point. Coalescence is also very effective for scenarios like these – when there’s a lot of players in a tight space, position yourself near the back of your squad and just let ‘er rip, both healing your squad and shredding the opps. It’s honestly one of my favourite ults in the game.
When you’re out for blood (and Biotic Energy), the damage version of Biotic Orb paired with the Grasp can also be pretty devastating against bunched up enemies. While the secondary fire only hits one enemy at a time, paired with a Biotic Orb it can hit for just under 100 a second. Timed well, you can pick off a group in turn fairly quickly. Don’t try it alone though, as Moira’s a bit of a glass cannon, with only 200 HP.
Biotic Grasp’s damaging beam also locks on to enemies pretty effectively, making quick work of more nimble opposition like Genji. He can try to jump around you all he likes – just keep an eye on him and let the beam do the work for you. He can’t deflect your beam, either.
One way that Moira falls down however is range, and this is particularly felt against airborne enemies. Pharah is proving a popular choice at launch, and her rockets can shred Moira without much recourse. Use your Fade ability and get away if you see her take to the skies.
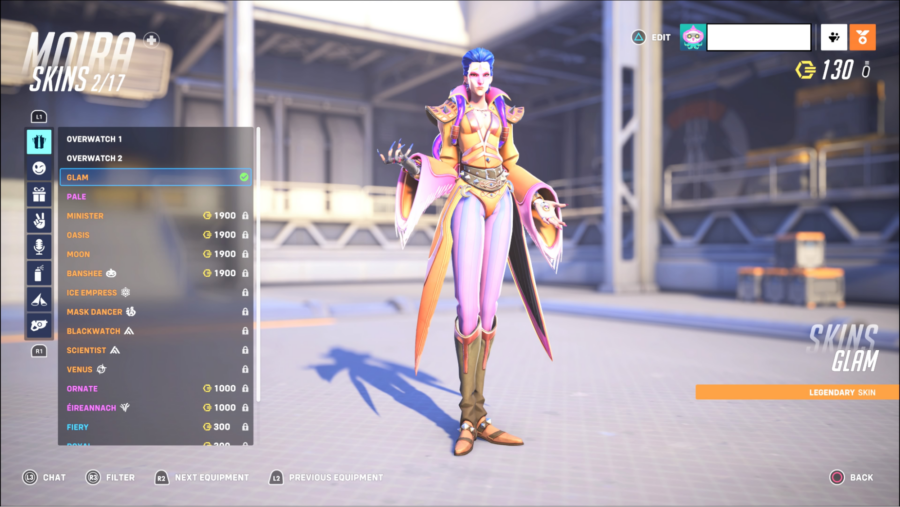
Moira Skins in Overwatch 2
There’s currently 19 skins listed for Moira on the Hero Gallery in Overwatch 2. The best by some margin, in my humble opinion, is Glam – proper Bowie vibes. Who doesn’t want that?
Name
Information
Overwatch 1
Common skin
Free, unlocked by default
Overwatch 2
Common skin
Free, unlocked by default
Minister
Legendary skin
1,900 Overwatch Coins
Oasis
Legendary skin
1,900 Overwatch Coins
Glam
Legendary skin
1,900 Overwatch Coins
Moon
Legendary skin
1,900 Overwatch Coins
Banshee
Legendary skin
1,900 Overwatch Coins
Seasonal
Ice Empress
Legendary skin
1,900 Overwatch Coins
Seasonal
Mask Dancer
Legendary skin
1,900 Overwatch Coins
Seasonal
Blackwatch
Legendary skin
1,900 Overwatch Coins
Seasonal
Scientist
Legendary skin
1,900 Overwatch Coins
Seasonal
Venus
Legendary skin
1,900 Overwatch Coins
Seasonal
Ornate
Epic skin
1,000 Overwatch Coins
Pale
Epic skin
1,000 Overwatch Coins
Èireannach
Epic skin
1,000 Overwatch Coins
Seasonal
Fiery
Rare skin
300 Overwatch Coins
Royal
Rare skin
300 Overwatch Coins
Selkie
Rare skin
300 Overwatch Coins
Whiskey
Rare skin
300 Overwatch Coins
Stay Updated on The Latest Punk News
Get the latest punk news delivered straight to your inbox