Rumbleverse Special Moves: The Ultimate Tier List (Season 1)

In Iron Galaxy’s battle royale brawler Rumbleverse, you can find Books during a match that will allow you to learn and equip powerful Special Moves, such as the Giant Swing and the Superkick. You can only equip two moves at once, however, so sometimes it can be hard to know whether you should keep the skills you currently have, or trade them in for something else you found that might be better. Well, fear not! We’re here to help you by laying out all the Special Moves in Rumbleverse in a definitive tier list from S to D, telling you which ones are worth your time and which Books to burn.

*All damage calculated with base stats, and does not include potential fall damage

V: Vicious (unblockable, low priority)

S: Strike (blockable, medium priority)

P: Power (blockable, high priority)

Rumbleverse Special Moves: S Tier


These are the best of the best, the absolutely busted skills that can demolish an opponent in mere moments. Enjoy abusing these Special Moves while you can, because they will almost certainly be nerfed in future seasons.

Javelin Tackle (V, 330 DMG) – If you’ve ever found yourself screaming at this game, it’s probably because of Javelin Tackle. This is easily the most popular move in the Rumbleverse meta right now, and for good reason. It’s an unblockable tackle that does incredible damage and has very quick start-up, making it hard to avoid. While the move description claims this move to be “High Risk”, it’s really no more punishable than any other Vicious Attack. The only exception is that if you miss your grab and run into a wall, you will splat and fall back as if you’d been Irish Whipped, leaving you vulnerable for a brief moment. Still, this is easily one of the most oppressive Special Moves in Rumbleverse currently. You should probably pick it up every time you see it, if only to keep other people from using it against you.

Omega Uppercut (P, 20+180 DMG raw, 5×10+180 DMG charged) – We’ve previously mentioned how important attack priority is in Rumbleverse, so it should be no surprise that a Power move like Omega Uppercut is in S Tier. This can defeat every other Special Move in a head-on collision (besides other Uppercuts, which it will Clash with instead), making it one of the safest moves in the game. It also does decent damage and is great at launching enemies off of buildings for extra fall damage, or wall-splatting them so that you can catch them with a follow-up in the air.

Cozmo Shot (S, 200+10 DMG) – One of the flashier looking moves in the game, Cozmo Shot kicks your opponent into the air and then follows up with a flipping kick in the air to send them flying. It takes away a decent amount of health once you factor in fall damage, and is very useful for when you want to put some space between you and an opponent. If you kick the opponent into a wall, rather than splat against it, they will bounce off of it back towards you, which can make it easier to continue your combo. You can also dodge-cancel after the first kick to use it solely as a launcher, allowing you to combo them in the air. Last but certainly not least, after the second hit you can immediately press the button for your Vicious Attack. The timing can be a little finnicky, but most of the time you will home in on the opponent and immediately hit your standard Vicious Attack for some extra damage. This works even when you’re in Superstar Mode, allowing you to combo directly into your Super for a potential touch-of-death combo.

Atomic Punchline (S, 300 DMG) – The only non-Epic move in this top tier, Atomic Punchline is an explosive punch that does wicked damage and even has a small AOE that can catch multiple opponents at once. Its in-game description describes it as “slow”, but much like with Javelin Tackle this is a very overstated downside: Atomic Punchline feels on par with most Special Strikes in the game, if not slightly faster than some of them. The greatest strength of Atomic Punchline however is that despite its high amount of damage, your opponent will not be invulnerable after a wall splat! This makes it very easy to abuse, since you can quickly follow up with a second Atomic Punchline to do even more damage and make your victim quit playing the game forever.

A Tier

Rumbleverse Special Moves A Tier

These skills are still incredibly strong, but aren’t quite as easily abusable as those in S-Tier. Maybe they’re slightly more situational, or take a bit more skill to use effectively, or maybe they just don’t do as much damage. Nevertheless, these are all still excellent Special Moves to come across in any Rumbleverse match.


Vicious Mist (V, 20 DMG) – A Common skill that does barely any damage, how could this possibly belong in A Tier? Well, Vicious Mist is incredibly useful as a combo-starter. It’s one of the fastest Vicious attacks in the game, and on hit it briefly stuns the opponent, allowing you to follow up with something much more painful. When done in the air, you will spit the mist downwards instead of simply ahead of you, which gives it excellent utility as an aerial mix-up. When someone sees you jumping down on them, they’ll generally block in anticipation of an Elbow Drop. Vicious Mist will catch many of your foes off-guard and then, they’re yours for the pounding.

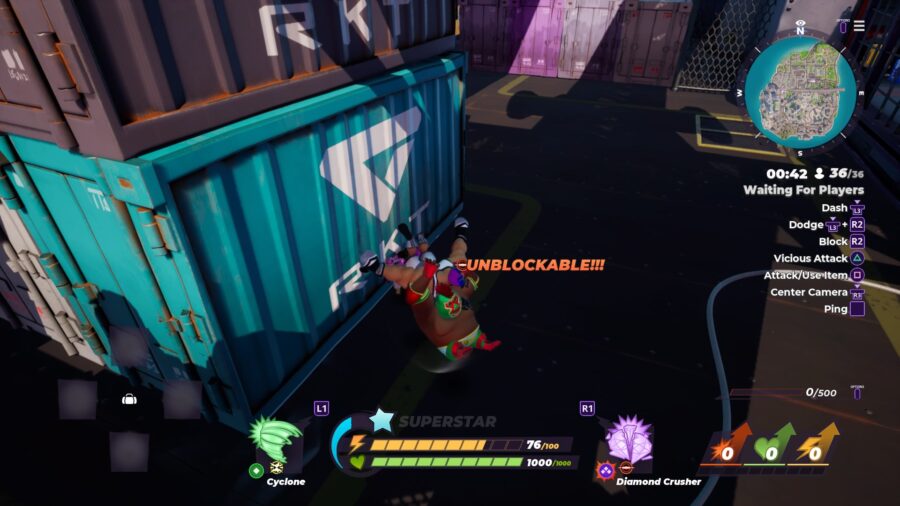
Diamond Crusher (V, 316 DMG) – Sometimes, all a move needs to do is a heavy amount of damage. That’s Diamond Crusher, a Vicious kick to the opponent’s gut followed by pulling them down face-first to eat pavement. There’s no real combo potential with this one, so save it for the end of whatever elaborate string you have in mind. Even hit completely on its own though, trust us, this one is gonna hurt.

Spear Tackle (V, 300 DMG) – This is good for all the same reasons as Javelin Tackle, just does a little bit less damage is all.

Tackle (V, 270 DMG) – Honestly, the Tackle moves are so strong that even in its weakest form, A Tier is pretty much as low as you can put this.

Dolphin Dive (S, 120 DMG) – In the very beginning of this season, you could find this Special Move laying around everywhere; nobody wanted it. People have since started to see the potential combo value in this volleyball-style dive that launches your opponent into the air. No, it doesn’t do a lot of damage, and yes, when you miss you are left quite vulnerable. But it’s got quick enough start-up to catch some folks sleeping, and on hit you have the option to jump-cancel your recovery animation. This means you can immediately follow-up attack on your opponent, regardless of whether they splat into a wall or are still sailing through the air. Some particularly talented Rumbleverse players can pull off insane combos with this move. It’s far from the easiest move to master, but the rewards are well worth the effort.

Super Sumoslap (S, 4×10+80 DMG raw, 8×10+80 DMG charged) – If there’s one thing you can say about the Rumbleverse meta right now, it’s that Rumblers be blocking. A lot. And in this block-heavy environment, Super Sumoslap is an excellent tool to have. Not only are these multiple quick palm strikes useful for slamming opponents into walls for follow-up attacks, they also significantly reduce your opponent’s Stamina, even if they block. Reduce your opponent’s Stamina to zero and they’ll suffer a Stamina Break, leaving them completely unguarded and open to attack. The Sumoslap Special Moves are also the only ones in the game that knock your opponent away without knocking them down. This can allow you to quickly catch them off-guard by running in for a Dropkick or throwing an item at them, letting you remain on the offensive for longer. The only real downside of this move is that it doesn’t do a lot of damage, so try to pair it with something beefier like a Diamond Crusher.

Bionic Uppercut (P, 20+160 DMG raw, 20+180 DMG charged) – Bionic Uppercut does less damage and launches the opponent less than its S-Tier cousin, but that Power priority is so valuable that it’s hard to turn your nose up at this one when you stumble across it in a match.

Giant Swing (V, 50 DMG to grabbed, 3×90 DMG to surrounding) – Giant Swing does not do a great deal of damage to the opponent you grab (though it’s worth noting they will likely take additional fall damage). It does, however, throw them very very far away, which can come in handy when you just want to get away so you can heal up. It’s also safer than most Vicious Attacks to use when dealing with multiple opponents, since you will damage and knockback anyone in the surrounding area while swinging your victim around. Most importantly though, the Swings are the only Special Moves in the game that you can aim in any direction you like. This means that when you’re close enough to the edge of the map, grabbing an opponent with this move is an instant KO, since all you need to do is point them towards the open waters. The only thing keeping this out of S Tier is the fact that despite the small amount of damage this move does, throwing an opponent into a wall with Giant Swing renders them invulnerable in the same way as much more powerful movies like Tackle, preventing any follow-up attacks.

Rumbleverse Special Moves: B Tier

These moves are, you know, pretty good. No they’re not as shiny and exciting as the stuff in the two tiers prior, but they still get the job done. Don’t even think twice about picking up one of these Special Moves if you see them in a match, just be ready to exchange them for something better should the opportunity arise.

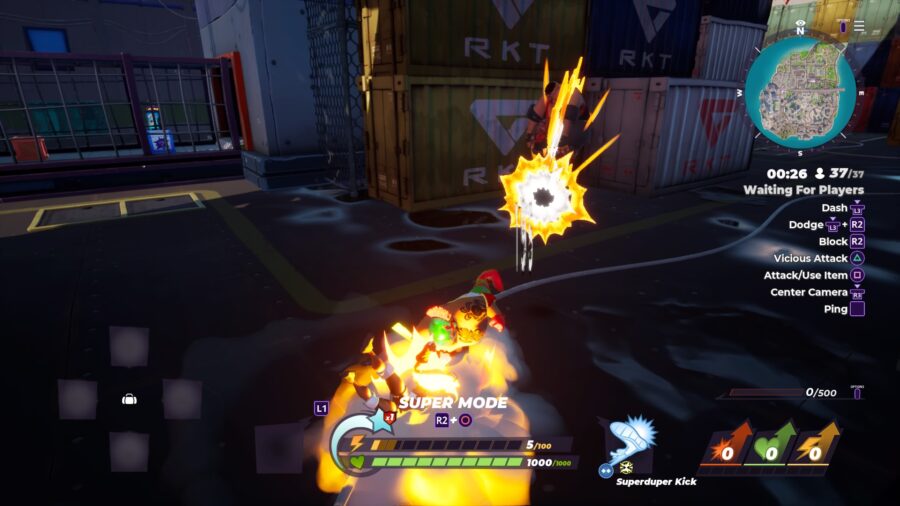
Superduper Kick (S, 195 DMG raw, 10×2+220 DMG charged) – The Superduper Kick does a healthy amount of damage for a Strike and can send your opponents flying off of buildings for fall damage, or splat them against walls for a follow-up attack. It has fairly quick start-up as well, though obviously that is less true when charged. Fully-charged, it can launch opponents far enough that it allows you to make a quick getaway if necessary. Nothing particularly outstanding about it, just a really solid move all around.

Skyrocket (S, 120 DMG raw, 3×50 DMG charged) – Very unique among Special Moves in the game, Skyrocket can hardly even be called an offensive move. It does damage if the opponent happens to be near, yes, but primarily its purpose is to quite literally rocket you up into the sky. This can be very useful for when you just want to get out of a sticky situation to catch your breath and eat some Chicken. Or for the less cowardly, you can use it to get higher above opponents to make your Elbow Drop do more damage and hit a wider area. Worth noting that while charging this attack glows red like a Vicious Attack, but it does not seem to possess any of the other Vicious qualities re: priority, blockability. Definitely not a move for everyone, but it has its uses.

Rocket Jump (S, 100 DMG raw, 120 DMG charged) – Since the main draw of Skyrocket/Rocket Jump is their upward mobility, a small reduction in damage does very little to make Rocket Jump less pickable than Skyrocket.

Punchline (S, 250 DMG) – This weaker version of Atomic Punchline still packs quite a wallop, but losing the AOE effect definitely makes it a little less of a threat. Nevertheless a very solid option, and a Punchline into a wall splat into another Punchline still significantly hurts your opponent’s HP and their pride.

Poison Sumoslap (S, 4×10+60 DMG, plus poison) – In terms of pure damage to the opponent’s health, Poison Sumoslap is probably stronger than Super Sumoslap. The amount of damage that poison does is hard to calculate exactly, but it seems to be something like 10 DMG per second for around 15-20 seconds. However, there are plenty of other moves you could choose if you want pure damage. The lack of Super Sumoslap’s extra charged hits and the accompanying Stamina damage make this just slightly less useful.

Uppercut (P, 160 DMG) – On the weaker side as far as damage goes, and lacks the charged version that brings you up into the air with your opponent. But a move that can beat almost any other move in a clash will always have its uses.

Omega Cyclone (S, 2×10+140 DMG raw, 4×10+140 DMG charged) – Omega Cyclone does not do a particularly impressive amount of damage, however it is one of the only AOE attacks in the game that covers a significant range (particularly when charged). Unfortunately while it launches opponents, it does not cause wall splats, which limits its usefulness in larger combos. When fully charged, the multiple hits are useful for the extra Stamina damage that might open up an opponent to a Stamina Break.

Emerald Crusher (V, 280 DMG) – If all that Diamond Crusher really has to offer is doing a hefty dose of damage, Emerald Crusher doing slightly less damage naturally makes it a little less appealing. Still nothing to sneeze at.

Super Chokeslam (V, 230 DMG raw, 250 DMG charged) – Super Chokeslam does a solid amount of damage, and like the Sumoslap moves it also significantly reduces the opponent’s Stamina. This makes it a little more viable than other Vicious moves that do similar damage, since you have the added likelihood of causing a Stamina Break and thus immediately being able to hit the opponent with another big move or combo-starter. However, despite being unblockable it is ironically not quite as effective of a guard-punishing tool as Super Sumoslap, since most guarders will dodge out of the way when they see the red flash of the move.

Rekt Shot (S, 180+10 DMG) – Rekt Shot has a lot of the same utility as its rarer relative, but it unfortunately lacks the tracking Vicious Attack follow-up that makes Cozmo Shot such a nasty piece of work. It also doesn’t kick the opponent quite as far away, and kicking an opponent into a wall will result in a regular wall splat instead of a bounce.

C Tier

These are the Special Moves that are not so special. They’re all fundamentally inferior to pretty much everything listed above, so don’t expect any miracles. But at the end of the day, they’re better than nothing.

Great Izuna Drop (V, 250 DMG) – Great Izuna Drop is one of the coolest looking moves in the game: you grab your opponent, jump up into the air with them and spin like a drill, driving them headfirst into the concrete and…doing a decent amount of damage. That’s it. You certainly can’t start a combo with this, and it doesn’t launch them away from you or greatly reduce their Stamina. While there is potential to do this move off of a building or onto a bouncy surface for increased damage, the lack of any way to aim makes this somewhat impractical and hard to rely on. If all you’re offering is a lump sum of damage, that damage has to be big enough to be worth it. A lot of the time, Great Izuna Drop is not.

Ruby Crusher (V, 250 DMG) – Everything said above about Great Izuna Drop applies to Ruby Crusher as well. It’s just a little more acceptable coming from a Common-level Special Move like this rather than a Rare one.

Volley Dive (S, 100 DMG) – A slight drop in damage doesn’t do much to hurt Volley Dive’s viability, but the lack of Dolphin Dive’s jump-cancel on hit severely reduces its combo potential. You can dodge-cancel out of a Volley Dive on hit so it’s not completely useless, but the added Stamina cost of a dodge can leave you vulnerable to a Stamina Break. Unless you’re very good at managing your Stamina during a Rumbleverse match, this is a hard one to recommend.

Sumoslap (S, 4×10+60 DMG) – No poison or extra charged hits make Sumoslap less appealing than its two big brothers, however the potential of getting that Stamina Break can sometimes make it worth holding on to this one even later in the game.

Chokeslam (V, 210 DMG) – For much the same reason as with Sumoslap, Chokeslam’s reduction to your opponent’s stamina can occasionally make it worth holding onto despite its mediocre damage compared to other Vicious Attacks.

Superkick (S, 175 DMG raw, 200 DMG charged) – Superkick launches the opponent a much shorter distance than the Superduper Kick, making it less useful when you need a getaway. However, when fully charged it can still usually wall splat an opponent or send them flying off a building. No shame in picking this one up when you can’t find something juicier like a Punchline or Uppercut.

Goal Shot (S, 170 DMG) – Goal Shot differs a fair bit from Cozmo and Rekt, in that you only perform the first kick that launches the opponent. It also launches them significantly more forward than the launchers of the other two Shots, presumably to make up for the lack of a second kick. Like with Cozmo Shot, kicking an opponent into a wall will result in them bouncing off of it back towards you, allowing you to catch them in the air with a follow-up attack. It feels like there might be some untapped combo potential with this move, but until that tech is discovered it’s simply an unremarkable but solid launcher.

Super Cyclone (S, 10+130 DMG raw, 10×2+130 DMG charged) – This is borderline D Tier to be honest, but the lack of many other AOE attacks and the decent height that a fully charged Super Cyclone launches your opponent just manage to get it across the line into C. Still, it does pretty weak damage and has surprisingly little combo potential. There are usually better options than this one.

Big Swing (V, 40 DMG to grabbed, 3×90 DMG to surrounding) – Big Swing throws the opponent a significantly shorter distance than Giant Swing, maybe only half as far. Considering how little damage it does and the fact that you cannot combo someone after swinging them into a wall, this makes it a great deal less useful. Can still come through in a pinch for some easy KOs when you’re close to the water though.

Rumbleverse Special Moves: D Tier

These moves are practically useless. Your only hope with these in your arsenal is that your opponents will be too busy laughing at you to defend themselves. Avoid these Special Moves unless you’re already so good at Rumbleverse that you need to add some extra challenge.

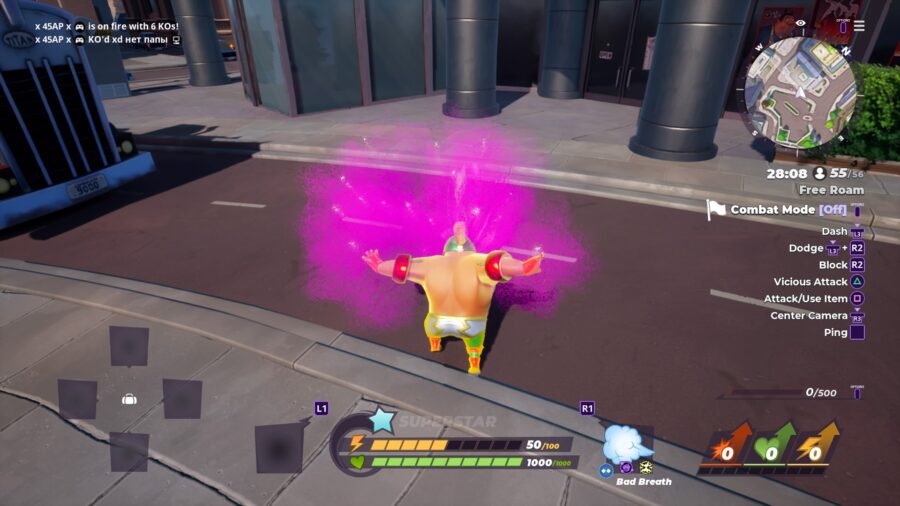
Bad Breath (S, 20 DMG, plus poison) – Bad Breath is significantly different from its more common twin, Vicious Mist. Unfortunately, it is also significantly worse. Bad Breath is not a Vicious Attack, so it can actually be blocked. It does not stun the opponent like Vicious Mist does, instead it instantly knocks them down, which prevents you from getting any significant follow-up attacks in. One arguably positive quality it has over Vicious Mist is the ability to charge the move, letting you run around while spraying mist continuously for a short time. However, this is not particularly useful seeing as your opponent can simply block the mist when they see it coming. Ultimately, if you want to play with poison, there’s absolutely no reason to take this instead of Poison Sumoslap, which at least is more likely to get you a Stamina Break.

Cyclone (S, 120 DMG raw, 2×10+120 DMG charged) – Weak damage, doesn’t hit as wide as Omega Cyclone and doesn’t launch as high as Super Cyclone. If someone is open to a Strike, you’re better off just going with your standard Basic Strike Combo.

Good Izuna Drop (V, 225 DMG) – More like Bad Izuna Drop am I right? When all you have to offer is one big hit of damage, that damage should be significantly more than the amount that your regular Vicious Attack can do. Just not worth wasting a slot on.

So now you know which Special Moves to seek out in a Rumbleverse match, and which ones to leave where you found them. We hope this helps you the next time you drop into Grapital City. Javelin Tackle and Atomic Punchline your way to that championship!

Age of Empires 4 (AoE4) English Build Order Guide

The English are among the best starting civilization for players new to Age of Empires 4. Here’s an AoE4 English build order that lets you quickly head to the Castle Age. Reaching the next Age before your opponent grants you access to more powerful units and techs.

The English have several tricks up their sleeve. English Longbowmen help you whittle down enemy armies from a distance thanks to their extra range. The civilization’s defenses are unrivaled among rival civilizations. With the Network of Castles bonus, English troops attack faster when in the presence of a Town Center, Outpost, or Keep. Cheaper Farms paired with villagers who gather from them quicker mean that contesting over Sheep or Berries isn’t a priority.

The following AoE4 English build order uses the civilization’s economic strengths to quickly advance to the Castle Age. Enemy raids can be effectively pushed back with Longbowmen and Spearmen if needed. This English build order for AoE4 focuses on heading to the Castle Age.

Age of Empires 4 English Fast Castle Build Order

  • Send two villagers to gather Food from Sheep, two to build a Lumber camp and gather Wood, and two to build a Mining camp and gather Gold.
  • Send your next villager near your Town Center and build a House and then a Mill. Keep enough space between the Mill and the Town Center for a Farm. The English have quicker gathering rates under the influence area of Farms so Berries and Sheep aren’t a priority.
  • Send the next villager to gather Gold.
  • Use the new villagers to build and gather Food from Farms near your Mill’s influence.
  • Move to the Feudal Age by building your landmark (pick the Council Hall if you’re new to the game) with two villagers who were gathering Food earlier. This happens at around the 4-minute mark. At the moment, you don’t need to be in a hurry to head to the next Age unless your opponent gets there first.
  • Once you reach the Feudal Age (around the 6-minute mark), get six villagers on Gold, ten on Wood, and continue building Farms around the influence of Mills. Build more Mills if needed.
  • Build a Barracks to train Spearmen that counter enemy Horsemen.
  • If you’re not facing an all-in attack from your opponent or raiding units, you should be able to start working on your Castle Age Landmark before the clock hits 9 minutes. Use some villagers from the Farms to build the Landmark.

Why This Build Order Works

The English are formidable in the Imperial Age thanks to their gold-producing Farms (Enclosures tech). But don’t count them out during the other Ages. Villagers with bows and the Network of Castles attack speed bonus will make opponents think twice before assaulting your base. Building Outposts near your enemies will let you bring that attack speed bonus along for an invasion.

If you’re looking to pressure your opponent, train Longbowmen and send them to the enemy base to snipe off villagers. Train Spearmen if they try to counter your archers with Horsemen. Consider investing in the Siege Engineering tech at the Blacksmith. It lets you build rams on the field and knock buildings over.

While your Longbowmen are lethal at a distance, Horsemen can reach them fairly easily thanks to their pierce armor. Use Spearmen to protect your archers and direct your archers’ attention to enemy archers if they start taking your Spearmen down. This Age of Empires 4 English build order will help you step into the Castle Age and access more powerful units before your enemies do. The English wield their bows to devastating effect and are a great starting point for new Age of Empires 4 players.

MultiVersus Garnet Guide: Best Moves, Strategies, Perks

The stoic leader of the Crystal Gems joins MultiVersus as an all-around Bruiser. She’s considered a “recommended” character in-game. That means she’s easy to learn for beginners and, more importantly, inexpensive. Despite her alleged ease of use, Garnet has never been considered especially good compared to other characters. She’s slow, fairly short-ranged, and her specials are unwieldy. Nevertheless, she offers a variety of unique abilities. Also, with the speed of incoming MultiVersus patches, you never know who’ll be the next top tier. In this MultiVersus Garnet Guide, I’ll review her attacks and their uses, along with general strategy.

MultiVersus Garnet Guide – Basic Attacks

garnet multiversus shockwave

For the first section of this MultiVersus Garnet Guide, I’ll describe her attacks and their uses.

  • Neutral Ground Attack: A big charged punch. Strong but slow, and with no armor protecting it like some other characters have, it’s risky too.
  • Side Ground Attack: A flurry of forward punches. It locks Garnet in place briefly, but has a powerful follow-up attack. Pressing forward, up, or down attack after the flurry performs a different move, similar to Marth’s side special from Smash Bros. The forward follow-up is most important: it’s the slowest, but it can kill horizontally at high damage and has armor. Up and down aren’t armored, but they steer the attack in the held direction. The upward follow-up travels a fair distance. The flurry into follow-up can also reverse direction, which can catch enemies sneaking up from behind.
  • Up Ground Attack: Two quick punches thrown upward. Garnet is considered a Horizontal character, and this often means that many of her vertical attacks are difficult to land. This is the case here. It does have an extra attack if fully charged, a jump with good range and power, but charging a full attack leaves you extremely vulnerable. Throw it out once in a while to catch enemies who have forgotten Garnet can do it.
  • Down Ground Attack: This impressive attack launches bolts of lightning along the ground! It extends farther if charged, and can cover most platforms entirely. It’s armored, too. Best of all, enemies hit by the bolts are flung towards Garnet, allowing her to easily follow-up. Of course, it’s easy enough to avoid with a jump, especially if Garnet is taking time to charge it. Use it as a surprise long-ranged attack – or against enemies who are focused on your teammate.
  • Neutral Air Attack: A simple air strike in all directions. Charging this can let Garnet stall in the air for a while, but also leaves her more vulnerable to counterattack. Even so, this is a decent way to reach enemies who are a little too far away for regular punching.
  • Side Air Attack: A one-two forward punch. It’s strong and fast, and the second hit is optional – you can throw one punch and back off, or follow up with a different attack. It makes a great horizontal kill move offstage… but its small hitbox means it has to be aimed carefully.
  • Up Air Attack: A pair of upward punches. This is essentially the up ground attack, air version, but without the powerful follow-up. Not great, but it can add a couple extra hits onto a vertical air combo.
  • Down Air Attack: A big dunk punch. As you’d expect, it makes a powerful finishing move against offstage enemies. It’s useful onstage as well: it emits a shockwave on landing, and if it hits, Garnet can immediately combo into her up air special for big damage. Go for it when you can, but make sure the timing is right – it’s a little more precise than it seems.

MultiVersus Garnet Guide – Special Attacks

garnet multiversus sing buff

Most of Garnet’s special attacks behave the same in the air as they do on the ground, but her upward special is a notable exception.

  • Neutral Special: Singing! This musical aura has a couple notable effects. Firstly, it applies a stacking buff. One stack grants a speed boost, and two stacks grant universal armor break. The buff affects your allies, too, if they’re nearby. Speed is always good, but the armor break will only matter based on your opponents. The aura’s second effect is to freeze enemy projectiles. Simply holding down the special button is enough to wall off most enemy bullets. Then, the frozen projectiles can be attacked to reflect them. It’s a powerful anti-projectile force, but it’s not a cure-all – it takes a second to activate, and leaves Garnet vulnerable. This move is best used on a team, to shield an ally from projectiles while they launch them back, and apply a buff to both of you.
  • Side Special: Garnet launches her gauntlets forward as a projectile. Holding the special button lets you control its direction as it flies, and releasing the button sends it forward quickly. It’s a strong all-around projectile, and it can even kill offstage enemies, but it has a cooldown.
  • Up Ground Special: Garnet fires an electric ball in an arc from her finger guns. It does minor damage as it travels, and makes a painful field of electricity wherever it lands. It’s not a kill move – throw it out whenever it’s off cooldown to mess up the terrain for your enemies. You can also hold the special button to angle the shot upward. Aiming straight up will deposit the electricity right at your feet. Another reason to use this often is, when it’s recharging, it’s replaced with a quick upward handclap. The clap is surprisingly strong, and works great against enemies attacking from above, or anyone hit by your down attack.
  • Up Air Special: Garnet travels a short distance into the air, then thrusts her fists out in a T-shape. This is an effective kill move, with good speed, range, and power. It’s easy enough to tack this onto the end of a basic combo, and can catch enemies who are trying to evade you in the air. Its downside is its height: it’s a very poor recovery move. Use your air dodges instead.
  • Down Special: This places a little star onto the field. Garnet is linked to the star via a glowing line, and using down special again zips her right to it. The first enemy she touches during the zip gets grabbed and thrown at the end. It’s a quick attack that’s hard to evade, and it can help Garnet with her poor recovery, but it takes some setup to use right. The star has a cooldown, and it vanishes after a little while, so leaving it lying around just in case isn’t completely effective. Your ally can pick up the star to become the target of Garnet’s zip, which also lets her cancel their knockback and save them from a death. It won’t help you much without precise timing, though, since Garnet has to activate it manually.

How To Win Team Battles As Garnet

garnet multiversus team battle

MultiVersus‘ Garnet makes a decent addition to any team. She can take the frontline and soak up damage with her weight and armored attacks, or she can hang back and harass the enemy with electricity, all while applying a speed buff. Having said that, her defense is better than her offense. An effective teammate for her would be an Assassin like Finn or Arya who can get quick kills while Garnet runs disruption.

Another teamplay option would be Steven Universe, whose bubble shield can provide extra armor to Garnet and keep her slow attacks a little safer. You could also pair Garnet with a powerful Vertical fighter, like Batman or Harley. Garnet’s powerful horizontal attacks are easy to avoid with some height, but less so if that would put enemies in range of a teammate’s deadly vertical kill move.

How To Win 1v1 Battles As Garnet

garnet 1v1 win

Garnet’s low speed, range, and recovery make this an uphill battle. Of course, nothing’s impossible for a skilled enough player. Victory will come down to exploiting the enemy where they’re weakest. If their range is poor, use down attack and side special, if they’re aggressive, use your armor, and if they rely on projectiles, quickly cancel them with some singing. Garnet isn’t a pro in any one area, but she has tools to respond to most situations. Just remember to stay mobile: in a one-on-one battle, her slower attacks are even easier to avoid.

Best Perks For Garnet

multiversus pre battle

For the last section of the MultiVersus‘ Garnet Guide, I’ll go over her perk options. Garnet’s two Signature Perks are Electric Groove at level 8, and Marker at level 10.

Electric Groove is the preferred Signature for Garnet, giving her a stack of singing buff when the enemy touches her up special electricity. Since you should have the electric trap out whenever possible, this translates to a little speed boost from time to time. Simple and effective.

Marker leaves Garnet’s down special star where her side special gauntlets end up. In theory, this could offset Garnet’s poor recovery, letting her fire the gauntlets onto the stage, then use down special to jump to their position. In practice, however, it makes her gauntlets more awkward as a reliable projectile, since using this Signature triggers the down special cooldown. Being able to use each special independently allows for more flexibility.

The current secondary perk meta in MultiVersus is to focus on utility. Sure enough, Garnet can take advantage of her survivability to make the most out of Tasmanian Trigonometry and ‘Toon Elasticity. With a couple useful cooldown abilities, she can get a little use from Coffeezilla or I Dodge You Dodge We Dodge.

I should mention a couple of perks that aren’t useful. First, Percussive Punch Power, boosting horizontal attacks. You might think to use this on Horizontal Garnet, but there are two issues. First, damage perks are weaker on average than defensive ones. Second, several of Garnet’s kills come from upward or downward strikes anyway. Static Electricity, a late-learned Garnet perk, might seem like a good synergy with Electric Groove, but it requires you to stay grounded. That’s not viable in any platform fighter. Instead, consider situational use of the Armor Crush red perk. With that, Garnet can break defensive enemies from a great distance using her charged down attack.

MultiVersus Rick Guide: Best Moves, Strategies, Perks

Rick Sanchez, the irreverent scientist, alcoholic, and war criminal, recently joined MultiVersus as a Mage-type character. That means his fighting style is based around throwing horrible things all over the screen. He’s listed as an Expert character. That ought to mean he takes a little more skill than other characters, but in this case it means he’s just stronger (and more expensive). Skilled players can use his abilities to cause a catastrophe of damaging effects. In this MultiVersus Rick Guide, I’ll explain how the madman gets the job done.

MultiVersus Rick Guide – Basic Attacks

multiversus rick laser gun shaggy

In the first section of this MultiVersus Rick guide, I’ll review Rick’s basic attacks. Even his simplest moves have some wild properties.

  • Neutral Ground/Air Attack: For his neutral attack, he wields a gun. Rapidly pressing the button fires quick shots. These are the brand-new “Light Projectile” type, meaning “projectile that barely does anything”. It’s Fox’s laser from Melee – can’t stun, but great at harassing the enemy whenever you have some space. Charging it, however, turns it into Wolf’s laser from Brawl: a slow moving projectile with moderate damage and light knockback. It’s pretty basic and can’t kill, but it covers a good distance and lingers for a while. This attack is usable in the air, allowing Rick to annoy higher-up enemies. It can also be charged in the air: charging a shot while jumping or falling lets you use the otherwise dead air time to fire a big projectile.
  • Side Ground Attack: Rick’s ground string has three parts. A laser-blade swipe, a forward kick that knocks the enemy away, and a missile fired in a low arc. The idea being, after the kick creates distance, the missile hits at range, and then Rick can go back to being obnoxious with his gun. The first and third hits can be charged, if you’re certain to hit. The missile isn’t very strong, and destroys itself against the ground, but it can travel far off the edge of the stage. If you kick the enemy offstage, a hit with the follow-up missile will send them flying back at a low angle for a cheap kill. Be aware, however, that this string is not a true combo. Even laser sword into kick often misses based on the enemy’s position. Be prepared for counterattacks.
  • Up Ground Attack: Rick lashes upward with a plasma whip. It hits pretty hard, but only on targets directly above him. Best used as anti-air.
  • Down Ground Attack: A fart bomb, placed at Rick’s feet. After a half-second, it farts, knocking enemies upward. It’s a neat trick that leaves your enemy in a vulnerable position, but the timing of the fart makes it tough to use if the enemy’s already in your face. Try deploying it pre-emptively against enemies trying to rush you down. It can also drop off ledges as an effective edge guard.
  • Side Air Attack: A crotch thrust from Rick’s shield belt. It’s a quick, simple strike, but this is one of Rick’s best knockback moves. It can easily kill offstage enemies. Throw some projectiles out, then nail them with this while they’re trying to jump over them.
  • Up Air Attack: Rick thrusts a Mega Seed upward. Its knockback and damage are lower than its radiant aura implies, but it inflicts a very brief Silence effect, preventing enemies from using cooldown moves. Alternately, you can use the attack on your teammate to make them Educated, shortening their cooldowns. Depending on your opponents and allies, the seed might have different optimal applications. Either use puts the seed on cooldown, though, so you can only pick one. Why does the seed have this effect? It’s not important, don’t think about it.
  • Down Air Attack: Rick fires a burst of flame from his rocket boots. It’s a pretty standard down air, but it does lots of damage and causes burn. Onstage, you can combo after the hit for even more damage.

MultiVersus Rick Guide – Special Attacks

In this section of the MultiVersus Rick guide, I’ll review his special attacks. They’re even wackier than his normals (which are already pretty wacky).

  • Neutral Ground Special: Pressing the button summons Mr. Meeseeks. Pressing a direction chooses his attack: forward for a rushing projectile, up for a quick uppercut, and down for a slow golf club swing. The golf club, evoking memories of Melee Peach, has a very long windup, but is meant to be used defensively. He swings right away when hit, and if he intercepts an enemy projectile, he reflects it back. With two charges on a fairly short cooldown, this is one of the most versatile and powerful tools Rick has. The staggered timing on Meeseeks’ attacks allows Rick to do team combos, Marvel vs. Capcom style. For true pros, Meeseeks has a secret: jump before giving him a command, and he’ll stay in place. From there, he’ll mimic the command you give to the next Meeseeks summon, meaning both Meeseeks will use the command at once, whether it’s a rush forward or golf club charge. Put it all together, and you can set up some brutal combos in the training room that will never actually land in a real match. One last note: Golf Meeseeks will reflect Rick’s own charged laser with proper timing, which more than triples its damage and knockback. The effect is so extreme, this might actually be a bug, so exploit it while you can. (UPDATE: Too late! This was apparently fixed in a server-side patch.)
  • Neutral Air Special: This is a super-rare neutral air recovery move! It summons a Meeseeks to carry Rick a short distance through the air. It doesn’t affect the cooldown or positioning of on-stage Meeseeks, so use this whenever you need it.
  • Side Ground Special: Rick summons a portal. He can aim it nearly anywhere in front of him with a targeting cursor. It has a few interesting uses. It doesn’t hurt enemies, but anyone knocked into it teleports next to Rick – if he’s quick, he can deploy it mid-combo to drag enemies to him. Allies can trigger it deliberately if they need an escape. If Rick uses the move a second time, he automatically teleports to the open one. Anytime someone uses a portal, a second one is created where they used to be. The “used” portals stay in place for a while, transferring projectiles between them, but unusable for player transport. Altogether, these portals can let Rick travel quickly, extend a combo, save an offstage ally, and/or launch projectiles in odd directions. There’s a long cooldown, so make sure you’ve chosen correctly.
  • Side Air Special: The same portal as the ground special, with one major difference: If no portals are out yet, Rick automatically travels to the new one he summons. This lets him use it as an emergency recovery, or a very quick instant pursuit option. The same cooldown applies, though.
  • Up Ground/Air Special: A downward blast from Rick’s jetpack, propelling him upward and hitting enemies both above and below. It’s chargeable. On the ground, charging increases height, and a full charge includes a second blast halfway up. This makes a good kill move, easily dunking offstage enemies below you, and finishing off enemies at the top edge of the screen. Its range is similar to Rick’s down air attack. Use down air attack for damage, and up special for kills.
  • Down Ground/Air Special: A polymorph grenade! It blows up after a couple of seconds. Allies in the blast get bigger and stronger, including the sizes of their (and your) projectiles. Enemies in the blast turn into miniature Reindogs that take extra damage and can’t attack. The enemy polymorph effect is devastating, effectively removing an opponent from the fight for a few crucial seconds. The ally effect is very brief, but can make decent bait. Fire the grenade and stand in it: you get buffed if the enemy cowardly stays away, and can punish hard if they pursue you into the blast. The effect also strengthens Rick’s Meeseeks, if you’re setting up a truly disgusting combo.

How to Win Team Battles as Rick

Here are some specific strategy tips. Between his Mega Seed, portal summons, and buff grenade, Rick makes a decent team player. His “Mage” classification, however, means he takes a little setup to reach his full potential. That also means it’s hard to coordinate his helpful effects without good communication. Imagine a randomly matched teammate jumping for you to put the Mega Seed in them! It’s just not going to happen.

Your role, then, is to be as annoying as possible by covering the screen in laser blasts and Meeseeks. If they’re engaged with your teammate, enemies won’t be able to evade. Don’t use too much of the weak laser – you want your foes flinching so they don’t hit your ally. When you see a vulnerable target, pursue and destroy with Rick’s deadly offstage abilities.

Rick is powerful, but prefers fighting at a distance when he can. His ideal teammate, then, is a frontline Brawler or Tank who can keep annoyed opponents from reaching you. Superman is a great option, with a high defense and kill potential to pair with Rick’s high damage, but lower kill potential. Cooldown-heavy characters like Taz or Wonder Woman are good allies as well, since you can help them out with Mega Seed.

How to Win 1v1 Battles as Rick

rick 1v1 win

Rick has the tools to compete 1v1, but he has to be a little careful. Charged projectiles and complex setups don’t work when the enemy walks up and steps on your foot. Use quick attacks like Rick’s side air to start with, and anytime you have some room, start unloading your projectiles. Charging your laser midair works great here, and can catch enemies by surprise. Overall, you want to limit your enemy’s space with lingering effects, then punish while they try to avoid them.

Best Perks For Rick

rick sanchez perk menu

For the last section of the MultiVersus Rick guide, here are his perks. Rick has three Signature Perks, each one focusing on a different aspect of his playstyle.

Squanchin’ Pyrotechnics is for Ricks who like weird portal setups. You can use the fire portals to strengthen your laser blasts and other projectiles if they’re aligned right. Use them offensively by placing a portal, then knocking the enemy in for fire damage. Or just get a damage buff after using them for recovery. This adds a little extra utility to Rick’s portals, but as always, they won’t help at all if you blow the cooldown on a poor placement.

Hephaestus, Who? is for nobody. Do not use it. It pulls enemies to you on a fully charged plasma whip. Sadly, hitting with a fully charged attack is hard, and hitting with the whip is hard, therefore hitting with a fully charged whip is super duper hard. In theory, it can extend those training room combos even farther when combined with Meeseeks or an ally, but it’s hard to imagine this paying off in-game.

Bit of a Stickler Meeseeks is for Ricks who like to combo with Meeseeks. This doubles the damage of a Meeseeks that hits someone who’s already being hit. Since the Meeseeks often hit first, the most frequent way to take advantage of this perk is with the long windup golf club, like in the perk’s icon. Timing a combo between Rick and Meeseeks could be tough but extremely rewarding this way. The perk is also more useful in teams, since your ally can trigger the effect as well.

The simplest option is Squanchin’ Pyrotechnics for the fire buff after portal use, but Bit of a Stickler Meeseeks should do the most extra damage overall (in teams).

For secondary perks, cooldown should be priority thanks to the value of Meeseeks, portals, morph grenade, and even Mega Seed. Coffeezilla is earned early and is great to start with, but the best cooldown reduction is considered to be I Dodge You Dodge We Dodge. An alternative is I’ll Take That, which refunds cooldown against debuffed enemies, if you can secure a debuff from your ally or are using Ice To Beat You.

Projectile buffs make sense for Rick, especially Ice To Beat You as mentioned. That also includes Shirt Cannon Sniper, which increases the damage of long-range shots for extra obnoxious projectile spam. Finally, Rick’s low weight means he should take dodge buffs over damage resist buffs, meaning Fancy Footwork or Slippery Customer, which can also help him escape when the enemy finally reaches him.


Here Are All the Pinocchio Movies Coming to Theaters This Year

There are a lot of Pinocchio movies coming out this year, but which film best explores the story of this man who turns a toy into a child? Well fear not, because here’s a list of all the Pinocchio films you can see in theaters before the end of 2022.

Robert Zemeckis’ Pinocchio

Disney expands their live action remakes in a futile attempt to avoid doing one of the really racist ones.

Guillermo Del Toro’s Pinocchio

Longtime fans of the Pinocchio children’s tale will admit that this adaption will in fact be a movie about the character Pinocchio.

Pinocchio: Robert Downey Jr. Gets To Do One This Time

I dunno. Could be good. Gepetto would have a goatee. Maybe he’s kind of funny? 

Pinocchio: The Musical

Someone at Disney is fired after Lin Manuel Miranda’s cage is left open and the Hamilton composer remakes Pinocchio while no one was looking.

Pinocchio Origins: Geppetto 

Idris Elba plays a down-on-his-luck wood carver who must steal and kill to provide for his puppets in this gritty prequel which allows audiences a peek into the sick, twisted origin of Pinnocchio’s father.

Pinocchio Goes to China 

Gotta make that overseas box office somehow, so this Pinocchio movie takes place after the events of the book and features Pinocchio traveling the beautiful country of China.

Pinocchio But He Isn’t a Puppet or Wooden and There’s No Fairy or Geppetto

This remake seeks to streamline a lot of the convoluted plot of the original for new audiences. This time Pinocchio is just some guy.

Pinocchio: Fuck It. Tim Burton Was Bored.

While not officially announced yet, this adaption will likely just materialize into existence in the next few months, especially considering that Tim Burton hasn’t made a weird fucked up little movie in a while.

Pinocchio Is Gay or a Woman and Everyone is Upset

A mediocre cash-grab that you’ll have to defend just because internet bigots will put you in a corner. But good for Billy Eichner for nailing that Pinocchio role!

Opinion: Stop Going to Therapy and Start Going to Ghablegharst the Bridge Troll

Hello, guest commentator here! I know they usually submit an author picture for that sort of thing, but for reasons you have to take my word for, a series of misadventures saw to it that my photograph would be misplaced and therefore there is no picture of me, so that’s just going to have to be okay, okay? 

Now, before we get bogged down in who I am or am not, let me get right down to my point today. With the ever increasing talk and focus on mental health and openness about going to therapy, there’s one important thing that’s rarely spoken of; why not go see Ghablegarst the Bridge Troll? Why, he’ll straighten you out, sell you some of his wares, and if you answer his series of riddles, who knows, he might grant you access to the other side of the bridge, a land our elders only dared dream of! 

Who knows what riches await on the other side of the bridge? Why, I bet Ghablegarst, the Bridge Troll knows! What a guy. Handsome fella.

Can your therapist do any of these wonderful things I’ve just described? Oh, they can’t? Very interesting.

I’m not Ghablegarst, by the way. Let me just tell you that. Oh curse my warted hide, why did I just say that? Let’s move on. 

I fear that many of you are going to therapy not because of the effectiveness of the process, you see, but rather the access to pharmaceuticals that the process affords you. I understand that. Uh, me and Ghablegarst definitely both understand that, I mean. It’s rough out here and you just want your head to be right. Respect. 

Well hey, remember those wares I mentioned earlier? Ghablegarst the Bridge Troll sells many homemade potions and tinctures that are comparable if not BETTER than a lot of what you non-bridge dwellers so foolishly refer to as “modern medicine.” You could jump through hoops with your insurance provider and go to a weekly therapy session to give you a magic pill that numbs your personality, or you could trade your second born for a smoky red jar that makes you feel better than you’ve ever felt in your life. Think about it. 

Oh, and the best part about that deal? If you don’t have a second born, Ghablegarst takes the hit. It’s just that easy! Wow, what a deal, huh? Just be careful not to have a second child, because Ghablegarst always collects, hahahahahahahahaha!

Or, I mean, I’ve heard he always collects. Hehe. 

So, have I successfully swayed you and convinced you to quit your current course of therapy? I understand it’s a lot to ask so suddenly. If you’d like to talk more, you can find me at the bridge pretty much anytime. It’s okay to bring your children, too!

The Fastest Cars in Forza Horizon 5

Is there anything better than zooming around in your comfy deluxe virtual automobile, watching the lush foliage drift by? Well perhaps the real thing, but as far as simulation goes, there’s little better than Forza Horizon 5. And sometimes, you just want to zoom around as fast as you can, so you might have thought about what the fastest car in Forza Horizon 5 is.

The selection in Playground Games’ title seems to be tailored for everyone’s tastes, perhaps you like a little more control on your vehicle along with going offroad, then the 4×4 cars are for you, or, perhaps, you like driving around in style and with a solid sense of speed, then surely you’d want to accommodate your derriere in a classy Ferrari.

In that case, here’s everything you need to know about the fastest car and Ferrari in Forza Horizon 5. Read on below to find out which cars those are and their top speed.

What is the Fastest Car in Forza Horizon 5?

The fastest car in Forza Horizon 5 is the Koenigsegg Jesko, which can reach a top speed of 300 MPH (482 km/h). 

Here are its stats:

  • Speed 10
  • Handling 10
  • Acceleration 6.9
  • Launch 7.4
  • Braking 9.0
  • Offroad 4.4

The fastest Ferrari in the game is the Ferrari LaFerrari, which can go up to 220 MPH (355 km/h). 

Here are its stats:

  • Speed 9.4
  • Handling 9.0
  • Acceleration 7.2
  • Launch 7.9
  • Braking 9.6
  • Offroad 4.4

Now clearly, to show off those incredible top speeds of those two cars, you’ll need to find a long stretch of straight road (look for that highway in the middle of the map…).

The Koenigsekk Jesko costs 2.800.000 credits in the Autoshow, but can also be obtained for free by doing a bit of work. First, choose the Baja Expedition out of all the Horizon Adventure zones. After that, just get another Accolade point, so you can try the V10 story mission. Playing as a stunt actor, the objective will be to complete all challenges with at least three stars. It is not that difficult and the reward unlocks the fastest car in Forza Horizon 5.

The Ferrari LaFerrari can’t be driven for free, unfortunately. It can be unlocked as a gift after buying all the Ferrari branded cars in Forza Horizon 5, with some of those costing up to 18 million credits, this will definitely cost in the realm of almost 50 million credits total. Perhaps you might get lucky and find a used one in the Auction House. Either way, best start saving those credits soon. Still, with a solid handling rating of 9.0, the LaFerrari is a great choice also for those twists and turns in the circuit races.

These two cars will definitely make any speed demon happy, but remember to fasten those seatbelts and keep your eyes on the road.


Age of Empires 4 (AoE4) Ottoman Build Order Guide

The Ottomans are one of Age of Empires 4’s new civilizations, featuring unique bonuses that let players steadily build an army even without resources. Ottoman Military Schools periodically grant free units, ensuring a constant supply of military units at no extra cost. Here’s an AoE4 Ottoman build order that kickstarts your military production with Military Schools before going for a second Town Center.

The Imperial Council system lets Ottoman players gain experience over time by training troops and advancing through the Ages. This experience can then be used to claim one of 9 unique technologies, ranging from area-healing Imams to siege engine boosts. If that wasn’t enough to convince you, the Ottomans also have access to unique units with powerful abilities. Available in the Castle Age, Janissary hand cannoneers are incredible against cavalry and can repair siege engines. Pair them alongside the Great Bombard, a hulking cannon with longer range and area damage than rival bombards. Add Mehter war drummers into your formations and pick between enhanced attack speed or armor bonuses across your units.

The following Age of Empires 4 build order prioritizes building Military Schools for some early aggressive tactics. While you can hit the Feudal Age earlier, early Military Schools can help you build an army for free. This Ottoman build order for AoE 4 focuses on efficiently building a Military School in the Dark Age and forcing your enemy to respond to constant attacks.

Age of Empires 4 Ottoman Dark Age Rush Build Order Guide

  • Send five villagers over to Stone to gather 10 Stone each. This will give you enough Stone to build a Military School.
  • Send one villager to gather Food from Sheep. Keep sending new villagers from your Town Center to Sheep.

  • Once you get 100 Stone, send four villagers that were gathering Stone to gather wood from one of the trees next to your Town Center. Use the fifth stone-gathering villager to build a Military School and then collect Food from Sheep. Set your Military School to train Spearmen.
  • Set the Military School’s rally point towards the enemy player’s settlement. This lets you perform some early Spearmen aggression in the Dark Age.
  • Once you get enough wood, use a villager to build a House (50 Wood) and then a Barracks (100 Wood). Ottoman military buildings cost 33% less than those of other civilizations.
  • Train two Spearmen and set the Barracks’ rally point towards the enemy base.
  • Use a villager to build another House and then a Mining Camp near your Gold deposit. Send the next two villagers to gather Gold.
  • Start sending villagers from the Town Center to gather Wood and build a Lumber Camp near your wood line.
  • Once you have enough resources to head to the Feudal Age (in about 4 minutes), send five villagers from Sheep over to build the Twin Minaret Medrese. This Landmark spawns in new Berry Bushes around it every 120 seconds.
  • Right when you start moving towards the Feudal Age, send your three Gold gatherers over to Stone and make a Mining Camp.

  • Pull one of your Wood gatherers to build a House and then return them to gathering Wood.
  • When you hit the Feudal Age, use the five builders to gather Food from the newly formed Berry Bushes under the Landmark. Switch your Military School from Spearmen into Sipahi production. These mounted units are perfect for raids, especially with their damage-boosting Fortitude ability. Remember that the ability also makes them take more ranged damage.
  • Once you have 100 Stone, pull two villagers from your Sheep to build a Military School and then send them over to gather Stone. Use two more villagers from Sheep to build a Blacksmith and then a Stable before sending them to Stone as well. Build military buildings in the influence area of a Blacksmith. Ottoman Blacksmiths raise the production speed of military buildings around them.
  • Keep sending new villagers to the Berry Bushes under your Landmark. Exhaust these Bushes quickly to make the most of their ability to respawn.
  • Once you have 300 Stone, build a second Town Center (around the 8-minute mark) and start training villagers.

Why This Ottoman Build Order Works

Building up an army of Spearmen right at the Dark Age lets you deny key resources from enemy villagers. Even if they do build an Outpost or train Spearmen to protect their base, they lose more resources than you since your Barracks costs less Wood. And if your enemy decides to counter your Spearmen with Archers in the Feudal Age, your Sipahi horsemen will be able to clear them out. Head into the Castle Age and your Janissaries will keep your siege engines safe from cavalry raids. The Mehmed Imperial Armory Landmark functions like a Military School but trains expensive siege units instead. 

The Ottomans have multiple ways of developing their economy. While this Ottoman build order picks the Food-producing Twin Minaret Medrese, the other Landmark offers gold instead. The Sultanhani Trade Network lets you garrison Traders inside for bonus Gold income. Pair this with the Imperial Age Sea Gate Castle to grant Traders a speed boost and extra armor under the influence of Ottoman Keeps. With the new patch reducing the training time of Traders, trade routes are a compelling way to secure an economic advantage.

With this Age of Empires 4 Ottoman build order, put pressure on your opponents right from the Dark Age. Force out a response from them and counter them with free units from your Military Schools. The Ottoman civilization shakes things up with its approach to military production and its steady trickle of free units. They’re a great option for players already accustomed to Age of Empires 4’s existing eight civilizations.

How to Play Boomer Ball in Rocket League: All the Right Settings

Rock’n’roll will never die, right? Well, we’re pretty sure Rocket League won’t either. Indeed, since 2015 Psyonix multiplayer game has been going on strong with its quite intoxicating concoction of football and cars with rockets strapped to their backs. As all vehicles clearly should. There’s a huge variety of game modes as well, with some limited time ones too. So, perhaps you liked playing Boomer Ball and are now looking for Rocket League boomer mode settings to replicate that experience? 

Indeed, despite Boomer Ball seemingly being one of the favorite modes of many players, it has one quite depressing downside: it is limited time only. Once it’s gone, it’s gone for good. But you don’t have to hurry to play it right now, since, by following our handy guide and applying some specific settings, you will be able to create a custom game with rules that will bring back that very same Boomer Ball experience.

Read on below to find out all the Rocket League boomer mode settings so you can get to scoring, hollering and screaming in rage and joy in the microphone in true Rocket League style.

Rocket League Boomer Ball Settings

While the actual boomer mode might not be accessible forever, here are the settings which work best in order to replicate the Rocket League boomer mode:

  • Ball Speed: Super Fast
  • Ball Physics: Super Light
  • Ball Bounce: Super High
  • Boost Amount: Unlimited
  • Boost Strength: 1.5x
  • Preset Settings: Custom
  • Match Length: Your preference
  • Maximum Score: Your preference
  • Overtime: Your preference
  • Game Speed: Default
  • Series Length: Your preference
  • Ball Type: Default
  • Gravity: Default
  • Rumble: None
  • Respawn Time: Your preference
  • Demolish: Default

Armed with this precious knowledge, you are now able to replicate Rocket League‘s incredibly popular boomer mode. So, nothing left to do except to strap those rockets to your car, call your friends, descend in the arena and humiliate them with your superior dexterity. Maybe.

Still haven’t had enough of zooming your car around? Then you might want to check out why we think Rocket League is still dope as hell.


Overworked Third Grader Can’t Imagine How They’re Expected to Squeeze In an 80 Hour JRPG on Nights and Weekends

CHICAGO — An absolutely stressed out third grader was recently overheard complaining that they don’t know how on earth they’re supposed to finish Xenoblade Chronicles 3 with all the shit going on in their life right now. 

“Ugh, how am I supposed to get through a game this size when I am so swamped?” asked Davey Bender, a local nine-year-old. “I’ve got math homework, church this weekend, flag football practice, and I’m digging a really big hole later. Exactly how am I supposed to fit an 80 hour game into my hectic schedule? Something’s gotta give here, fellas.” 

“This was so much easier when I was younger,” he sighed. 

His parents confirmed that the poor guy just had a lot going on these days. 

“We don’t really realize the toll we put on our kids today,” said Caroline Bender, Davey’s mother. “Anyone that pays attention to esports knows that a gamer is totally washed up by their 17th birthday, so these are the most precious gaming years of his life, and I think he knows that. That’s why he’s so frustrated that he just can’t set aside the time to play games like he could when he played Breath of the Wild in the first grade a few years back. Poor guy has really been burning the candle at both ends trying to make it all work, though.”

Friends of Bender’s have reportedly grown concerned about the number of obligations he currently has. 

“Davey’s not looking great these days, man,” said Aiden Mitchell, a friend of Davey’s who plays a little Fornite here and there. “And he hasn’t been out to ride bikes in like a month or two. It’s been different ever since he got that stupid robot game for his birthday. We used to hang out at lunch every day as well, but now he just sits there drinking coffee and playing his Switch. I miss my friend.” 

As of press time, an exasperated Davey had fallen asleep on the bus ride home from school and woke up at the bus garage.