Marvel Snap has been brimming with new content ever since its release earlier this year. The flood of content continues through the holiday season with the Winterverse event. As part of the event, all players have the chance to unlock Nick Fury, whose card is signed off by the real Nick Fury himself, Samuel L. Jackson.
Nick Fury is a 7 power 5 cost card that reads the following: On Reveal: Add 3 random 6-Cost cards to your hand. His unique effect makes him quite a puzzle to deck build with, and very fun to play. As our holiday gift to you, enjoy these three unique Nick Fury decks that utilize him effectively.
It is important to note that given the nature of Marvel Snap’s card collection, all cards may not be available to you, so take advantage of your individual card pool and adapt according to what you have available.
Marvel Snap Nick Fury Decks: Nick’s Collection
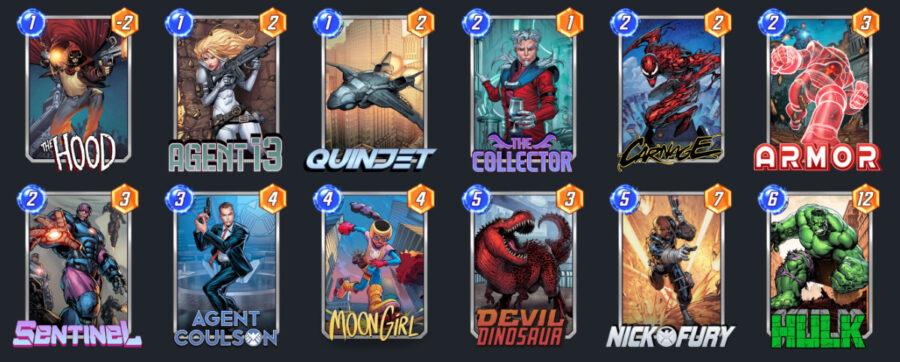
| Name | Energy | Power | Ability |
| The Hood | 1 | -2 | On Reveal: Add a demon to your hand |
| Agent 13 | 1 | 2 | On Reveal: Add a random card to your hand |
| Quinjet | 1 | 2 | Ongoing: Cards that didn’t start in your deck cost 1 less. |
| The Collector | 2 | 1 | When a card enters your hand from anywhere (except your deck), +1 Power.. |
| Sentinel | 2 | 3 | On Reveal: Add another Sentinel to your hand |
| Carnage | 2 | 2 | Destroy your other cards here. +2 Power for each destroyed. |
| Armor | 2 | 3 | Ongoing: Cards at this location can’t be destroyed |
| Agent Coulson | 3 | 4 | On Reveal: Add a random 4-cost and 5-cost card to your hand. |
| Moon Girl | 4 | 4 | On Reveal: Duplicate your hand |
| Devil Dinosaur | 5 | 3 | Ongoing: +2 Power for each card in your hand |
| Nick Fury | 5 | 7 | On Reveal: Add 3 6-cost cards to your hand |
| Hulk | 6 | 12 | No Ability |
This deck utilizes the ever-strong card generation archetype to show Nick Fury’s raw power. The Collector and Devil Dino benefit from all the card generation our deck can provide via Agent 13, Agent Coulson, Sentinel and the inclusion of Nick Fury. Nick Fury adds a respectable +3 power to The Collector and +6 power to Devil Dino when played. He also generates a 6-cost card that can be played as a finisher if our Hulk is not drawn on time or if we need to be more flexible and unpredictable with our final plays. Quinjet is also a neat addition, discounting all our generated cards.
Nick’s Ramp
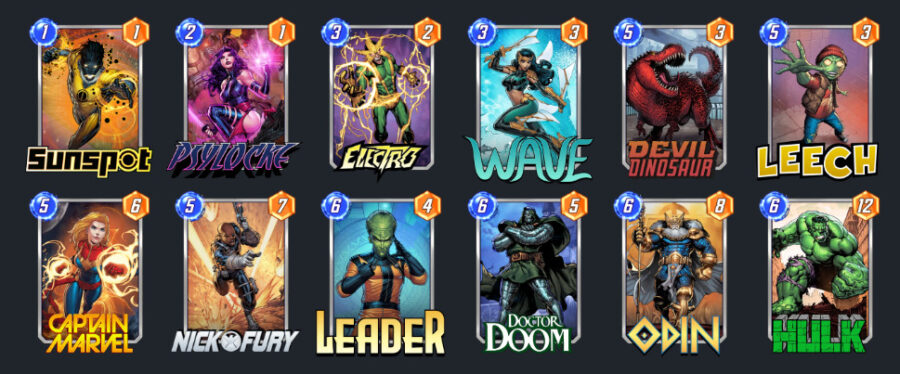
| Name | Energy | Power | Ability |
| Sunspot | 1 | 1 | At the end of each turn, gain +1 Power for each unspent energy. |
| Psylocke | 2 | 1 | On Reveal: Next turn you get +1 energy |
| Electro | 3 | 2 | On Reveal: +1 Max Energy. Ongoing: You can only play 1 card a turn |
| Wave | 3 | 3 | On Reveal: Next turn, cards in both players’ hands cost 4. |
| Devil Dinosaur | 5 | 3 | Ongoing: +2 Power for each card in your hand |
| Leech | 5 | 3 | On Reveal: Remove all abilities from all cards in your opponent’s hand |
| Captain Marvel | 5 | 6 | At the end of the game, move to a location at the end of the game that wins you the game. (If possible) |
| Nick Fury | 5 | 7 | On Reveal: Add three random 6-cost cards to your hand. |
| Leader | 6 | 4 | On Reveal: Copy all the cards your opponent played this turn, but on your side. |
| Doctor Doom | 6 | 5 | On Reveal: Add a 5-power Doombot to each other location |
| Odin | 6 | 8 | On Reveal: Activate the On Reveal abilities of your other cards at this location |
| Hulk | 6 | 12 | No Ability |
This deck takes advantage of the ramp package to gain excess energy to play our high cost cards before our opponent. This is achieved with the help of cards like Wave, Psylocke, Electro. This lets us play our various 6 cost cards or play Nick Fury early. This gives us even more potential plays depending on the state of the game and the cards we have in our hand. This deck can be quite tricky to play since you will regularly only be able to play a card a turn if you play Electro. Recognizing the correct play each turn becomes even more important, as you have less plays to make and less room for error.
Nick Fury Pool 1 Deck – Marvel Snap
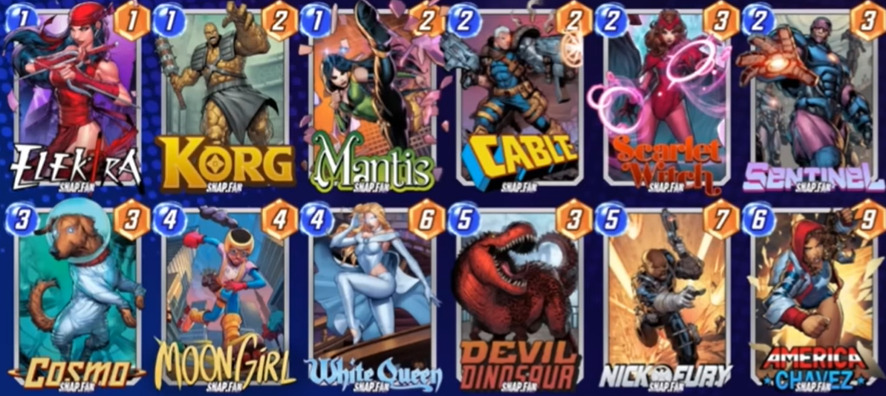
| Name | Energy | Power | Ability |
| Elektra | 1 | 1 | On Reveal: Destroy a random 1-cost card at this location |
| Korg | 1 | 2 | On Reveal: Shuffle a Rock into your opponent’s deck |
| Mantis | 1 | 2 | On Reveal: If your opponent played a card this turn, draw a card from their deck. |
| Cable | 2 | 2 | On Reveal: Put the bottom card of your opponent’s deck into your hand. |
| Scarlet Witch | 2 | 3 | On Reveal: Replace this location with a random new one. |
| Sentinel | 2 | 3 | On Reveal: Add another Sentinel to your hand |
| Cosmo | 3 | 3 | Ongoing: On Reveal abilities won’t happen at this location |
| White Queen | 4 | 6 | On Reveal: Draw a copy of the highest cost card in your opponent’s hand. |
| Moon Girl | 4 | 4 | On Reveal: Duplicate your hand |
| Devil Dinosaur | 5 | 3 | Ongoing: +2 Power for each card in your hand |
| Nick Fury | 5 | 7 | On Reveal: Add 3 6-cost cards to your hand |
| America Chavez | 6 | 9 | You always draw this card on turn 6, not before. |
This is a pool 1 deck for people new for the game that have gotten their hands on Nick Fury early thanks to the Winterverse event. This deck takes advantage of all of the best cards in pool 1, including our friend Devil Dinosaur, Korg, and White Queen to take advantage of cards with powerful effects and high power. This lets us keep up with our opponent even if they have access to better cards from higher pools. Disruptive effects such as Elektra and Cosmo let us disrupt our opponent’s one cost plays and powerful On Reveal effects. Nick Fury is fundamental in providing a finisher to this deck when America Chavez does not provide enough power by herself. The ability to gain access to three high cost, high power cards lets you make plays your opponent won’t anticipate.
These are only a few possible Marvel Snap decks that include Nick Fury. His effect and inherent flexibility lets him be played in a variety of decks, so feel free to experiment and mess around with him. His unique play style makes every game different and a joy to play, especially when you get your hands on cards you do not have in your collection yet. Looking at you, Galactus!