MultiVersus Stripe Guide: Best Moves, Strategies, Perks

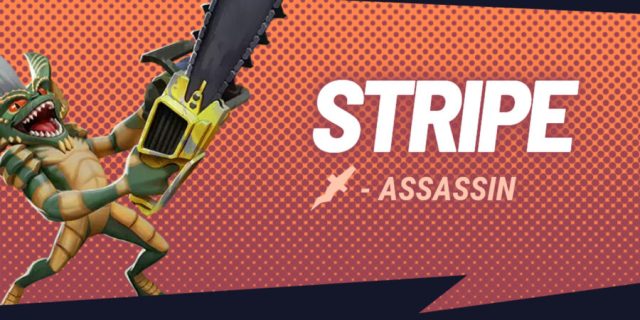
Stripe, the horrible Gremlin from the similarly-named movie, has just hatched his way into MultiVersus. He’s a fast, deadly Assassin-type character with a bunch of tricks to punish his chosen target. His general playstyle is straightforward rushdown, but the best Stripe players will be those who can use his moves creatively to torment the opposition. For a little help on causing the most havoc, here’s our MultiVersus Stripe guide.

MultiVersus Stripe Guide – Basic Attacks

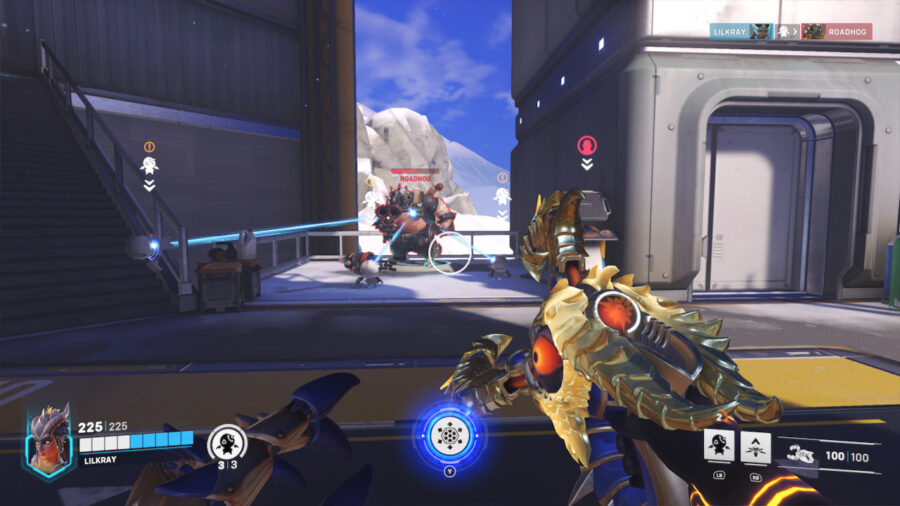
For the first section of the MultiVersus Stripe guide, I’ll review his normal attacks. These are usually basic claw swipes, but there are some important exceptions. Almost all of Stripe’s physical attacks apply a Targeted debuff (shown above) to enemies that lasts a couple seconds. It allows him to follow-up with his gun, which will be explained in the special attack section.

  • Neutral Ground Attack: A chargeable buzzsaw throw. When it’s thrown, it crawls along the floor, including up or down walls. That makes it ideal for harassing players trying to recover with wall jumps. Throw one at a wall-hanging enemy, then intercept them when they jump away for an easy down-air dunk. It’s a fast, reliable projectile, but it’s limited by a cooldown and an ammo count of 3. Throw it out before moving into close range to start fights at an advantage. This is also Stripe’s only dedicated teamplay move. Hitting an ally with your buzzsaw makes it circle around them as a mobile hitbox. That could mess up your throws, but is mainly a good thing since it makes them a lot harder to avoid.
  • Side Ground Attack: Stripe’s ground combo has three parts. The first is two quick forward swipes. The second looks and feels like Wolverine’s Berserker Barrage: an advancing series of claw swipes. The third, Stripe leans forward and takes a big bite. This string is quick, and it covers a wide area in front of him. It’s easy to cancel between steps, and doesn’t leave him as vulnerable as other characters’ melee strings. It’s great to land whenever possible, doing good damage and easily transitioning into other attacks and specials (such as gun).
  • Up Ground Attack: Stripe does a handstand and kicks at the air. Its reach is a lot shorter than his side ground string, but you can substitute any of the side attack steps for this, then follow up with up special twice (and end with gun). It can’t be charged: unlike many characters, Stripe has very few charged melee attacks. That’s okay: it’s often not worth holding still to charge an attack.
  • Down Ground Attack: Stripe places a radio at his feet, then jumps backward a short distance while shooting it with a crossbow. The radio explodes, and the blast knocks enemies directly upward. This unnecessarily complex attack has very poor range, but Stripe’s backstep makes it useful for punishing enemies who are trying to rush you. It’s a projectile that also applies Targeted, so you can chain it into an air combo (or just use gun).
  • Neutral Air Attack: This is the chargeable buzzsaw again, but it behaves differently in the air. Stripe can aim up and down while charging, and his throw will travel through the air for a while before sticking to the ground and crawling along like normal. An airborne saw will bounce off struck targets. Stripe can actually attack a bounced-back airborne buzzsaw with his physical strikes, bouncing it back again and marking it with Targeted. He can then shoot the double bounced-back airborne buzzsaw to send it in even stranger directions. This could be used for some frightening ricochet action. Getting everything to aim correctly will take some effort, but Stripe has enough buzzsaws in reserve for it to be worth throwing them out often to see what they can do.
  • Side Air Attack: A quick forward swipe. This one’s chargeable, and makes a good approach option, as well as a useful combo tool (along with gun).
  • Up Air Attack: A chargeable, upwards bite. Harder to land than Stripe’s upward special, but doesn’t consume his air recovery.
  • Down Air Attack: Stripe swipes downward. It’s a standard dunk on offstage opponents (and can lead into gun). It also has good kill potential onstage (especially followed by gun).

MultiVersus Stripe Guide – Special Attacks

In this section of the MultiVersus Stripe guide, I’ll cover Stripe’s special attacks. They’re straightforward, most of them being attacks using different tools (such as a gun).

  • Neutral Special: This is Stripe’s signature ability: he channels the mystical power of the Mogwai and shoots his enemy with a gun. On its own, the attack is poor: it’s very short-range for a gun and has little knockback. But if an enemy is Targeted, the gun will automatically hit them at any range! That means Stripe can end ANY combo with a free extra attack. He even gets three shots! The best possible use of the gun is to seal the deal: any physical strike that almost pushes an enemy offscreen can lead into a final nudge with the gun. The three shots have a cooldown, but a bigger limiting factor is attack decay. If you use gun after every attack, it’ll decay quickly, and then it won’t have the little knockback it needs to secure kills when it counts. Managing the status of this attack will be essential in performing well as Stripe. I suspect it will be nerfed quickly.
  • Side Ground Special: A rush-style attack in which Stripe rides a skateboard into the enemy. It’s chargeable before releasing, which extends its range and power. It also includes a follow-up with a second press: Stripe will hop off the board and kick it upward. The hitboxes on this attack are somewhat strange. While it’s charging, Stripe will begin to roll forward, but this isn’t part of the attack. Stripe can accidentally roll forward into enemy attacks if he’s too close when he starts charging. The flipped board has an odd timing as well. Starting the flip makes Stripe cancel his skateboard charge, and then the flipped board hits the area a little ahead of him. It’s a decent attack (and it can chain into gun), but it’s best to understand its properties before using it.
  • Side Air Special: Instead of a skateboard, Stripe produces an entire chainsaw and lunges forward through the air! It has good horizontal movement, but it also falls quickly, so it won’t help with recovery if you’re already too low. Once the move begins, Stripe’s path through the air is fixed. Proper use of the attack means understanding where it will end up. One way to alter its path is to fastfall while the move is starting, which can surprise enemies on the ground. It’s slow, but powerful if you can catch your target, locking them into a chain of hits and ending with big knockback (and a chance for gun).
  • Up Special: An upward leap. It’s a poor recovery move, but a great follow-up to Stripe’s ground and air attacks. It also has a special property: it destroys enemy projectiles, even the big ones like Bugs’ rocket. When on the ground, it can be used twice in a row and chains into itself, but that consumes both of Stripe’s recovery specials. In the air, it can be angled to hit targets a little out of reach (and it can always lead into gun). There’s an oddity with this move: its description says it can latch onto enemies, but that doesn’t happen. It’s unclear whether the description is wrong, or if the move itself is broken.
  • Down Special: On the first use, Stripe takes out a bundle of dynamite. On the second, instead of throwing it, he bites into it, exploding himself. He takes six damage from the burn, but briefly becomes a fast-moving, hard-hitting projectile. It’s a risky setup, and not just because of the damage: Stripe drops the dynamite if he takes a hit, making the move useless (and then anyone can pick up the dynamite). But the move hits hard enough to be worth trying. Just having the dynamite in hand might spook an enemy you’re approaching. Don’t wait too long, though. It’ll explode on its own after a few seconds. Even that has a use, though: the automatic explosion counts as triggering the move normally. Let it fire on its own to cap off a long physical combo (plus gun as needed). It also has recovery applications if you don’t fastfall accidentally while using it.

How to Win Team Battles as Stripe

stripe win tricycle

For this section of the MultiVersus Stripe guide, I’ll explain some basic team strategies. Stripe is a simple guy: he hits and shoots. He can do a lot of damage very quickly, but he’s light and has poor recovery; typical Assassin qualities. He doesn’t have much teamplay besides his circling saws and his ability to move quickly to help his ally. Stripe’s job is to get kills.

A good teammate for Stripe is a Tank with low kill power that can take damage in Stripe’s place and get in the enemy’s face with saws, like Superman or Iron Giant. Another option would be a character who can augment Stripe’s poor defense, like Steven with his shields or even Velma with her bouncing projectiles. The best of all may be Wonder Woman, a frontline tank who can also provide armor.

How to Win 1v1 Battles as Stripe

Assassins are naturals at 1v1, and Stripe is no exception. He’s fast and deadly, and his gun can be extremely frustrating for everybody. His basic gameplan is to poke with buzzsaws while looking for an opening with side air attack. Once he’s in, he can tear up the enemy with his claw strings.

Although Stripe is quick, he’s punished hard if he puts a foot wrong thanks to his poor recovery. For this reason, it’s a good idea to mix riskier, stranger moves into his fighting to make the enemy nervous. His down ground trap makes a quick response for aggressive enemies, and his side air chainsaw makes a deadly counter against foes who think you’re in a vulnerable midair position – as long as your aim is right.

Best Perks For Stripe

multiversus stripe perks

For the last section of the MultiVersus Stripe Guide, here’s some info about his signature perks.

  • Boom, Boom, Bounce! (Level 8): This causes a second dynamite explosion if the first one knocks Stripe into the wall or floor. It’s a straightforward upgrade, but it applies to Stripe’s riskiest attack, and only when angled downward. It doesn’t benefit straight forward blasts, or midair interceptions. This could make the attack more reliable from certain angles, but takes some forethought.
  • He’s The Leader (Level 10): This lets Stripe leap off of his teammate’s projectiles as he can his enemies’, and gain a buff. This is the most potent Signature if you’re on a coordinated team thanks to the speed boost, but too difficult to take advantage of otherwise. It’s easier with teammates with large, slow projectiles.
  • Feeding After Midnight (Level 12): This extends the length of debuffs on Stripe, in exchange for letting him pass them onto enemies with his up special. (Its description says it requires Stripe to grab on, but there is no grab. Fortunately a regular up special hit triggers the effect.) The potential here is pretty interesting. For example, it applies to the self-inflicted burn damage from his dynamite, allowing Stripe to potentially end a dynamite attack with a lunge to give the self-damage to his target! This may be valuable against enemies that rely on debuffs, like Taz’s Hungry or Batman’s Weaken. The duration self-penalty, though, makes it a risky gambit.

Boom, Boom, Bounce! is the easiest Signature Perk to use in most situations.

For secondary perks, you may think to buff Stripe’s projectiles. An ice debuff from each gunshot using Ice To Beat You sounds good, right? Wrong. Stripe’s gun doesn’t benefit from projectile debuff perks. Only his saws and radio trap apply debuffs from Ice To Beat You and That’s Flammable, Doc. They’re still worth considering since Stripe has a lot of saws, but shouldn’t be a priority.

Instead, consider perks that strengthen Stripe’s weak recovery. Triple Jump is obvious, but Fancy Footwork (extended dodge distance) can both help Stripe avoid attacks and use his dodges for better recovery. Add I Dodge You Dodge We Dodge onto that for cooldown reduction, since Stripe’s best tools (gun, saw, dynamite) all have cooldown. That should make a solid all-around setup.

Overwatch 2: How to Play Tracer (Abilities, Skins & Changes)

Tracer is probably one of Overwatch 2’s most-known characters. Her speed and ability to get back in time are what make her so unique. On the other hand, she is not the easiest character to master and be effective with right after only a couple of matches. But, once you learn how to play as Tracer in Overwatch 2, you’ll become extremely powerful, disturbing the backline of the enemy team, and killing them so fast that they won’t even know what has hit them. 

Overwatch 2: Tracer’s Abilities

The concept behind Tracer is speed. Her whole kit is all about attacking, reaching enemies, or fleeing from their attacks as quickly as possible. Her skills are not difficult to understand, but applying them effectively during matches is pretty hard.

Her Primary Fire is a short-range attack with her Pulse Pistols which holds up to 40 rounds at a time. These pistols are pretty fast, so you’ll need to get used to Tracer’s reloading time after a few shots. Tracer’s Primary Fire is only deadly when it gets the enemy by surprise delivering a killing sequence of headshots. However, you can still farm some kills against squishy characters with it or meltdown the enemy tank’s health bar. 

Tracer’s abilities are her signature and to some extent the core of her kit. Without them, her Primary Fire nor her Ultimate would be as strong as they can be with their help.

The first skill is called Blink and she has three charges of it. Each charge has a cooldown of around three seconds. Using this ability you teleport to the direction you are moving to. Even in a situation in which you are walking facing the opposite side, Blink teleports you to the direction you are walking to. During the time of teleportation, Tracer becomes invulnerable.   

Tracer using her Pulse Bomb in Overwatch 2.

Together with Blink, Tracer has Recall as her second ability which has a cooldown of 12 seconds. Once used, it will take you back in time, getting back to the place you were a few seconds before with the exact amount of health you had at that time. Keep in mind where you were before using it, otherwise, you might find yourself in the middle of the enemy team.

As a damage character, she comes with the Damage passive ability. Because of it, every elimination you execute will grant you a boost in movement and reload speed. It’s a great addition to Tracer’s kit considering how many times you end up reloading her weapons during a fight. 

Tracer’s Ultimate is called Pulse Bomb and it’s one of the most difficult abilities to use correctly. The Pulse Bomb explodes after some seconds. It can be thrown on the ground or to an enemy on whom it will stick. Placing it on the right enemy character can be deadly. At the same time, it’s pretty common to just miss the target when you are still learning and hit no one with it.  

Overwatch 2 Tracer Changes

In general, Tracer has received a few minor changes that maybe only players who spent thousands of hours into this character will notice.

  • Tracer’s Pulse Pistols had their damage output reduced by 1 point.
  • She now has the Role Passive Ability Damage. 

Overwatch 2 Tracer Strategy and Team Composition

While mastering Tracer is not easy, mostly because of her Ultimate ability and positioning, she is an extremely useful character. The first thing you must have in mind when playing as Tracer is her ability Blink. This is a great skill, but you must learn when to use it. There are situations in which sneaking behind an enemy character is a better option than using Blink, which can be heard, giving your enemy the time to respond to your attack. 

A second important habit you must have when playing as Tracer is to keep one charge of Blink available. Most of the time, you will use Blinks to engage the enemy and avoid their attacks. However, if you spent all your Blinks, you won’t have a way out of any nasty situation you may find yourself in. 

Playing as Tracer is all about flanking the enemy team and trying to adapt in terms of priority. You can find space to attack the healers in the backline which can call the attention of the tank, disrupting the team’s defense.  You can also just have the role of annoying the enemies while protecting the flanks of your own team. Because of these possibilities, knowing the map is always helpful when playing Tracer.

The most difficult aspect of playing Tracer is using her ultimate effectively. Consider always blinking to place your Pulse Bomb, since you need to get really near to the target. Placing it on the ground among the team enemy may be an option, but the best way to use it is by sticking it to someone. Keep in mind that, for example, you can blink, place the Pulse Bomb, and then use Recall to get back to a safe spot. 

In terms of team composition, Tracer works pretty well in many situations. She is usually a key character for dive teams. However, whenever you see your team with a solid frontline, you can pick Tracer and try to create opportunities for your team to attack a point. Tracer works pretty well with a team that has D.Va as the tank for example or Winston. Lucio and Zenyatta are also great options to pair with Tracer.

Overwatch 2 Tracer Skins

All of Tracer's Overwatch 2 skins.

As one of the most iconic characters in Overwatch 2, Tracer has at her disposal a considerable number of different skins. Keep in mind that some of them are only available for purchase during specific events. 

  • Overwatch 1 – Automatically unlocked
  • Overwatch 2 – Automatically unlocked

Rare (75 credits)

  • Electric Purple
  • Hot Pink
  • Neon Green
  • Royal Blue

Epic (250 credits)

  • Lightning – Seasonal event
  • Posh
  • Rose – Seasonal event
  • Sporty

Legendary (1900 credits)

  • Cadet Oxton – Seasonal event
  • Cavalry – Seasonal event
  • Graffiti – Seasonal event
  • Hong Gildong – Seasonal event
  • Jingle – Seasonal event
  • Mach T
  • Nezha – Seasonal event
  • Punk
  • Sprinter – Seasonal event
  • Slipstream – Unlocked to those who purchased Overwatch: Origins, Game of the Year, or Legendary Editions.
  • Tagged – Seasonal event
  • T.Racer
  • Tagged – Seasonal event
  • Track and Field – Seasonal event
  • Ultraviolet 
  • Will-o’-Wisp – Seasonal event

This is all you need to know to begin your journey as Tracer in Overwatch 2!

Overwatch 2: How to Unlock All OW2 Player Titles (February 2023)

Overwatch 2 is filled with cosmetics to earn (and buy), including items for your career profile. A new addition to the career profile customization is Player Titles. These unique Titles appear with your username on your career profile and player card once unlocked and equipped, showing off your dedication, or denoting a specific accomplishment. Here is how you can earn Player Titles.

How to Unlock Overwatch 2 Player Titles

At launch, there are 25 Player Titles available to unlock in Overwatch 2. Player Titles are broken up into categories, at launch there are Overwatch, Competitive, and Battle Pass Player Titles. The majority of them are rewarded for completing challenges; however, some are unlocked by other means. And, undoubtedly more will be added to the game in future updates, like the upcoming Junkenstein’s Revenge Event. Sadly, the Player Titles tab under career profile customization doesn’t specify how to unlock each Title, but for those tied to challenges, you can view the Challenges tab to find out. Each Challenge that rewards a Player Title will be marked with a T in the bottom right corner of the Challenge card. Hovering over the Challenge card will reveal what Title is awarded for completion. 

How to Unlock Overwatch & Competitive Player Titles

A list of Overwatch 2 player titles.

Below is a list of all the unlockable Overwatch and Competitive Player Titles and unlock conditions:

Overwatch Player Titles

Stalwart Hero Lifetime Challenge – Stalwart Hero: Win 250 games in any mode
Tenacious Hero Lifetime Challenge – Tenacious Hero: Win 750 games in any mode
Unrelenting Hero Lifetime Challenge – Unrelenting Hero: Win 1,750 games in any mode
Partygoer Lifetime Challenge – Partygoer: Win 500 games in any Arcade mode, excluding Deathmatch
Executioner Lifetime Challenge – Executioner: Win 500 games in any Deathmatch mode
Shapeshifter Lifetime Challenge – Shapeshifter: Win 500 games in Mystery Heroes
Assassin Lifetime Challenge – Assassin: Win 250 games as any Damage Hero in Quick play or Competitive
All-Star Lifetime Challenge – All-Star: Win 85 games in each of the three roles in Quick play or Competitive
Medic Lifetime Challenge – Medic: Win 250 games as any Support Hero in Quick Play or Competitive
Vanguard Lifetime Challenge – Vanguard: Win 250 games as any Tank Hero in Quick Play or Competitive


Competitive Player Titles

Adept Competitor Competitive Challenge – Adept Competitor: Win 250 games in any Competitive mode.
Seasoned Competitor Competitive Challenge – Seasoned Competitor: Win 750 games in any Competitive mode.
Expert Competitor Competitive Challenge – Expert Competitor: Win 1,750 games in any Competitive mode.
Diamond Challenger Competitive Challenge – Season 1 End Diamond: End the season ranked as Diamond in Competitive Play
Master Challenger Competitive Challenge – Season 1 End Master: End the season ranked as Master in Competitive Play
Grandmaster Challenger Competitive Challenge – Season 1 End Grandmaster: End the season ranked as Grandmaster in Competitive Play
Top 500 Challenger Competitive Challenge – Season 1 End Top 500: End the season ranked as Top 500 in Competitive Play

How to Unlock Season One Battle Pass Player Titles

Overwatch 2's battle pass titles.

At first glance, Season One’s Battle Pass has 80 tiers to complete; however, that is actually false. The Season One Battle Pass has a staggering 200 tiers to complete. After finishing tier 80, a ninth page is unlocked. This page rewards Battle Pass Player Titles for completing additional tiers after tier 80. Completing all 200 tiers will take an additional 1.2 million Battle Pass XP after the grind to tier 80.

Below is a list of all the unlockable Season One Battle Pass Player Titles and unlock conditions:

Season One Battle Pass Player Titles

Nomad Complete Season One Battle Pass tier 85
Neogun Complete Season One Battle Pass tier 95
Streetrunner Complete Season One Battle Pass tier 105
Bytefixer Complete Season One Battle Pass tier 120
Netbreaker Complete Season One Battle Pass tier 135
Data Broker Complete Season One Battle Pass tier 155
Technoknight Complete Season One Battle Pass tier 175
Cyberdemon Complete Season One Battle Pass tier 200

Overwatch 2: How to Unlock Season 2 Player Titles

How to unlock the Overwatch 2 Season 2 titles.

At first glance, Season Two’s Battle Pass has 80 tiers to complete; however, that is actually false. The Season Two Battle Pass has a staggering 200 tiers to complete. After finishing tier 80, a ninth page is unlocked. This page rewards Battle Pass Player Titles for completing additional tiers after tier 80. Completing all 200 tiers will take an additional 1.2 million Battle Pass XP after the grind to tier 80.

Below is a list of all the unlockable Season Two Battle Pass Player Titles and unlock conditions:

Season Two Battle Pass Player Titles
Mortal Complete Season Two Battle Pass tier 85
Philosopher Complete Season Two Battle Pass tier 95
Argonaut Complete Season Two Battle Pass tier 105
Gorgon Complete Season Two Battle Pass tier 120
Daimon Complete Season Two Battle Pass tier 135
Demigod Complete Season Two Battle Pass tier 155
Olympian Complete Season Two Battle Pass tier 175
Titan Complete Season Two Battle Pass tier 200

How to Unlock Battle For Olympus Player Titles

How to unlock Overwatch 2 Battle for Olympus player titles.

The Battle For Olympus is a limited time mode with the first iteration beginning on January 5th, 2023. All of the available Player Titles are unlocked in the Battle For Olympus Arcade Game mode.

Below is a list of all the unlockable Battle For Olympus Player Titles and unlock conditions:

Battle For Olympus Player Titles
Zeus’s Favorite Child Event Challenge – Earn 300 final blows as Zeus Junker Queen
Pride of Poseidon Event Challenge – Earn 300 final blows as Poseidon Ramattra
Sentinel of Hades Event Challenge – Earn 300 final blows as Hades Pharah
Herald of Hermes Event Challenge – Earn 300 final blows as Hermes Lucio
Master of Minotaurs Event Challenge – Earn 300 final blows as Minotaur Reinhardt
Acolyte of Medusa Event Challenge – Earn 300 final blows as Medusa Widowmaker
Scion of Cyclops Event Challenge – Earn 300 final blows as Cyclops Roadhog

Overwatch 2 – All New Season 3 Player Titles

All of the new Overwatch 2 Season 3 Player Titles.

At first glance, Season Three’s Battle Pass has 80 tiers to complete; however, that is actually false. The Season Two Battle Pass has a staggering 200 tiers to complete. After finishing tier 80, a ninth page is unlocked. This page rewards Battle Pass Player Titles for completing additional tiers after tier 80. Completing all 200 tiers will take an additional 1.2 million Battle Pass XP after the grind to tier 80.

Below is a list of all the unlockable Season Three Battle Pass Player Titles and unlock conditions:

Season Three Battle Pass Player Titles
Peasant Complete Season One Battle Pass tier 85
Trickster Complete Season One Battle Pass tier 95
Disciple Complete Season One Battle Pass tier 105
Noble Complete Season One Battle Pass tier 120
Scholar Complete Season One Battle Pass tier 135
Sage Complete Season One Battle Pass tier 155
Fearsome Spirit Complete Season One Battle Pass tier 175
Legendary Beast Complete Season One Battle Pass tier 200

Overwatch 2: How to Play Symmetra (Abilities, Skins, & Changes)

Symmetra has been a playable hero in Overwatch since the beginning; originally a defense hero, Symmetra is now a damage-based hero in Overwatch 2. Symmetra can be challenging to use for inexperienced players since she has very specific uses and can’t be effective in every game mode. Regardless, Symmetra’s light-bending weapon makes her one of the most distinctive characters in Overwatch.

Overwatch 2 Symmetra Guide – Weapons & Stats

Symmetra has 100 health points and 125 shield – for a total health pool of 225. Her shields will recharge after not taking damage for a few seconds, making her more self-sufficient than some other damage heroes.

Photon Projector (Primary Fire)

Symmetra’s primary fire (RT/R2 on a gamepad) shoots a straight-lined beam that deals more damage the longer it hits an enemy. At first, this beam will deal 60 damage per second. After hitting an enemy, enemy turret, or enemy shield for 1.33 seconds, the beam will deal 120 damage per second. After another 1.33 seconds, the beam will deal 180 damage per second. If you fail to hit anything for a few seconds, the beam will return to dealing 60 damage per second.

Unlike the weapon’s previous iterations in Overwatch, this beam is more precise and doesn’t attach to enemies. This beam fires in a straight line and has a close-medium range use. The beam completely ignores D.Va’s defense matrix. 

Photon Projector (Secondary Fire)

The Photon Projector’s secondary fire (LT/L2) charges up a round projectile that can deal up to 90 damage once fully charged. A fully charged shot will consume 10 ammo. 

Symmetra’s projectiles have a faster firing rate than her previous iterations and move through the air faster. This change makes it possible to spam many smaller energy balls at enemies. In addition, the projectiles can pass through enemy barriers, like a Reinhardt shield, and damage enemies behind it.

Neither the primary nor secondary fire deals critical damage for headshots.

Overwatch 2 Symmetra Guide – Abilities

Sentry Turret

Symmetra has access to three mini turrets that can be stuck onto any surface and deal 40 damage per second each. These mini turrets are stationary and have only 30 health points, making them easy to take down. The turret’s fire beams ignore D.Va’s defense matrix, and these beams reduce every enemy’s movement speeds. 

Once Symmetra deploys a turret, it’ll travel through the air as a projectile, meaning it can be destroyed before activation. Since these turrets travel through the air, Symmetra can deploy them from the other side of the map. The cooldown to cast one Sentry Turret is 10 seconds.

Teleporter

Symmetra’s second ability allows her to create two teleportation devices that allies can travel between. One teleporter will deploy in front of her; the other will deploy wherever Symmetra is aiming, as long as it’s within a 30-meter radius. 

The teleporter will be open for 10.5 seconds, and the ability has a cooldown of 12 seconds. Enemies can destroy the teleportation pods as they have a health pool of 200. 

You can transport more than just allies through these teleporters. As Symmetra, you can deploy sentry turrets through the pods. D. Va and Junkrat can also throw their Ultimate Abilities through the teleporters, giving the enemy team a nasty surprise. 

Symmetra can also use a teleporter to escape Zarya’s Graviton Surge.

Overwatch 2 Guide Symmetra – Passive Abilities 

Symmetra using her teleporter in Overwatch 2.

Role: Damage

Symmetra only has one passive ability, and it’s the same as every other damage hero in Overwatch 2. Role: Damage boosts your movement and reload speed whenever you eliminate an enemy.

Overwatch 2 Guide Symmetra – Ultimate Ability: Photon Barrier

Symmetra using her ultimate, Photon Barrier, in Overwatch 2.

Symmetra’s Ultimate Ability allows her to deploy a massive energy barrier that cuts across the entire map. It acts as a shielded wall for your team that can take 4000 damage points and lasts 12 seconds. Allies can still shoot through the barrier, including Symmetra’s primary and secondary fire. 

Photon Barrier is best used to block an incoming enemy Ultimate. Symmetra’s Photon Barrier can nullify Ultimate Abilities from an enemy Pharah, Soldier 76, or Roadhog.  

Photon Barriers can also be helpful when you’re defending in an Escort match. Place the barrier in front of the moving payload, and you can contest the objective without receiving damage.

Photon Barrier has an ultimate cost of 1680. Ultimate charge is generated through damage, so Symmetra can deal 1680 damage to charge her Ultimate. All characters also generate ultimate charge automatically. At 1680, Symmetra’s Ultimate Ability costs relatively little, so don’t save Photon Barrier for too long, as it’ll charge quickly.

Overwatch 2 Symmetra Changes

Symmetra has changed drastically from her debut in the first Overwatch, but her changes in Overwatch 2 are a little more reserved. None of her abilities have been replaced or changed significantly; Symmetra has instead received a host of smaller, positive changes. 

  • The Photon Projector’s total ammunition has increased from 60 to 100.
  • Symmetra’s secondary fire shoots projectiles faster, but a fully charged ball is smaller and deals slightly less damage.
  • Deploying the teleporter and Sentry Turrets is now marginally quicker.
  • Bonus change: the new animations for the Photon Projector are beautiful.

Overwatch 2 Symmetra Guide – Strategy & Team Composition

The changes to Symmetra in Overwatch 2 are slight, but they make her a significantly better, more aggressive damage hero and a good defensive choice. If you’re defending a map with a significant chokepoint, like Eichenwalde, Symmetra is a deadly pick. Cover the chokepoint with Sentry Turrets, and hurl energy balls through the chokepoint. The Sentry Turrets will slow enemies passing through and leave them vulnerable to incoming damage. A shielded Reinhardt or Brigitte will struggle to push through as Symmetra’s secondary fire passes right through shields.

Symmetra’s faster teleporter makes her a more aggressive hero in pushing objectives. She can solo kill multiple support heroes this way too. If an enemy Zenyatta or Ana is isolated, you should use Symmetra’s teleporter to surround them with Sentry Turrets and close the distance between you. These support heroes will struggle to fight you off since they specialize in long-range combat. 

Lucio excels in his mobility and unpredictability. Since he’s always speedily moving across walls, he can be a hard target to eliminate. Symmetra’s Sentry Turrets can slow him down, and her primary fire doesn’t require much precision, making her a good counter for Lucio. 

Genji is the damage hero most vulnerable to Symmetra as he won’t be able to deflect the beams from her turrets or primary fire. Symmetra’s ability to slow down and lock on to targets will be useful when dealing with Genji’s erratic movement.

Overwatch 2 Symmetra Guide – Skins

All Symmetra skins in Overwatch 2.

Symmetra has 18 unique skins in Overwatch 2. Players can transfer their unlocked skins from the original game by transferring their accounts. You can unlock new skins by progressing through the Battle Pass or buying skins via the Shop with Overwatch Coins or Legacy Credits. You can acquire Overwatch Coins with real money or by completing weekly challenges. Players can transfer Legacy Credits over from the first Overwatch.

Skins Details
Overwatch 1
  • Common Skin
  • Automatically unlocked
Overwatch 2
  • Common Skin
  • Automatically unlocked
Cardamom
  • Rare Skin
  • Sometimes available in the Shop
Hyacinth
  • Rare Skin
  • Sometimes available in the Shop
Saffron
  • Rare Skin
  • Sometimes available in the Shop
Technomancer
  • Rare Skin
  • Sometimes available in the Shop
Utopaea
  • Epic Skin
  • Sometimes available in the Shop
Peacock
  • Rare Skin
  • Sometimes available in the Shop
  • 250 Legacy Credits
  • 1000 Overwatch Coins
Regal
  • Rare Skin
  • Sometimes available in the Shop
  • 250 Legacy Credits
  • 1000 Overwatch Coins
Vampire
  • Rare Skin
  • Sometimes available in the Shop
  • 1000 Overwatch Coins
Qipao
  • Rare Skin
  • Sometimes available in the Shop
Vishkar
  • Legendary Skin
  • Sometimes available in the Shop
Devi
  • Legendary Skin
  • Sometimes available in the Shop
Dragon
  • Legendary Skin
  • Sometimes available in the Shop
Architech
  • Legendary Skin
  • Sometimes available in the Shop
  • 1000 Legacy Credits
  • 1900 Overwatch Coins
Goddess
  • Legendary Skin
  • Sometimes available in the Shop
  • 1000 Legacy Credits
  • 1900 Overwatch Coins
Mermaid
  • Legendary Skin
  • Sometimes available in the Shop
  • 1900 Overwatch Coins
Figure Skater
  • Legendary Skin
  • Sometimes available in the Shop
Magician
  • Legendary Skin
  • Sometimes available in the Shop
Oasis
  • Legendary Skin
  • Sometimes available in the Shop

Overwatch 2: How to Play Baptiste (Abilities, Skins, & Changes)

Baptiste is one of the support heroes in Overwatch 2. He offers a mix of healing, damage negation, and damage amplification with his kit and can also dish out a reasonable amount of damage. Baptiste is a former Talon operative who has now left his past behind. He helps those whose lives are impacted by the war.

Overwatch 2 Baptiste’s Abilities

Overwatch Baptiste Concept Art

Baptiste wields a burst rifle that can dish out a considerable amount of damage and can also heal allies. He has decent survivability and is one of the better supports in the game. 

Exo Boots (Passive): Baptiste has an enhanced jump that you can charge up by crouching. You can boost yourself to vantage spots and it is an excellent ability to escape flankers. 

Biotic Launcher (Primary Fire): Baptiste’s weapon has a three-round burst that deals up to 75 damage per burst which is quite respectable and it is hitscan, making it ideal for pesky flying enemies. 

Biotic Launcher (Secondary Fire): Baptiste has excellent single-target and multi-target healing with his secondary fire. Landing your projectiles directly on allies heals them for 70 while the splash healing is capped at 50. His healing is particularly effective in teams where all players stick together. The downside of his weapon is that he cannot heal himself with it.

Regenerative Burst (Skill): Baptiste heals all allies for up to 250 HP over 5 seconds. Players can heal themselves with this ability and it cannot be interrupted by stuns or hacks.

Immortality Field (Skill): One of Baptiste’s signature skills that allows him to make everyone in an area invulnerable. You can still take damage but you cannot drop below 10% HP. Placing it tactically can make an entire team immune to death for 5.5 seconds.

Amplification Matrix (Ultimate): Baptiste’s Ultimate can double all healing and damage for himself and his allies. It takes 2310 points to charge up but it can instantly turn the tides of fights. It is an extremely powerful ability that can only be destroyed by Sombra’s EMP, which means that you are very likely to get value out of it. 

Baptiste Overwatch 2 Changes

Overwatch 2 Baptiste Blackwatch skin.

Baptiste was a very strong support hero in Overwatch 1 and that has not changed in the sequel. However, Blizzard did nerf his damage falloff range slightly while buffing his healing capabilities.

  • Damage from Baptiste’s Biotic Launcher primary fire has been increased from 24 to 25.
  • The minimum falloff of Baptiste’s primary fire damage increased from 20 to 25 meters.
  • Biotic Launcher’s secondary fire ammo for healing has been increased from 10 to 13 rounds.
  • Regenerative Burst now heals allies for 100 HP.
  • Baptiste now regenerates health passively like all other supports in Overwatch 2.

Overwatch 2 Baptiste Skins

Baptiste skins in Overwatch 2.

Here are all of the skins available for Baptiste in Overwatch 2:

  • Tropical (Legendary) – Event Skin
  • Desert Ops (Legendary) – 1000 Overwatch 1 Coins
  • Spec Ops (Legendary) – 1000 Overwatch 1 Coins
  • Buccaneer (Legendary) – 1000 Overwatch 1 Coins
  • Pirate (Legendary) – 1000 Overwatch 1 Coins
  • Snowboarder (Legendary) – Event Skin
  • Talon (Legendary) – Event Skin
  • Arctic Ops (Legendary) – Event Skin
  • Funky (Legendary) – Event Skin
  • Camouflage (Epic) – 250 Overwatch 1 Coins
  • Wasteland (Epic) – 250 Overwatch 1 Coins
  • Combat Medic (Epic) – 250 Overwatch 1 Coins
  • Overwatch League Skins (Epic) – 250 Overwatch League Coins
  • Ble (Rare) – 100 Overwatch 1 Coins
  • Vet (Rare) – 100 Overwatch 1 Coins
  • Vyolet (Rare) – 100 Overwatch 1 Coins
  • Wouj (Rare) – 100 Overwatch 1 Coins
  • Overwatch 1 (Default)
  • Overwatch 2 (Default)

Note: Event skins will be available via the Shop. Keep an eye out on the Shop to see when your favorite skins are available. These skins do not have fixed pricing as they sometimes come in bundles.

Overwatch 2 Baptiste Tips

Learn the Primary-Secondary Combo: You can fire his primary fire and secondary fire together at the same time if you press the associated inputs back to back. It allows you to keep dealing damage and heal your allies at the same time. Since it takes a short while for your healing projectiles to land on your allies, you can use the downtime to deal some damage while you’re supporting your teammates.

Use Exo Boots When in Danger: There are way too many Baptiste players who forget that his passive can bail them out of danger. You can use Exo Boosts to dodge certain Ultimate abilities or simply relocate away from danger.

Use Immortality Field Behind Objects: When using your Immortality Field, you can easily give your allies a false sense of safety. Your ability can easily get destroyed and you will end up dying. You should always use your Immortality Field as tactically as possible and try to avoid putting in spots where your enemies can see it. You have a 5.5-second window during which you should try your best to heal up your allies to high HP so they do not die as soon as your ability ends.

Help With Team Damage: Just because you are a healer does not mean that you should focus on one role. Baptiste has reasonable DPS capabilities so you should pay attention to your teammates and actively take down enemy heroes who are low HP.

Play Tactically Against Sombra: Baptiste’s biggest counter is Sombra who can shut down all his abilities. Immortality Field is unable to be hacked before it hits the ground, it is possible to throw it out in the air as soon as you hear an enemy Sombra approaching for casting EMP. If you time it right, your Immortality Field will land after her EMP is cast and you will be able to survive lethal damage for a few seconds.

When Should You Play Baptiste?

Baptiste is a solid pick overall but he does have some negative synergies. If you have too many high-mobility heroes like Genji, Pharah, and Echo it becomes very frustrating for Baptiste to land his healing projectiles especially if the allies are moving around a lot. In dive compositions, he does not have any horizontal mobility which makes it difficult for him to keep up.

However, in teams where you have heroes with limited mobility that like to play close together, his healing has a lot more value as you will be able to heal multiple targets at the same time. He pairs well with tanks like Sigma and Reinhardt especially if you have DPS heroes like McCree and Soldier who typically stay by your side and can keep you covered.

Overwatch 2: How to Play Ashe (Abilities, Skins, & Changes)

Ashe is one of the DPS heroes in Overwatch 2 and her consistent damage along with her ability to lock down areas with her Ultimate is why a lot of players enjoy playing her. The leader of the Deadlock Gang and a respected figure in the criminal underworld, Ashe is an outlaw in the world of Overwatch. She relies on her guns, dynamite, and trusty Omnic partner Bob to handle threats in style.

Overwatch 2 Ashe’s Abilities

Ashe is able to hipfire her weapon and also aim-down sights, giving her a lot of flexibility. The hipfire is good when you want to duel enemies at close range but we recommend aiming down sights in every other situation.

The Viper (Primary Fire): Ashe uses The Viper as her primary weapon. The weapon is amazing at medium ranges but there is some damage falloff beyond the 50-meter range when aiming down sight. The weapon has pinpoint accuracy and it is hitscan, which makes her ideal for taking down heroes like Echo and Pharah from a distance.

Dynamite (Skill): Ashe’s Dynamite is a projectile that can deal tons of damage over time. You can toss it at enemies and shoot it to instantly detonate it or you can wait for it to explode on its own after a 2-second delay. It can deal up to 150 damage, making it lethal. It is also one of the best tools to charge up your Ultimate if you can consistently land your Dynamites on multiple enemies.

Coach Gun (Skill): Ashe’s Coach Gun is the only real defensive tool that allows her to create distance between herself and any flankers. You can also use it as a mobility tool to reposition yourself. 

B.O.B. (Ultimate): Ashe summons Bob with her Ultimate ability who is a giant Omnic that shoots down everything in sight. Bob has 1000 HP and does about 112 damage per second which is quite menacing. Unfortunately, Bob cannot move around and enemies can simply stay in cover to avoid Bob’s damage. However, Bob is highly effective at shutting down objectives and taking space, making the Ultimate quite valuable to play for map objectives.

Ashe Changes in Overwatch 2

Ashe received minimal changes to her kit in Overwatch 2 as she was already in a very balanced state. Here are all of the changes to Ashe’s kit in Overwatch 2. 

  • Bob’s health has been reduced from 1200 to 1000 HP. 
  • Thanks to the new DPS passive, Ashe gets increased movement and reload speed after getting an elimination.

Overwatch 2 Ashe Skins

Ashe Overwatch 2 skins.

Here are all of the skins available for Ashe in Overwatch 2:

  • Gangster (Legendary) – 1000 Overwatch 1 Coins
  • Jungle (Legendary)  – 1000 Overwatch 1 Coins
  • Safari (Legendary) – 1000 Overwatch 1 Coins
  • Poolside (Legendary) – Event Skin
  • Socialite (Legendary) – Event Skin
  • Little Red (Legendary) – Event Skin
  • Mobster (Legendary) –  1000 Overwatch 1 Coins
  • Warlock (Legendary) – 1900 Overwatch 2 Coins
  • Tiger Huntress (Legendary) – Event Skin
  • Thorn (Epic) – 250 Overwatch 1 Coins
  • Posh (Epic) – 250 Overwatch 1 Coins
  • Mardi Gras (Epic) – Event Skin
  • Overwatch League Skins (Epic) – 250 Overwatch League Coins
  • Paintbrush (Rare) – 100 Overwatch 1 Coins
  • Sunflower (Rare) – 100 Overwatch 1 Coins
  • Tansy (Rare) – 100 Overwatch 1 Coins
  • Yucca (Rare) – 100 Overwatch 1 Coins
  • Overwatch 1 (Default)
  • Overwatch 2 (Default)

Note: Event skins will be available via the Shop. Keep an eye out on the Shop to see when your favorite skins are available. These skins do not have fixed pricing as they sometimes come in bundles.

Overwatch 2 Ashe Tips

Deploy Bob Safely: When you cast your Ultimate, make sure that you deploy Bob in a safe location. Bob runs in a straight line depending on where you are aiming at and stops after a brief moment to start firing. Positioning Bob on objectives or in enemy backlines can be highly effective. Make sure that you keep an eye on abilities like Ana’s Sleep Dart to ensure your Ultimate does not get shut down immediately. 

Learn Coach Gun Mechanics: You should identify opportunities to use your Coach Gun effectively to push yourself into places that you wouldn’t be able to reach normally. One of the best ways to use the Coach Gun is to use it when Genji is using Deflect. It will proper you twice as far which will allow you to gain some distance and duel the hero at an advantage. 

Spam Your Dynamites: Dealing damage is the fastest way for DPS heroes to build Ultimate charge and you should try to deal as much damage as possible with your Dynamites. The ability is designed in a way that it will line up with your crosshair as soon as you are able to shoot, making it very easy to trigger those mid-air detonations.

Master The Viper: Your primary fire is the best way to dish out consistent damage at range and you should learn how to use the weapon. Since the weapon does not one-shot enemies even if you land a headshot, you need to be able to land those follow-up shots to finish off low-health enemies. You should practice landing headshots on moving targets as landing those critical hits is important for any Ashe player to secure kills consistently.

Know Ashe’s Weaknesses: Ashe is vulnerable in close combat and you should never have to rely on your hipfire. Save your Coach gun to create distance and deal with enemies at ranges that offer you an advantage.

When Should You Play Ashe?

Ashe is a very consistent DPS hero that can be played in almost all situations. She works best in team compositions that rely on mid-range damage. She has a hard time surviving when being flanked by characters like Genji and Tracer and if the enemy team decides to focus you down at all times using high-mobility characters, she will need help from your team. The key to mastering Ashe is learning to position yourself. You need to be far enough from the enemies to avoid taking unnecessary damage but you also need to be close enough to your supports so they can aid you if you get pushed.

Unlike a lot of other heroes that have self-sustain, Ashe has very little defensive utility and if your team isn’t offering you enough assistance, she can feel frustrating to play. But if your tanks create space for you and you are given enough breathing room to work with, Ashe can dish out a lot of damage and lock down areas with Bob and burst down enemies with The Viper and her Dynamites.

Mobile Game Requiring You to Play in Landscape Mode Really Asking for a Lot

TAMPA, Fla. — A popular new mobile game reportedly requires players to play in landscape mode, a requirement that many gamers feel is asking for a lot.

“Everyone’s been talking about this new mobile game Heavenfall’s Rise, but to be honest I haven’t gotten into it,” said local gamer Charles White. “I tried to play on my lunch break, but as soon as I saw I had to turn my phone sideways I was like, ‘I’ll just come back to this later.’ It was just a big commitment at the time. Two thumbs at the same time? Come on, man. Grow up.”

According to those familiar with the situation, White did eventually try the game. The experience later, however, wasn’t much better.

“I was ready this time, I had my phone sideways and everything,” White said. “But then I saw the intro cutscene had voice acting and I didn’t want to use my phone speakers, so I grabbed my bluetooth headphones. But then they wouldn’t connect for some reason, so I spent a few minutes resetting them and restarting my phone and finally got them to connect. That’s when my friends decided to spam the group chat right as I launched the game again. The notifications kept rolling in, so I had to go put my phone on Do Not Disturb. After all that, I was finally able to play, but I didn’t last long. The touch controls were too finicky, so I decided to just come try another time. Other than that, it’s pretty fun, though.”

The director of Heavenfall’s Rise, John Kornacki, said he has his hands tied when it comes to developing such complex games for mobile devices.

“Do you know how hard it is to replicate the experience of a console game on a phone?” Kornacki asked, rubbing his eyes. “Changing the screen orientation changes everything about the experience: the UI, how things are framed, how players interact with elements, and so on. Just turn your TV vertical if you think it’s so minor. And yes, it does have to replicate the experience of a console game. Or else what are we even doing? Just trying to pull as much money from suckers as possible? OK, yea, that’s a big part of it too, honestly.”

At press time, White reportedly tried to open Heavenfall’s Rise again, but after the loading screen lasted roughly two seconds, he decided to just back out and fuck around in Pokémon Go for the 10,000th time.

Struggling Korean Esports Athlete Sent Down to United States

PEORIA, Ill. — Professional Korean Overwatch player Kim Min-Soo, after recent failings in competitive matches, was reportedly sent down to the United States until his performance improves.

“It’s sad to lose a friend, but hopefully his time down in the minors will help him improve his confidence,” said former teammate Lee Jin-seo. “Sometimes you need to spend some time scrimmaging against much worse players to build yourself up, and I don’t imagine he’ll be in the U.S. very long before we bring him back up here again, we don’t want him to develop bad habits that he can get away with on under-leveled opponents.”

Min-soo was disheartened at the news and the public perception of his new league.

“I tell people I play for a professional Esports team, which usually gets people excited and interested, but now I clarify I play for an American team and they’re deflated and they walk away,” Min-soo said. “I have to get back into the Korean league before my career is irreparably damaged. I’m already the top ranked player in United States history. I’ve never been more mortified in my life.”

Min-soo’s American teammates appreciate Min-soo’s expertise on the virtual field.

“We’re already learning so much from Kim’s guidance,” New teammate Eric Cromwell said. “He’s taught us so many amazing things, did you know there’s a jump button? Also, when you die, the game isn’t over. You come back to life and can go shoot people again. I’m so excited!”

At press time, Min-soo was further humiliated when his U.S. masters team was swept in their scrimmage by the Korean Youth Public School Team.

Physical Media Collector Pretends Not to Care That Super Obscure Film Is Available for Free on Tubi

PORTLAND, Maine — Physical media collector Travis Hovey reportedly acts like he doesn’t care about news that the very expensive obscure cult film he purchased on blu-ray is available to stream on Tubi for free, sources confirm. 

“Yeah sure, I can totally stream Night of the Cannibal Carnies on Tubi or whatever, but this version is the super limited steel box and was totally worth the $250 price tag,” Hovey explained. “Plus, you’re not getting the awesome extras on Tubi like you do with a physical copy. Can you get a commentary track from the guy who dry cleaned the director’s clothes during filming? I think not! You never know when these companies will just decide to delete a movie from history for some tax money, and then what? I can just never watch Night of the Cannibal Carnies again?! You’re the one out of your mind!”

Samantha Miller, Hovey’s partner, weighed  in on how much of a hassle her boyfriend’s interest can be.

“I know collecting is his thing, but to me it seems a bit unnecessary,” Miller said. “It seems like almost every movie Travis owns is online, free of charge. Whenever we check out a streaming service’s library, he tends to sit there with a sad, blank stare. I’ll say to him, ‘Oh, look! Video Violence is on here babe!’ and he’ll glance over at his $1,000 dollar VHS copy then stare at the floor for 30 minutes. I know a piece of him dies every time, but Tubi is just so damn convenient.”

According to those familiar with the situation, Tubi tries to have as many movies as possible available to stream for free.

“One time some guy cut me off in traffic, but he couldn’t see my car coming because his back window was covered by mountains of DVDs and Blu-rays. That’s when I decided to dedicate my life to destroying physical media collectors once and for all, launching Tubi,” explained Tubi CEO Farhad Massoudi. “The plan is to slowly grow our streaming library until we have every single obscure movie ever made, available for people to watch. Then, people start feeling like they can get rid of all those old physical copies of movies they have. Why not? It’s on Tubi, right? That’s when we strike, deleting the entire company from existence. I will have my revenge. Few people know this, but the name Tubi comes from the phrase, ‘to be continued.’”

At press time, Hovey was seen with a tear rolling down his face after seeing an album he paid $300 dollars for is streaming on YouTube. 

“He’s Not Ready,” Mutters Miyamoto Over Shrieking Flesh Pile of Failed Mario Clone

KYOTO, Japan — Legendary Nintendo producer and designer Shigeru Miyamoto shocked stockholders when his ‘NextGen Showcase,’ the shrieking pile of flesh of a failed Mario clone, was unfortunately behind schedule.

“Soon, my son. Soon,” Miyamoto said solemnly loading a pistol. “Your sacrifice will not be forgotten, but I cannot allow you to exist. I will create you, but I will do it right. Your pain is but a mere stepping stone to the most revolutionary leap gaming has ever seen. Until then, you must remain my shameful little secret.”

Sources noted that directly after this monologue, Miyamoto placed a tender kiss on the unholy melted abomination before stoically unloading a full magazine into its twisted mass.

“We’re trying as hard as we can, but Mr. Miyamoto is insatiable,” said Nintendo scientist Bradley Cromwell. “I warn Mr. Miyamoto of the dangers of playing God, but he’s blinded by the idea of creating the most immersive 3D platformer the world has ever seen. I just hope we can make the necessary strides before the next Nintendo Direct. With every failed attempt, more and more scientists mysteriously disappear.”

Despite terrifying warning signs, Nintendo fans seem incredibly optimistic about the project.

“If anyone can shamelessly break the laws of humanity, it’s Miyamoto,” said Nintendo Fan Mark Churley. “Nobody thought Mario Sunshine would be good, but it turned out to be a masterpiece, so whatever horrendous scientific affront to God he wants to make, I’m on board.”

At press time, Nintendo had just tweeted a cryptic new teaser for their next project, a photo of a shattered containment unit with nothing but the sound of an employee screaming.