Game Starring Ageless Demon Forced to Shred for Eternity Not About Tony Hawk

NEW YORK — The gaming community was rocked this week upon realizing that a new skateboarding game published by Devolver Digital, called Skate Story, which features a demon protagonist destined to rip forever, is not about Tony Hawk.

“When I first heard about a new game where you play as an undying skater putting together sick lines through the underworld, I just assumed they were making Tony Hawk’s Pro Skater 6,” said skater Brendan Green. “I mean, I saw a video where that guy broke his femur clean in half and was walking on crutches the next day. If that’s not some kind of pagan healing magic, I don’t know what is!”

Skate Story creator Sam Eng clarified that there is an abundance of Hawk-esque skaters in the community — ageless ghouls fated to ride until the Earth is reduced to ash — and therefore does not require his protagonist to be Tony Hawk himself.

“The skating community has been writing itself off by always using Tony Hawk as the selling point for these games,” remarked Eng. “The number one thing I felt Skate Story should showcase was the plethora of other very talented skaters who have been eternally damned to a cycle of hitting spots and shattering into a million pieces like Vans-clad Sisyphuses.”

Hawk himself has been struggling with his apparent immortality and purpose in this world.

“I’ve been doing a lot of soul-searching about this, you know, consulting spiritual mediums and Ouija boards, the classics,” explained Tony Hawk, “and I’ve come to the conclusion that the reason I must still perform McTwists at age 54 is because back in 2004 I gave players a peek of Hell in the New Orleans level of Tony Hawk’s Underground 2. They didn’t like that.”

Despite the Skate Story’s lack of Tony Hawk, however, Eng confirmed at press time that the game’s protagonist will still be trapped in a never-ending Hell of people not recognizing him in public places.

Good news, gamers! This article is sponsored by Devolver which means that we didn’t just make all this shit up. Skate Story is a real life video game that you can play when it comes out. Press that wishlist button on Steam because this game looks sick as fuck — and we didn’t even have to say that.

Wanna read our other articles about Devolver Digital games? Click here!

100 Mega Man Villains Who Were Rejected for Being Too On-the-Nose

Since its debut in 1987, the Mega Man franchise has produced dozens of games and introduced over 80 of its iconic Robot Master Villains. These mechanical enemies that grant you their signature powers when defeated have been as much a part of the long running series as Rush, Dr. Wily, and even Mega Man himself. And while fans have rightly celebrated their favorite Robot Masters over the years such as Wood Man and Skull Man, did you know that there have been countless potential Robot Masters that were excluded from the series due to being incredibly on the nose?  We’ve gone through the old pitch docs and conceptual art and ranked our favorite 100 of these overly obvious opponents. 

  1. Khaki Man
  2. Eats Salad With His Hands Man 
  3. Crappy Fireworks Man
  4. Hugh Jackman in Swordfish Man 
  5. Craig Man (known as Mega Man’s Older Brother That Dropped Out of High School and Still Lives at Home Man in Japan
  6. Bomberman’s Dad Man 
  7. Asshole Is A USB Port Man 
  8. Just An Ironing Board Standing There Man 
  9. Finger Mustache Tattoo Man 
  10. Verizon Wireless Employee Man 
  11. Backwards Baseball Cap Man 
  12. Paul New Man 
  13. Astronaut Having A Breakdown Man 
  14. Sauce Man
  15. Charles Barkley Man 
  16. Lies About The Things He’s Seen Man 
  17. No Weapons Just Spit Man 
  18. Asbestos Man
  19. Picnic Man 
  20. Auxiliary Cord Man 
  21. Civil War Man 
  22. Scalding Hot Piss Man 
  23. Uncle Grandpa Man 
  24. Dicks For Teeth Man 
  25. Sick Ass RGB Lighting Man
  26. “Actually, The Comic Was Better” Man 
  27. Just An Espresso Machine Man 
  28. Rambling Speech At Wedding Man 
  29. A Tub Full of Beans Man
  30. Flat Earth Man 
  31. Salad Bar Sneeze Guard Man
  32. “Hey, So I’m Doing This Walkathon” Man
  33. Went To See Amsterdam Man 
  34. Really Good At Whistling “The Impression That I Get” By The Mighty Mighty Bosstones Man 
  35. Old Meat From The Deli Man 
  36. Ass Fell Asleep Man 
  37. Christian Metal Man 
  38. “Ooh, Ouch, Wait, My Hernia!” Man 
  39. Makes His Hands Into Crabby Pinchers Man 
  40. Buries Himself Alive and Then Dies Man 
  41. On Bad Acid Man 
  42. Alan Arkin 
  43. Refuses to Use A Coaster Man  
  44. Disgraced LAPD Officer Man 
  45. Jet Lag Man
  46. Prefers Lethal Weapon 2 Man 
  47. Sweaty Clown Man 
  48. Revolver Ocelot Man 
  49. Laughs at Any Novelty T-Shirt He Sees Man 
  50. Sob Man 
  51. Just Woke Up Man 
  52. Electric Toothbrush Man 
  53. Teeth For A Dick Man 
  54. Spikey Head Man (would go on to join Slipknot)
  55. Good Sportsmanship Man 
  56. MRI Machine Man 
  57. Uses The Computer At The Library For A Long Time Man
  58. Depressed That He Will Never Love Man 
  59. Burning Twin Towers Man 
  60. Just A Lil’ Kitty Cat Man
  61. Constant Screeching Brakes Man 
  62. Looks Like Steve Martin But Talks Like Chris Tucker Man 
  63. Junkie Man 
  64. Knife Man 
  65. Powdered Milk Man 
  66. Asshole Is A USB Port Man’s Bratty Son Man
  67. Annoying Cigar Guy Man 
  68. Dwayne “The Rock” Johnson Man 
  69. Wiseass Talking Paperclip With Two Eyes Man 
  70. Loudly Sipping Coffee Man 
  71. Wants To Talk About His Tattoos Man 
  72. Lead Singer Of That Band The Spin Doctors Man 
  73. Injury Timeout Man 
  74. Beer Bong Man 
  75. Room Temperature Man 
  76. Packets Of Diner Jelly Man 
  77. Brillo Man
  78. “Look Into My Eyes While We Fight” Man 
  79. The Marlboro Man
  80. Cell Phone Accessory Kiosk At The Mall Man
  81.  “Hey What Do Ya Say We Take All This Back To My Garage?” Man 
  82. A Picture Painted On A Wall To Look Like A Robot Man 
  83. Tries To Fart But He Hurts His Stomach Man 
  84. Shared Needle Man 
  85. Takes A Bite Of Your Sandwich And Now You Don’t Even Want It Anymore Man 
  86. Notebook Full Of Weird Drawings Man
  87. Remarkably Average Man 
  88. Pig In Robot Costume Man 
  89. “This Must Be Some Sort of Mistake! My Name Is Glenn Washington, And I Am An Engineer From Phoenix! I Have A Wife And Two Kids! What Have You Done To Me?” Man 
  90. Pubic Lice Man 
  91. Lice Man 
  92. Pubic Man 
  93. Dolphin With A Gun Man 
  94. Inspector Gadget’s Brother, Terry Gadget 
  95. Line Cook Man 
  96. Crowd Funded Robot Master That Doesn’t Quite Work Like He Should Man
  97. The Actual, Literal Devil Man 
  98. Satirical Blackface Man 
  99. Spit Valve Man
  100. Running To Catch A Bus Man 

Overwatch 2: How to Play Mei (Abilities, Skins, & Changes)

Mei, Overwatch 2’s arctic explorer, is a damage hero all about ice. Mei’s weapons and abilities have one primary goal: slowing the enemy down and eliminating them. Mei’s Endothermic Blaster freezes her enemies, while her abilities are designed to block enemy counterattacks and contest objectives for as long as possible. Mei is a relatively simple character to use as long as you understand her limits and when best to play as her.

Mei has 250 health points, but her self-healing ability enhances that health even more.

Overwatch 2 Mei Guide – Weapons

Endothermic Blaster (Primary Fire)

The primary fire for Mei’s blaster (RT/R2 on a gamepad) will spray a beam of ice at enemies. This deals ~90 damage per second and reduces enemy movement speed by 50%. The primary fire uses about 20/150 ammo per second.

Since this ice spray is a beam, it can’t deal headshot damage, but it will ignore abilities like D.Va’s defense matrix or Genji’s deflect.

Mei’s primary fire is great for dealing with quick heroes that are hard to keep in one place, like Genji or Lucio. However, almost any hero will be severely vulnerable while freezing. 

Endothermic Blaster (Secondary Fire)

Mei’s secondary fire will shoot a long-ranged icicle at enemies. This projectile deals ~75 damage per hit and ~125 for a critical headshot hit. This spike uses up 10/150 ammo per shot and takes 0.5 seconds to fire. 

The blaster’s primary and secondary fire are a great match. After you hit a foe with the primary fire, they will still be slowed for a few milliseconds, giving you enough time to charge up an icicle and quickly land a headshot. 

The Endothermic Blaster’s secondary fire is also great at dealing with faraway foes like Pharah or Hanzo, though you should note that the projectile has a downwards trajectory as it flies through the air.

Overwatch 2 Mei Guide – Abilities

Cryo-Freeze

Cryo-Freeze traps Mei in an icy cocoon, blocking her from any incoming damage and restoring her health and ammo. Once activated, Mei can stay in Cryo-Freeze for 4 seconds and cancel the ability at any time. Cryo-Freeze can heal up to 200 damage and has a 12-second cooldown. 

Obviously, this ability is best used when you’re low on health, and your support is preoccupied. But it also has some more annoying uses. Cryo-Freeze is great when you need to contest the point; let’s say you’re in overtime and waiting for your team to respawn. Cryo-Freeze can be a last-second help in close games.

Ice Wall

This ability allows Mei to grow a large, breakable Ice Wall. Each pillar in the wall takes 250 damage to destroy. Ice Wall stays in place until it’s destroyed or after 5 seconds and has a cooldown of 12 seconds.

Ice Wall is a great defensive tool if you’re trying to block damage, keep enemies away from objectives, or if you’re trying to separate enemies from their team. Ice Wall can also be used underneath you and your teammates, letting you reach inaccessible areas.

Passive Ability – Role: Damage

Role: Damage boosts Mei’s movement and reload speed after eliminating an enemy. Every damage hero in Overwatch 2 has this passive ability. 

Overwatch 2 Mei Guide – Ultimate Ability: Blizzard

Mei using her Overwatch 2 ultimate, Blizzard.

Mei’s Ultimate Ability has her launch her cute drone into the air, creating a blizzard that freezes the enemy in a wide area. Blizzard lasts for just over 4 seconds and has a 10-meter radius. Enemies caught in the zone will take 20 damage per second and be slowed; enemies stuck too long will be completely frozen for 1 second. 

Since Blizzard is an area-of-effect ability, it should be used when the enemy team is close together and vulnerable to such attacks. You should try to activate it when you have backup since the freezing effects only last a few seconds – you need to maximize your damage output in this time. Use Mei’s secondary fire to land headshots and quickly gain eliminations. 

Mei’s Ultimate is also pretty good at pushing back enemies. If your foes are pushing through a tight chokepoint, like the one in Hollywood, Blizzard is a tool for clearing the area. Even if enemies aren’t completely frozen by the cold, they will temporarily pull back and give your team enough time to regroup and heal. 

Blizzard has an Ultimate cost of 1610. Ultimate charge depends on how much damage or healing you deal, so landing 1610 damage will fully charge Mei’s Ultimate. In addition, all characters automatically generate a small amount of ultimate charge.

Overwatch 2 Mei Changes

All Overwatch 2 Mei changes.

None of Mei’s core abilities have been removed or reworked, but the changes to Mei in Overwatch 2 are pretty significant. Her inability to freeze enemies completely makes Mei less distinct from other damage heroes. Even though her primary fire has a damage boost, the rest of her changes nerf her abilities on the battlefield. 

  • Mei’s primary fire no longer freezes enemies in place, it only slows their movement speeds. Her primary fire’s damage has increased from 55 damage per second to 100 damage per second.
  • Mei’s Ultimate Blizzard cost has increased by 15%
  • Role: Damage is a new passive ability for Mei.
  • Ice Wall has each pillar’s health reduced from 400 to 250.

Overwatch 2 Mei Guide – Strategy & Team Composition

Mastering Mei’s playstyle is tough since she’s outclassed in many situations. In 1v1 situations, Mei’s self-healing and freezing abilities make her quite useful; engaging in long-ranged fights isn’t recommended, however. Mei doesn’t do enough damage to be able to solo kill a Roadhog or a Reinhardt, but Mei is effective against most damage and support heroes.

Genji is particularly vulnerable to Mei, as he excels in fast movement and close-range combat. Both can be nullified by Mei’s Endothermic Blaster. If Genji tries to escape using his abilities, try to block him with your Ice Wall.

Mei’s most useful abilities are her Ice Wall and her Ultimate. You should use Mei’s Ice Wall offensively and defensively. In most 5v5 matches, the enemy team will have their tanks at the front, their damage behind, and their support heroes at the back. A well-placed Ice Wall will be able to separate an enemy tank from their team while blocking damage from their DPS heroes. Separating their team often will lead to many 5v1 situations and allow you to pick off enemies when they’re vulnerable. Also, if an enemy is trying to disengage from a fight and back off, use an Ice Wall behind them and finish them.

Mei’s Ultimate has many use cases. As previously mentioned, players can use it to generate eliminations and push back enemies, but it also has a relationship with other Ultimates. For example, if an enemy Zenyatta or Lucio activates their Ultimate, they’re gearing up to dive into the objective. Mei’s Blizzard will slow down the enemy and buy your team a few seconds. By the time Blizzard finishes, so will the enemy team’s Ultimate, allowing you to counter with a supportive Ultimate of your own.

Overwatch 2 Mei Skins

All Overwatch 2 Mei new skins.

Mei has 23 different skins in Overwatch 2. Players can transfer skins unlocked in the original Overwatch by merging their accounts. Otherwise, you can unlock new skins by completing the Battle Pass or by purchasing skins in the in-game Shop.

Skins Details
Overwatch 1
  • Common Skin
  • Automatically unlocked
Overwatch 2
  • Common Skin
  • Automatically unlocked
Chrysanthmum
  • Rare skin
  • Sometimes available in the Shop
Heliotrope
  • Rare skin
  • Sometimes available in the Shop
Jade
  • Rare skin
  • Sometimes available in the Shop
Persimmon
  • Rare skin
  • Sometimes available in the Shop
Earthen
  • Epic Skin
  • Sometimes available in the Shop
  • 250 Legacy Credits
  • 1000 Overwatch Coins
Snow Plum
  • Epic Skin
  • Sometimes available in the Shop
  • 250 Legacy Credits
  • 1000 Overwatch Coins
Pumpkin
  • Epic Skin
  • Sometimes available in the Shop
  • 1000 Overwatch Coins
Firefighter
  • Legendary Skin
  • Sometimes available in the Shop
Rescue Mei
  • Legendary Skin
  • Sometimes available in the Shop
Abominable
  • Legendary Skin
  • Sometimes available in the Shop
Jiangshi
  • Legendary Skin
  • Sometimes available in the Shop
Ecopoint: Antarctica
  • Legendary Skin
  • Sometimes available in the Shop
  • 1000 Legacy Credits
  • 1900 Overwatch Coins
Yeti Hunter
  • Legendary Skin
  • Sometimes available in the Shop
  • 1000 Legacy Credits
  • 1900 Overwatch Coins
Sprinkles
  • Legendary Skin
  • Sometimes available in the Shop
  • 1900 Overwatch Coins
Mei-rry
  • Legendary Skin
  • Sometimes available in the Shop
Penguin
  • Legendary Skin
  • Sometimes available in the Shop
Chang’e
  • Legendary Skin
  • Sometimes available in the Shop
Luna
  • Legendary Skin
  • Sometimes available in the Shop
Pajamei
  • Legendary Skin
  • Sometimes available in the Shop
Beekeeper
  • Legendary Skin
  • Sometimes available in the Shop
Honeydew
  • Legendary Skin
  • Sometimes available in the Shop


Overwatch 2: Best Damage (DPS) Heroes Tier List

Overwatch 2 has a sizable roster of damage heroes, sitting at 17 unique playable characters. Each hero has their strengths and weaknesses, and each of them can be countered by a good player and the right character. But that doesn’t stop some damage heroes from being better than others. The new 5v5 meta in Overwatch 2 has made damage heroes more important than ever, so it’s crucial that you pick Overwatch 2’s best DPS heroes for the job.

S Tier – Who Are The Best Overwatch 2 DPS Heroes?

Genji, Overwatch 2's best DPS hero.

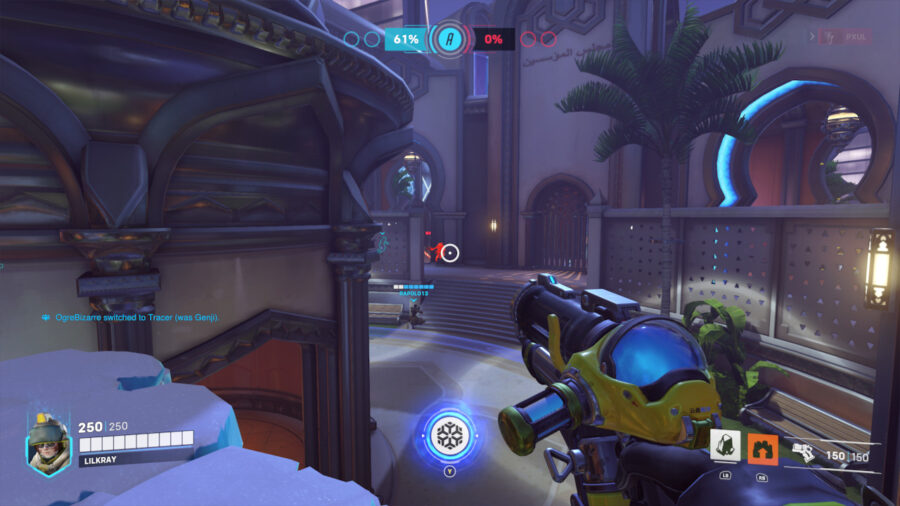
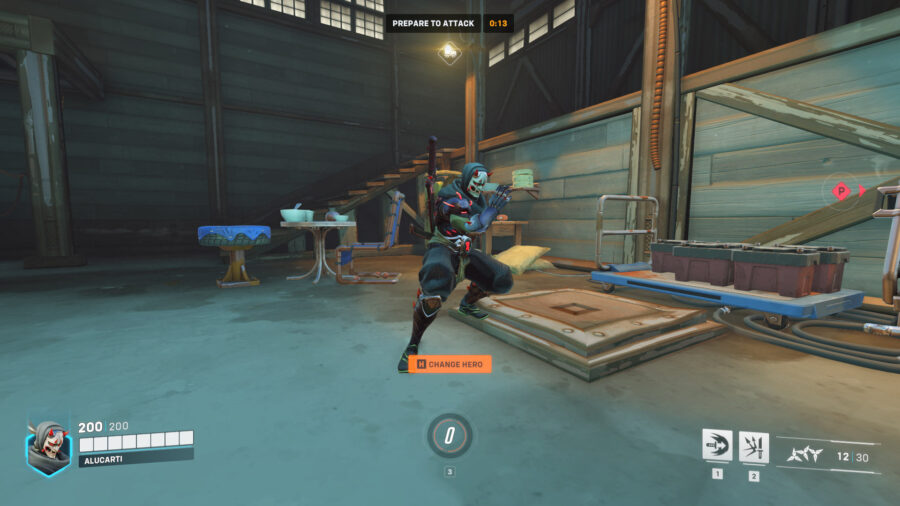
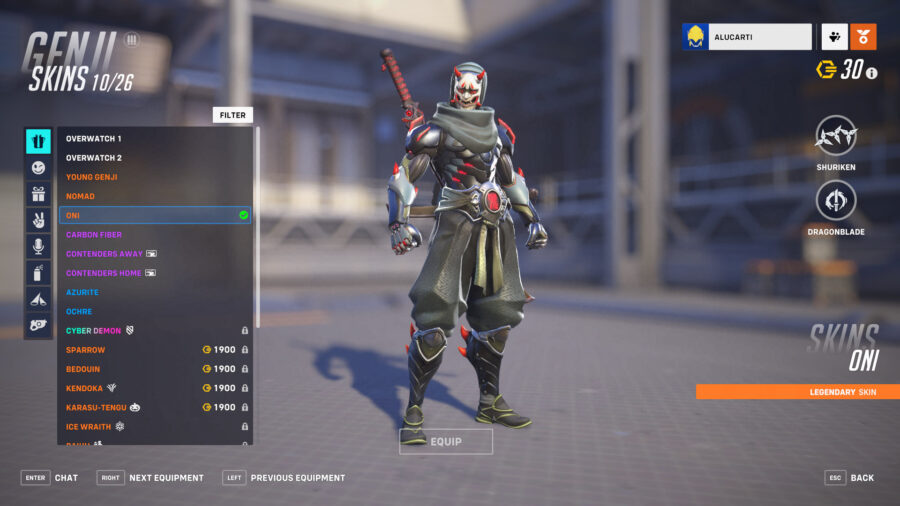
Overwatch 2’s Best DPS: Genji

Overwatch 2 is all about the dive right now, and Genji is one of the best heroes to dive with. If you’re unfamiliar, ‘dive’ is a team composition that focuses on literally diving into enemy teams and focusing on one hero to eliminate first. This is a really popular way to compose your team right now, and in this respect, there’s no better damage hero than Genji.

Genji’s ability to climb walls and his Swift Strike make him a perfect choice if you want to get behind enemy lines. In addition, his hyper-mobility and close combat will give him the edge in taking out specific enemy heroes. His Deflect ability will also be extremely handy if you’re left vulnerable while in a fight. 

Genji’s most lethal ability right now is easily his Ultimate. Dragonblade was already a dangerous Ultimate in Overwatch, capable of earning triple kills. In Overwatch 2, every damage hero also has the Role: Damage passive, granting a burst of movement speed for every elimination. This leads to a snowball effect with Genji. Once he receives one elimination with Dragonblade, it’ll make him more lethal and evasive. 

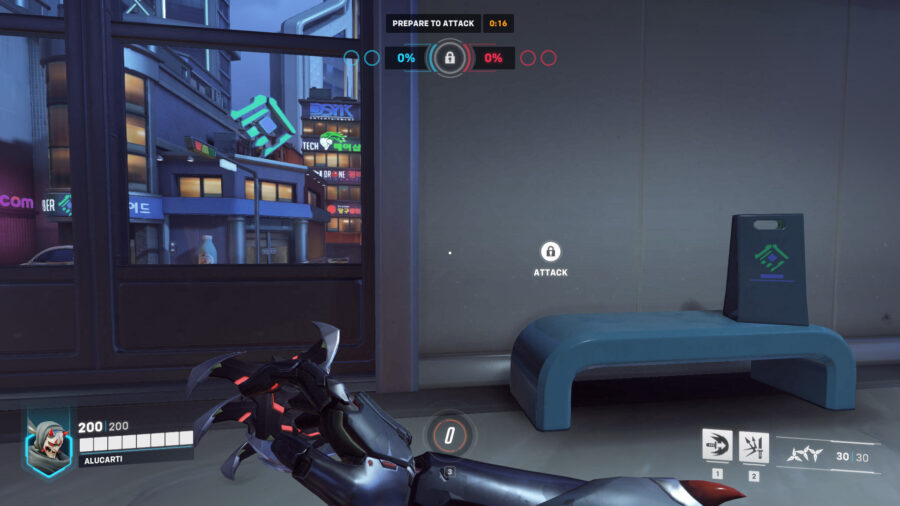
Sombra – Overwatch 2 Best DPS

Sombra is another excellent hero to dive with. The difference here is that Sombra doesn’t even need the rest of her team. Sombra, a deadly hacker, can become invisible, sneak past enemies and focus on any target she chooses. Her increased damage in Overwatch 2 means she’s more than capable of solo-killing most enemies. Any support character, and most damage heroes, can be eliminated within one clip of her machine pistol.

Even if Sombra cannot finish her target, her hacking ability will leave them vulnerable to a future takedown. Hacking an enemy will mean they cannot use their abilities for a short time, so an enemy Reinhardt won’t be able to shield his team for a few seconds. Hacked enemies can also be seen through walls by your entire team, making that foe a target for everyone. 

Sojourn

Sojourn might now be as sneaky or mobile as our two other S-tier heroes, but a Sojourn in the right hands can be the most dangerous opponent. Sojourn’s automatic railgun is already a menacing weapon with its long-range and high rate of fire. But this railgun also charges up to 100-points of energy that can be discharged into a single, powerful shot. The railgun’s secondary fire allows Sojourn to one-hit kill many heroes in the game if she lands a critical hit. If you’re faced with a hyper-accurate Sojourn, your chances of survival are slim.

Sojourn’s Ultimate, Overclock, turns her into a beast. This Ultimate auto-charges the railgun, allowing her to unleash brutal shots quickly. With her multi-use railgun, Sojourn is essentially a mix between Soldier: 76 and a sniper capable of instant kills. Unfortunately, she is definitely a prime candidate for nerfs in the coming season.

A Tier – Overwatch 2 Best DPS Heroes

Ashe, an A-tier Overwatch 2 DPS hero.

Tracer

Tracer is another brilliant dive hero. Her blinks allow Tracer to get behind enemies undetected, leaving them vulnerable to incoming damage. Tracer can also disappear with Recall, leaving her enemies disorientated and scrambling to find her. Tracer is a little similar to Sombra as she’s able to engage with enemies before swiftly disappearing. Tracer’s Pulse Bomb is another excellent Ultimate for a dive composition, as she can easily stick it onto an enemy support, leave the area, and guarantee 1-2 eliminations. 
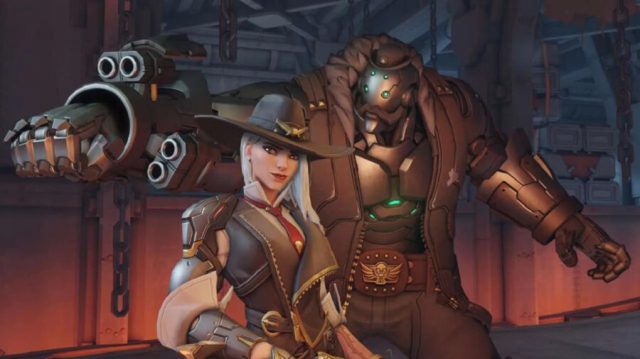
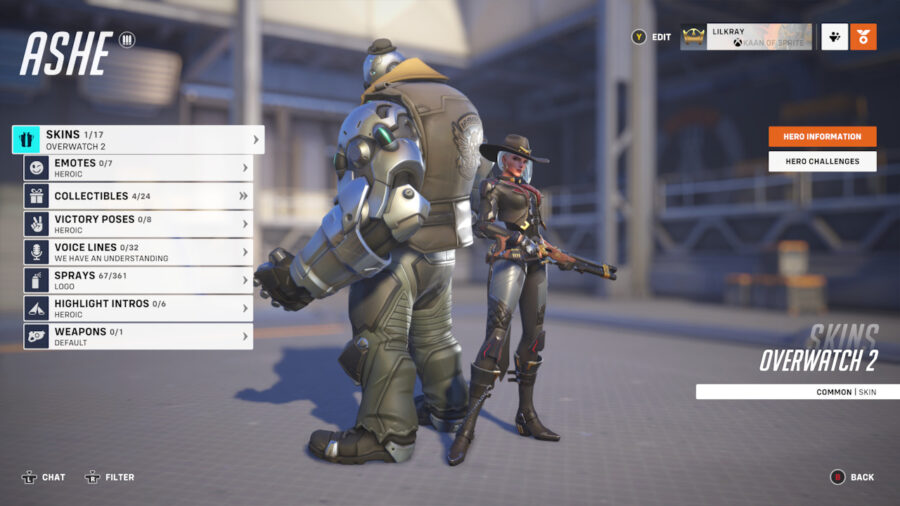
Ashe

Ashe pretty much replaces every precision hero in the roster, thanks to her high rate of fire. Most damage and support heroes will die within one or two headshots, so why would you pick Widowmaker or Hanzo? Ashe’s higher rate of fire and dynamite make her a better all-rounder, capable of dealing with enemies up close and far away. Not to mention Ashe’s Ultimate, B.O.B. Having an extra friend on the battlefield is more alluring in a 5v5 context, making B.O.B. one of Overwatch 2’s best Ultimates.

Soldier: 76

Soldier: 76 might be outclassed by Sojourn, but he’s still an A-tier hero in his own way. Firstly, he’s a great hero for first-time players since his moveset will be familiar to any shooter fans. Secondly, his toolkit makes him a self-sufficient character, which is more crucial in a 5v5 match. His ability to heal himself is more valuable now than ever, and the Soldier is still capable of dealing massive damage in any context.

Overwatch 2’s Best DPS: B Tier

Symmetra

Placing Symmetra at the top of B-tier might be controversial, but it’s true. The only reason she isn’t in A-tier is that Winston easily counters Symmetra. Otherwise, Symmetra is in a surprisingly good position right now. Symmetra’s strength mainly comes from how good she is against an enemy Genji or D.Va – who are both very popular. Her sneaky Sentry Turrets slow down evasive characters that thrive from diving, leaving them vulnerable to more damage. Symmetra’s increasingly powerful primary fire is also a great counter to Genji and D.Va’s defensive moves, as beams pass right through Deflect and Defense Matrix.  

Cassidy

Ashe has somewhat outshined Cassidy, but he’s still a capable hero in the right hands. An accurate shooter can finish enemy heroes with ease, and his Ultimate is still able to deliver triple kills. The lack of barriers in the meta is also a boon for Cassidy since headshots are more readily available. The only things holding Cassidy back are his lack of mobility and Ashe’s popularity.

Junkrat

Junkrat will always be a solid pick, thanks to his grenade launcher being a unique weapon in Overwatch. If the enemy team is congregating around an objective, you can be sure that Junkrat’s area-of-effect damage will scatter them. In a defensive context, Junkrat can block chokepoints with his grenades, mines, and traps. Junkrat isn’t an ideal damage hero for every scenario, but he excels when needed.

Reaper

We’ve come a long way from Reaper ripping up the meta, but he’s still a significant threat in the right hands. His restorative abilities make him very difficult to kill in 1v1 fights, and Reaper can take out most foes in a couple of shots at close range. The problem is that Reaper will struggle to get close to enemies in most contexts. However, if he manages to activate his Ultimate in the middle of an enemy, it’s a guaranteed multi-kill.

Echo

Echo has the potential to be a super useful D.P.S. hero, but the prevalence of Sojourn, Ashe, and D.Va makes it challenging to play as Echo effectively. If Mercy were in a better position in the meta, Echo would also be more appealing, since they’re both aerial heroes. Regardless, Echo is still a solid pick. Her Focusing Beam ability allows her to eliminate weakened enemies quickly, and her Ultimate can turn the tide of a team skirmish. She also has some of the best skins in Overwatch 2, though that’s not relevant here.

C Tier – Overwatch 2 DPS Heroes

Widowmaker/Hanzo

Widowmaker and Hanzo fulfill the same role as Overwatch 2’s premier snipers. Both can be crucial to matches in the right hands since they’re both capable of one-shot kills. However, both are too easily countered by a D.Va or a Sombra, who are both very strong right now. Furthermore, as snipers, neither of them are too effective at close range, which is critical when contesting objectives.

Mei

Mei is a little too niche to place higher than C-tier in Overwatch 2. She still excels in slowing down the enemy team and isolating individual targets, but she doesn’t do enough damage to keep up with other DPS heroes. Additionally, Mei’s Ultimate isn’t as lethal as it used to be. In a 6v6 context, Mei could be a great hero to slow down enemies for follow-up damage. However, in Overwatch 2, Mei is the one filling up a crucial damage slot; she just doesn’t deal enough damage in most cases.

Torbjorn 

Torbjorn is extremely situational since his stationary turret won’t fare well in game modes with a moving objective. But if you’re playing defense, Torbjorn can still provide massive damage and even get a few Play of the Games. Torbjorn’s turret can be a major distraction for enemies, and its automatic aiming makes it a threat to evasive enemies like Genji or Tracer. Torbjorn’s Molten Core will also make it difficult for enemies to capture objectives, as you’re essentially creating a deadzone for any diving foes.

Pharah

There was a time during the original Overwatch when Mercy/Pharah were in every single match, and they were killing it, literally. That was back when Overwatch still had 6v6 games – two of your allies could be airborne, and you’d be fine. The prevalence of Ashe and Sojourn makes this duo less appealing due to their long-range capabilities. In addition, this duo doesn’t contribute much to a dive composition.

Bastion

Note: Bastion is temporarily unavailable due to a bug with his Ultimate Ability.

Bastion is a hero that gets less effective in more competitive settings. His bulky stature makes him an easy target, and his low mobility doesn’t fit into the dive meta in Overwatch 2. Bastion would be a great pick if the meta were more barrier-focused, but Reinhardt has lost some of his shine since the switch to 5v5. Bastion is still capable of dealing insane amounts of damage; he’s just a bit too slow for this season of Overwatch.

Overwatch 2 Halloween Event: Dates, Skins, & PvE

Seasonal Events are returning to Overwatch 2 with the first being the annual Halloween Event, Junkenstein’s Revenge. This year’s iteration plans to introduce an entirely new event named Wrath of the Bride. Here is everything you need to know about Junkenstein’s Revenge: Wrath of the Bride.

What Are Seasonal Events in Overwatch 2?

Overwatch 2 seasonal content vision.

Seasonal Events, which were first introduced in the original Overwatch, are timed events usually themed around popular holidays or important dates for the Overwatch series. These events vary in their theme and their offerings, but always introduce new cosmetics to unlock and new game modes to participate in. As timed events, they only last for a couple of weeks; however, Blizzard usually announces these dates ahead of time, so players can clear their schedules to participate in these events.

Overwatch 2 Halloween Event: When Is Junkenstein’s Revenge?

Overwatch 2 Halloween event- Junkenstein's Revenge

Junkenstein’s Revenge: Wrath of the Bride will be available for a limited time from October 25th to November 8th. This is a surprisingly short event window when compared to previous events in the original Overwatch. Perhaps this hints at more events planned throughout the year, or just an overall shift to shorter events in Overwatch 2.

What Do We Know About Junkenstein’s Revenge 2022?

Overwatch 2 Halloween Event. Junkenstein's Revenge: Wrath of the Bride.

Junkenstein’s Revenge has been the Seasonal Halloween Event since 2016 in the original Overwatch. In this year’s iteration, Junkenstein’s Revenge: Wrath of the Bride, players can expect a 4-player co-op PvE event; however, beyond that details are sparse. 

It has been confirmed that Ashe, Junker Queen, Kiriko, and Sojourn will all be playable in the event. There have been Junkenstein’s Revenge events with only 4 playable heroes, while others allowed you to choose from a selection of 12 or more. Once again, we can only speculate if the 4 heroes mentioned above and shown in the teaser image are the only playable heroes for the event. 

All previous versions of Junkenstein’s Revenge have taken place in Eichenwalde. Based on the teaser image, this year seems to continue that pattern, showing our aforementioned heroes fighting zomincs inside Eichenwalde’s castle. 

Finally, it has been confirmed that the main antagonist of this year’s event will not actually be Junkenstein, a version of Junkrat created for the original Halloween event. Instead, our main villain will be Sombra decked out with a new Frankenstein’s Bride-inspired skin. Blizzard has stated that more details will be made available ahead of the event’s launch on October 25th.

What Overwatch 2 Halloween Event Skins Will Be Available?

New Halloween Kiriko Witch Skin.

As of the writing of this article, only two new skins have been confirmed. Those are a new legendary witch skin for Kiriko and Sombra’s new Frankenstein’s Bride inspired skin. But, it is very likely we will see new skins for Ashe, Junker Queen, and Sojourn as they are shown in the teaser image and many more for other heroes too.

A Definitive Guide to Move Priority in Rumbleverse

If you’ve played more than a couple of games of Rumbleverse, you’ve probably grown to despise the word “Priority” popping up on your screen, as it means someone just kicked your ass even though you’re pretty sure you got your attack out first. If you’re confused and frustrated about this happening, fear not! We here at Minus World and Hard Drive are ready to explain the beguiling mysteries of Rumbleverse move priority.

What is Move Priority?

When two moves in Rumbleverse collide, the game checks the level of “Priority” of both moves to determine which one hits. There are seven levels of move priority: Super, Power, Weapon, Special Strike, Normal Strike, Special Vicious, and Normal Vicious. A move of a higher priority will always defeat a move of a lower priority in a head-on collision. If two moves with the same priority collide, there will be a clash and both players will be knocked back without receiving any damage.

But knowing all of this isn’t very helpful unless you also know which kinds of moves fit into which category, something that isn’t explained particularly well in the game itself. Not to worry, we’ve got it covered:

Super

Super is the highest tier of move priority, and will override any other type of move in a head-on collision. There is currently only one Super move in the game, the “Super Vicious Attack” that you can perform when in Superstar Mode. If your opponent is in Superstar Mode and you see them glow red and try to grab you, dodging is your only defense.

Power

Power is the second-highest tier of move priority, and can only be overridden by a Super move. The only Power moves currently in the game are the Dropkick (performed by Striking while Dashing), the Backfist (performed by Striking after being knocked down), and the Uppercut, Bionic Uppercut and Omega Uppercut Skills that can be equipped during a match. Power moves can be identified by the blue aura they give off, although this can be hard to spot at times. As the main Power move that everybody has access to, you’re going to see a lot of Dropkick spamming. But don’t panic! Dropkicks can be blocked and your opponent will then be open for a counterattack.

Weapon – Rumbleverse Move Priority

Weapon is the third-highest tier of move priority and is pretty self-explanatory: it applies to any hit with an equipped weapon such as a Metal Bat, Stop Sign or Wooden Plank. Many players do not currently seem to respect the high priority of Weapon attacks, so it’s worth keeping a weapon or two in your pockets for when you want to catch someone off-guard.

Special Strike

Special Strike is the middle tier of move priority. It applies to any of the Skills you can equip during a game that “strike” the opponent and aren’t in the Power category, such as the Superkick, Cyclone and Punchline. These moves are high priority enough that newer Rumbleverse players will likely be unable to defend against a continuous onslaught of Special Strikes, but more experienced opponents will simply block or counter with Power and Weapon attacks.

Rumbleverse Move Priority – Normal Strike

Normal Strike is the third-lowest tier of move priority. It applies to the basic Strikes that every player has access to: Chops and Elbow Drops. If you see your opponent glow red for a Vicious Attack and they aren’t currently in Superstar mode, mashing out some Normal Strike attacks is genuinely one of the best defenses. 

Special Vicious

Special Vicious is the second-lowest tier of move priority. It applies to any of the Skills that you can equip during a game where you “grab” your opponent, such as the Tackle, Big Swing and Chokeslam. If you’re not entirely sure whether an attack is “Vicious” or not, look for the telltale red glow before the move hits. You may wonder why anyone would equip these Skills when Special Strikes have higher priority, but Vicious Attacks make up for this by being unblockable, as well as generally more powerful than their Striking brethren. 

Rumbleverse Move Priority: Normal Vicious

Normal Vicious is the lowest tier of move priority. It applies to the regular, charged, and wake-up Vicious Attacks that are part of your basic moveset. Like the Special Vicious attacks, these low priority moves are unblockable and generally more powerful than your Normal Strikes. Use them to punish newer players who won’t let go of the block button, or when sneaking up on someone from behind.

And there you have it! Now you have all the information you need to go out there and Pavlov some Rumbleverse newbies into hating the word “Priority” just as much as you once did. Now get out there and drive some piles!

Rumbleverse Best Moves: Basic Moveset Guide

Before you can become a great Rumbleverse player, you need to master the basics. Superkicks and Giant Swings may look pretty and do some great damage, but you can never be sure which Skill Magazines you’re going to come across each time you launch into Grapital City. However, your basic moveset will always be available to you. By mastering each of these moves and learning which situations they’re best suited for, you’ll be ready for anything, even if you find nothing but Volleyball Dive Magazines. This is what separates the jobbers from the main-eventers, folks.

Rumbleverse Best Moves – Standing Attacks

Your Basic Strike is a Chop that does a small amount of damage. Striking two additional times will perform a combo that does moderate damage and knocks down your opponent, leaving them open to a follow-up Elbow Drop. Your combo can also be altered by pressing Vicious as the second or third input. Strike, Vicious will perform a roundhouse kick that knocks your opponent away *without* knocking them down. This can be useful for aggressive players who don’t want to give their opponent the brief moment of (mostly) invulnerability that being knocked down provides. Strike, Strike, Vicious will perform an overhead axehandle that launches the opponent up and behind you. This can be devastating when performed near the water’s edge or on top of a building, and the very skilled may even be able to catch them in the air for a follow-up attack.

Your Basic Vicious Attack is an unblockable Suplex that does a moderate amount of damage and knocks down your opponent. If a player keeps blocking all your Chops, this will break through their guard and make them a little less certain of how to defend against you. Be warned: Basic Strikes will override Vicious Attacks due to their higher move priority, so Vicious Attacks should generally only be attempted when your opponent is guarding, in a recovery animation, or unaware of your presence entirely.

Performing a Vicious Attack while in Superstar Mode and it becomes a Super Vicious Attack: an unblockable and devastating move where you grab your opponent, toss them into the air and then give them a spinning piledriver into the ground. Unlike Basic Vicious Attacks, the Super Vicious Attack cannot be interrupted by Basic Strikes or indeed any other move in a head-on collision, so feel free to press that button as soon as another player is in range. Try landing on a car mid-Super Vicious Attack to bounce back up for extra height and damage!

Best Charged Attacks

Your charged Basic Strike is a strong Chop that stuns the recipient for a significant length of time. Newer players tend not to be aware of this move’s hit-stun, so you can catch them off-guard fairly easily, leaving them open to one of your more powerful Skills or your Super.

Your charged Vicious Attack is a powerful ground pound that does unblockable knockback in a wide area. In theory, this should be a great attack for dealing with multiple opponents at once. Unfortunately, the low move priority of Vicious Attacks make this fairly impractical in those situations. Our advice: forget this move exists.

Jumping Attacks (Rumbleverse Best Moves)

Rumbleverse best moves: Jumping Attacks

Your jumping Basic Strike is a diving Elbow Drop. This move does more damage and hits a wider area when performed from higher up, making it excellent for surprising a group of opponents who are busy fighting each other. You can get additional airtime (and thus, damage) on your elbow drop by landing on a bouncy surface – like a car or a parasol – before landing on your target. The elbow drop is also one of the only attacks in the entire game that can hit an opponent while they’re knocked down, and for this reason alone it is an incredibly valuable weapon in your arsenal.

Your jumping Vicious Attack is an unblockable Suplex, the same as when done standing. The only real use for this move is attempting to catch an opponent after they have been launched into the air, or smashed against a wall. Not a move you’ll likely be using all that often, but worth remembering for those moments.

Rumbleverse Best Moves: Dashing Attacks

Rumbleverse best dash attacks.

Your dashing Basic Strike is a running Dropkick. This does a moderate amount of damage but more importantly, has extremely high move priority. Your Dropkick will defeat almost any other move in a head-on collision. Naturally this is an excellent attack to use when approaching an opponent, and you may be tempted to simply spam this attack over and over again. However, it’s worth noting that when successfully blocked or avoided, this move leaves you very open to a counterattack. Spam at your own peril.

Your dashing Vicious Attack is an unblockable Irish Whip: you grab your opponent and can then throw them in any direction, causing them to run on your chosen path for a short while until tripping over and receiving mild damage. Not a particularly impressive move on its surface, but it can be much more devastating when used to throw an opponent off of a tall building, or into a wall to set up for a follow-up attack. Experienced players who see you dashing towards them will likely expect a Dropkick and block, so the Irish Whip can be a great way to catch them off-guard.

Best Defensive Options

Your two main defensive options are dodging and guarding. You are completely invincible during your dodge animation, however you are left vulnerable in the moment that the dodge ends. This makes the dodge ideal for avoiding Vicious Attacks and singular Striking moves like the Dropkick or Superkick, but not a great option for avoiding basic Strikes and multi-hitting Skills such as the Sumoslap or Cyclone. Dodging also uses Stamina, so be careful not to get Winded and leave yourself open to a Stamina Break. When engaging with multiple opponents at once, be sure not to accidentally dodge into another attack.

Guarding is your most solid defensive option, protecting you from all Striking attacks. After successfully guarding against a Strike combo or Skill, your opponent will usually be left open to a counterattack. You also recover your Stamina faster when guarding, so it’s worth doing any moment you have time to catch your breath. However be careful: if an opponent glows red, that means they’re about to do a Vicious Attack, which cannot be guarded against. If you see that red aura, dodge immediately. And while your Stamina does recharge faster while guarding, successfully blocking attacks will still reduce your Stamina. If your guard turns yellow, that means your Stamina is running low. Continue to block too many attacks and it will deplete to zero, resulting in a Stamina Break that will leave you defenseless.

There is a third defensive option that many newer players may not be aware of: the move cancel. By pressing dodge and guard simultaneously in the middle of certain moves, your wrestler will cancel their attack and dodge backwards. This has a number of valuable uses, for instance if you’re charging up an attack and see your opponent dashing towards you for a higher priority Dropkick, you can cancel your attack, avoid the Dropkick and then counter while your opponent is still recovering. Likewise, if you start a Strike combo and your opponent successfully guards your first Strike, you can cancel mid-combo to prevent being left vulnerable after your final Strike is blocked. This is a tool that does not currently seem to be utilized by most players, so take advantage of their ignorance while you can.

Wake-Up Moves – Rumbleverse Best Moves

Your wake-up Basic Strike is a Backfist that does a small amount of damage in the area around you and knocks opponents back. This Backfist has the same high priority as the Dropkick, making it a fairly safe choice for a wake-up attack (it can also catch relentless players trying to Elbow Drop you while you’re down). However, wary opponents will attempt to bait out the Backfist, dodge or block and then quickly counterattack.

Your wake-up Vicious Attack is an unblockable Low Blow that does a small amount of damage and stuns your opponent in a similar way to your Charged Strike. If an opponent is guarding in anticipation of the Backfist, the Low Blow is a great way to catch them off-guard and open them up to a vicious follow-up attack. The Low Blow has a fairly limited range however, so it should only be attempted when the opponent is very close by.

Your wake-up dodge is, well, a dodge. The safest option if you want to completely avoid the chance of being attacked again, you can even quickly follow with a regular dodge to put some extra distance between yourself and whoever knocked you down. Go with this if you’re feeling a little outmatched or overwhelmed and want to retreat.

Now you have a complete understanding of the best Rumbleverse moves available to you and every other player. With this knowledge you’ll now have a better concept of what your opponent may be trying to do, and how best to counter their plans. And you won’t need a Chokeslam or Diamond Crusher to do it!

Overwatch 2: How to Play Hanzo (Abilities, Skins, & Changes)

Hanzo has some family – he’s the heir to the Shimada crime dynasty, brother to Metal Gear Solid fanboy Genji and also grew up alongside one of Overwatch 2’s newest heroes, Kiriko. When it was time to assume the mantle of would-be crime boss, Hanzo was forced to kill Genji, and subsequently withdrew from the fulfilling career of racketeering and extortion, racked by guilt. 

Hanging up his sword for a bow, he’s been wondering the earth as a vagabond for years now, honing his murdering skills. And you can thank him for that, as he well and truly does shred with a bow. 

Let’s get into Hanzo’s abilities, how Hanzo changed for Overwatch 2, tips, and skins. 

Hanzo’s Abilities

Overwatch 2: Hanzo using his ultimate.

Storm Bow: Hanzo’s main weapon, which covers a good distance and hits for between 27.5 and 125, depending on how long you’ve drawn the arrow back and generated charge for. Max charge only takes about three-quarters of a second, so while this is practically no time at all, it does mean you have to be mindful not to just spam the fire button as you’ll be dealing less damage overall as a result – fully charged arrows also travel faster, so be sure to keep cool under pressure to deal it back. You can keep a drawn arrow ready for as long as you like too, allowing you to prep for a good shot or react as enemies approach you. You can also press reload or secondary fire to undraw a loaded arrow. 

Storm Arrows (Ability): Take five shots in rapid succession, travelling at the max speed the bow offers (110m/s) and hitting for 65 each. While the individual shots are a little weaker, their cumulative effect can be devastating if you land most or all of them, and is capable of taking down a fair number of Overwatch 2’s heroes even if they’re at full health. 

Sonic Arrow (Ability): Activating Sonic Arrow makes your next shot, whether from your primary fire or the Storm Arrows ability, carry a tracker that allows you to see enemies within a nine metre radius of where the shot lands for six seconds. If you hit an enemy, the radius follows their movements. It doesn’t affect the damage from your shot, and has a cooldown of 12 seconds. 

Lunge (Ability): Hanzo can double jump every five seconds, for a distance of just under eight metres. While it isn’t as nimble as Genji’s, it does allow you to change direction mid-jump, which can come in clutch dodging around something that takes you by surprise or misleading your opponents. 

Wall Climb (Passive): Surprisingly enough, this lets you scramble up walls for a vertical distance of four metres. 

Role: Damage (Passive): New for Overwatch 2, as a damage hero, Hanzo now gets a 25% reload and movement speed buff for two and a half seconds after each elimination. 

Dragonstrike (Ultimate): How To Train Your Dragon To Wreck Shit. Fire off an arrow that calls forth a pair of ghostly, swirling, blue spirit dragons that deal 150 damage per second each, over a radius of four metres, and with no maximum travel distance. The dragons pass through solid objects too, so no one in your line of fire is safe for the duration of this ult. 

How Has Hanzo Changed for Overwatch 2? 

Hanzo aiming in Overwatch 2

Players who main our favourite immaculately-groomed bow sniper will be pleased to hear that he hasn’t changed much between games, though there has been bit a slight nerf to his Storm Bow ability. These now hit for 65 each instead of 70, and while they may not seem like much, you’ll now need to land four arrows instead of three to hit for over 200, and take down heroes like Ana, Genji, or even an opposing Hanzo in one fell swoop. Tracer’s still getting done in by three, at least. 

Like all heroes, Hanzo also now has the added benefit of a new role-specific passive too, in the form of Role: Damage, buffing reload and movement speed by a quarter after each elimination. 

Hanzo Strategy

One of Overwatch 2’s handful of snipers, Hanzo is best placed at mid range or further, dealing damage out but keeping out of damage heroes range where possible. He’s particular well equipped to deal with the pesky Pharah that’s flying overhead too thanks to his range, damage output, and accuracy.

Make the most of Hanzo’s mobility by wall climbing and double-jumping your way up to vantage points that most heroes can’t reach, and get griefing while backing up your team. Sonic Arrow is also a great way to share any intel you get from your verticality, as you can effectively ping a group of enemies’ exact locations back to the rest of your squad if you land the arrow on a hero, and let your team chase them down. 

Equally, Sonic Arrow can reveal enemies’ locations to you if you get lucky with a hail mary shot in their vague direction, and you can pair this with Dragonstrike for a real bastard of a sneak attack. Remember too that Dragonstrike is perfect for area denial as well as racking up eliminations, so if you’re closing in on 100% on Control and the enemies are pushing, make it harder for them by blocking their entrance. 

The bow’s relative silence is also a real strength for Hanzo, as if you can’t track down enemies from your crow’s nest, you’re nimble enough to try and sneak in closer and do some damage without immediately alerting the rest of the team to your position. 

That said, if the opposition draws in a little too close, remember that Storm Arrows will do some serious damage if you land all of your shots – and that’s much easier to do in proximity. Treat it like a quick shotgun blast if you need to, and clear an opening to get back to safety on high.

Old Super-Hanzo does fall down somewhat against shields though, and lacks the range that Widowmaker’s hitscan sniper offers. But what he lacks here, he more than makes up for in overall versatility. 

Overwatch 2 Hanzo Skins

Overwatch 2 Hanzo's skins.

Currently, Hanzo has 20 skins in Overwatch 2. And one of which lets him trade in that trademark aesthetic for a considerably more laid-back vibe – Wave is all beach shorts, Crocs, and abs. Surf is most certainly up, dudes.

Name Information 
Overwatch 1 Common skin

Free, unlocked by default

Overwatch 2 Common skin

Free, unlocked by default

Okami Legendary skin

1,900 Overwatch Coins

Also available in the Watchpoint Pack

Kabuki Legendary skin

1,900 Overwatch Coins

Young Hanzo Legendary skin

1,900 Overwatch Coins

Young Master  Legendary skin

1,900 Overwatch Coins

Lone Wolf  Legendary skin

1,900 Overwatch Coins

Wave Legendary skin

1,900 Overwatch Coins

Seasonal

Dai-Tengu Legendary skin

1,900 Overwatch Coins

Seasonal

Casual Legendary skin

1,900 Overwatch Coins

Seasonal

Huang Zhong Legendary skin

1,900 Overwatch Coins

Seasonal

Scion Legendary skin

1,900 Overwatch Coins

Seasonal

Cyberninja  Legendary skin

1,900 Overwatch Coins

Seasonal

Cloud Epic skin

1,000 Overwatch Coins

Dragon Epic skin

1,000 Overwatch Coins

Demon  Epic skin

1,000 Overwatch Coins

Seasonal

Azuki Rare skin

300 Overwatch Coins

Kimono Rare skin

300 Overwatch Coins

Midori Rare skin

300 Overwatch Coins

Sora Rare skin

300 Overwatch Coins

Overwatch 2: How to Play Genji (Abilities, Skins & Changes)

The cybernetic ninja Genji is a strong character that players can pick in Overwatch 2. His kit comes with the tools needed for you to become a silent and mortal assassin. Genji is an agile character for those who want to jump into action and challenge enemy players to face Genji’s blade.

Genji’s Abilities

Genji is extremely dependent on his abilities, so knowing what they do, learning the different ways to use them, and tracking their cooldowns are vital to play this character well. 

To keep up with Genji’s theme of a cybernetic ninja, he throws shurikens as his basic attacks. With his Primary Fire, Genji throws three shurikens linearly, reaching farther enemies with ease. It is, however, harder to hit depending on the hitbox of the enemy. On the other hand, Genji’s Secondary Fire is a medium-range attack in which he throws three shurikens horizontally. In contrast with the first, the Secondary Fire is easier to hit.

Genji’s first ability is called Deflect and once activated, Genji is capable of protecting himself from projectiles and redirecting them to an enemy. Even though this is not an effective source of damage, this is the ability that will help you run from complicated situations or during fights. To complement Genji’s kit, the cybernetic ninja has a second ability called Swift Strike. With this skill, Genji dashes forward and damages any enemy in front of him. This is a strong ability that has a cooldown that resets whenever you eliminate an enemy character with it. Besides using it to fight, it’s also a quick way to escape from an attack or reach higher places.

 In terms of Passive Abilities, Genji comes with two of them. The first is the Role Passive Ability: Damage, which grants Genji a boost in his movement and reloading speed after eliminating an enemy. Damage is not that important considering the rest of Genji’s kit, but it can be helpful. On the other hand, his second Passive Ability called Cyber-Agility is what adds more value to his kit. Thanks to this ability, Genji can double jump and climb on walls which makes him incredibly agile, especially together with Swift Strike. 

Dragonblade is Genji’s ultimate, a powerful move that stays up for 6 seconds. During this time, Genji attacks with his sword, causing a lot of damage, while his movement speed is also boosted. This is an important ability in Genji’s kit, but also quite difficult to be used since Genji becomes too exposed during his attacks. Timing and communication with your team are the secrets to extracting the most out of Dragonblade. 

Overwatch 2 Genji Changes

All of Genji's Overwatch 2 changes.

Genji is the same character from the previous version of Overwatch. Nothing in his kit has been modified, so players who are already familiar with him will find the same hero in Overwatch 2. Here is the only change for Genji:

  • Genji now has the Passive Role Ability: Damage, which boosts his movement and reloading speed after an elimination.

Genji Strategy and Team Composition

A good Genji may change the whole scenario during a match. At the same time, without a good sense of what to do as a Genji, players may become quite useless to their teams. 

As a Genji, you usually want to fight directly against one enemy, looking for those who are a little separated from the rest of the team or being ignored by your teammates. Genji has the potential to overcome any duel with a combination of his Secondary Fire, Melee attack, and Swift Strike. For example, if you see a Widowmaker shooting freely at your team, you can go after her and since she is a squishy character, killing her won’t be a problem for you. 

While every character has a melee attack, players should get used to always follow-up a dash with Genji’s melee attack as part of the character’s combo. Besides that, it can be used to cancel animations which is helpful when playing Genji. 

However, try to always consider whether it’s worth it or not fully committing to a duel. In some situations, you don’t need to go for a kill. Only chasing the enemy character and making them useless against your team might be a better option instead of trying to solo-kill them and dying in the process. 

Another important habit you must have as a Genji is to take advantage of your double jump and capacity to climb walls. This makes you hard to hit and gives you a good potential to escape from enemies. Together with that, do not stop throwing your shuriken. Genji’s ultimate is by far his most powerful skill, so farming it with your normal attacks is extremely important. Take advantage of narrow spaces to throw your Primary Fire which can be quite effective in case you hit headshots. 

In terms of team composition, Genji works pretty well with a Dive team, usually paired with D.Va, Tracer, and Lucio. Supports like Zenyatta and Ana can work well with him since Genji doesn’t need a lot of healing. 

Overwatch 2 Genji Skin

All of Genji's Overwatch 2 skins.

Since Genji is a favorite of many Overwatch 2 players, the character has at his disposal many skins. Not all of them are available, mostly because some are tied to seasonal events or the battle pass. Here is the list of skins for Genji: 

  • Overwatch 1 – Automatically unlocked
  • Overwatch 2 – Automatically unlocked
  • Cyber Demon – Available in the Battle Pass

Rare (75 credits)

  • Azurite
  • Cinnabar
  • Malachite
  • Ochre

Epic (250 credits)

  • Carbon Fiber
  • Chrome
  • Contenders Away – Given as the prize of an event
  • Contenders Home – Given as the prize of an event
  • Nihon – Seasonal event

Legendary (1900 credits)

  • Baihu – Seasonal event
  • Bedouin
  • Blackwatch – Seasonal event
  • Bushi – Seasonal event
  • Demon – Seasonal event
  • Genjiman – Seasonal event
  • Ice Wraith – Seasonal event
  • Karasu-Tengu – Seasonal event
  • Kendo – Seasonal event
  • Nomad
  • Oni – Seasonal event
  • Sentai – Seasonal event
  • Sparrow
  • Young Genji

Now you can enjoy your matches as Genji in Overwatch 2.

NHL 23: Crossplay & Cross-Platform Breakdown

With days getting shorter and temperatures getting colder, you know exactly what time it is. Yes, it’s time to go back on the ice and throw that puck in the goal. Many fans have been eagerly awaiting this year’s iteration of the classic EA Hockey franchise, and consequently, many can’t help wondering about whether NHL 23 crossplay will finally be a thing or not.

Why is the feature so important for players? Well, first because being restricted to matchmaking only with people playing on our same console is definitely no fun. But, more importantly, this restriction means that future multiplayer games might require a long waiting time, as the player base gets less and less populated, while cross-platform means more populated servers for a longer time. 

Everything we know about cross-platform features will be below, as well as the gameplay trailer for the game.

Does NHL 23 Feature Crossplay and Cross-Platform Matchmaking?

NHL 23 features cross-platform matchmaking.

NHL 23 will feature full crossplay and cross-platform matchmaking, it is the first time the feature is present in the series. This was first announced in the game’s reveal trailer, and it was also confirmed in the official, and slightly nostalgic, launch trailer. NHL 23 is out on Xbox One, Xbox Series X, Xbox Series S, PlayStation 4, and PlayStation 5.

Crossplay means that, indeed, that players who own the game on any of the previously mentioned platforms are free to play with friends on any other console the game is available on. By this we don’t mean you’re restricted to friendly competition, you can definitely play with people you don’t know as well! This means that, when player numbers start to dwindle, we – hopefully! – won’t be stuck waiting minutes for a game.

With NHL 23 now being released, players are free to play with whoever they want regardless of their platform of choice. It’s time to grab those sticks and score those goals!