Overwatch 2 Halloween Event: Dates, Skins, & PvE

Seasonal Events are returning to Overwatch 2 with the first being the annual Halloween Event, Junkenstein’s Revenge. This year’s iteration plans to introduce an entirely new event named Wrath of the Bride. Here is everything you need to know about Junkenstein’s Revenge: Wrath of the Bride.

What Are Seasonal Events in Overwatch 2?

Overwatch 2 seasonal content vision.

Seasonal Events, which were first introduced in the original Overwatch, are timed events usually themed around popular holidays or important dates for the Overwatch series. These events vary in their theme and their offerings, but always introduce new cosmetics to unlock and new game modes to participate in. As timed events, they only last for a couple of weeks; however, Blizzard usually announces these dates ahead of time, so players can clear their schedules to participate in these events.

Overwatch 2 Halloween Event: When Is Junkenstein’s Revenge?

Overwatch 2 Halloween event- Junkenstein's Revenge

Junkenstein’s Revenge: Wrath of the Bride will be available for a limited time from October 25th to November 8th. This is a surprisingly short event window when compared to previous events in the original Overwatch. Perhaps this hints at more events planned throughout the year, or just an overall shift to shorter events in Overwatch 2.

What Do We Know About Junkenstein’s Revenge 2022?

Overwatch 2 Halloween Event. Junkenstein's Revenge: Wrath of the Bride.

Junkenstein’s Revenge has been the Seasonal Halloween Event since 2016 in the original Overwatch. In this year’s iteration, Junkenstein’s Revenge: Wrath of the Bride, players can expect a 4-player co-op PvE event; however, beyond that details are sparse. 

It has been confirmed that Ashe, Junker Queen, Kiriko, and Sojourn will all be playable in the event. There have been Junkenstein’s Revenge events with only 4 playable heroes, while others allowed you to choose from a selection of 12 or more. Once again, we can only speculate if the 4 heroes mentioned above and shown in the teaser image are the only playable heroes for the event. 

All previous versions of Junkenstein’s Revenge have taken place in Eichenwalde. Based on the teaser image, this year seems to continue that pattern, showing our aforementioned heroes fighting zomincs inside Eichenwalde’s castle. 

Finally, it has been confirmed that the main antagonist of this year’s event will not actually be Junkenstein, a version of Junkrat created for the original Halloween event. Instead, our main villain will be Sombra decked out with a new Frankenstein’s Bride-inspired skin. Blizzard has stated that more details will be made available ahead of the event’s launch on October 25th.

What Overwatch 2 Halloween Event Skins Will Be Available?

New Halloween Kiriko Witch Skin.

As of the writing of this article, only two new skins have been confirmed. Those are a new legendary witch skin for Kiriko and Sombra’s new Frankenstein’s Bride inspired skin. But, it is very likely we will see new skins for Ashe, Junker Queen, and Sojourn as they are shown in the teaser image and many more for other heroes too.

A Definitive Guide to Move Priority in Rumbleverse

If you’ve played more than a couple of games of Rumbleverse, you’ve probably grown to despise the word “Priority” popping up on your screen, as it means someone just kicked your ass even though you’re pretty sure you got your attack out first. If you’re confused and frustrated about this happening, fear not! We here at Minus World and Hard Drive are ready to explain the beguiling mysteries of Rumbleverse move priority.

What is Move Priority?

When two moves in Rumbleverse collide, the game checks the level of “Priority” of both moves to determine which one hits. There are seven levels of move priority: Super, Power, Weapon, Special Strike, Normal Strike, Special Vicious, and Normal Vicious. A move of a higher priority will always defeat a move of a lower priority in a head-on collision. If two moves with the same priority collide, there will be a clash and both players will be knocked back without receiving any damage.

But knowing all of this isn’t very helpful unless you also know which kinds of moves fit into which category, something that isn’t explained particularly well in the game itself. Not to worry, we’ve got it covered:

Super

Super is the highest tier of move priority, and will override any other type of move in a head-on collision. There is currently only one Super move in the game, the “Super Vicious Attack” that you can perform when in Superstar Mode. If your opponent is in Superstar Mode and you see them glow red and try to grab you, dodging is your only defense.

Power

Power is the second-highest tier of move priority, and can only be overridden by a Super move. The only Power moves currently in the game are the Dropkick (performed by Striking while Dashing), the Backfist (performed by Striking after being knocked down), and the Uppercut, Bionic Uppercut and Omega Uppercut Skills that can be equipped during a match. Power moves can be identified by the blue aura they give off, although this can be hard to spot at times. As the main Power move that everybody has access to, you’re going to see a lot of Dropkick spamming. But don’t panic! Dropkicks can be blocked and your opponent will then be open for a counterattack.

Weapon – Rumbleverse Move Priority

Weapon is the third-highest tier of move priority and is pretty self-explanatory: it applies to any hit with an equipped weapon such as a Metal Bat, Stop Sign or Wooden Plank. Many players do not currently seem to respect the high priority of Weapon attacks, so it’s worth keeping a weapon or two in your pockets for when you want to catch someone off-guard.

Special Strike

Special Strike is the middle tier of move priority. It applies to any of the Skills you can equip during a game that “strike” the opponent and aren’t in the Power category, such as the Superkick, Cyclone and Punchline. These moves are high priority enough that newer Rumbleverse players will likely be unable to defend against a continuous onslaught of Special Strikes, but more experienced opponents will simply block or counter with Power and Weapon attacks.

Rumbleverse Move Priority – Normal Strike

Normal Strike is the third-lowest tier of move priority. It applies to the basic Strikes that every player has access to: Chops and Elbow Drops. If you see your opponent glow red for a Vicious Attack and they aren’t currently in Superstar mode, mashing out some Normal Strike attacks is genuinely one of the best defenses. 

Special Vicious

Special Vicious is the second-lowest tier of move priority. It applies to any of the Skills that you can equip during a game where you “grab” your opponent, such as the Tackle, Big Swing and Chokeslam. If you’re not entirely sure whether an attack is “Vicious” or not, look for the telltale red glow before the move hits. You may wonder why anyone would equip these Skills when Special Strikes have higher priority, but Vicious Attacks make up for this by being unblockable, as well as generally more powerful than their Striking brethren. 

Rumbleverse Move Priority: Normal Vicious

Normal Vicious is the lowest tier of move priority. It applies to the regular, charged, and wake-up Vicious Attacks that are part of your basic moveset. Like the Special Vicious attacks, these low priority moves are unblockable and generally more powerful than your Normal Strikes. Use them to punish newer players who won’t let go of the block button, or when sneaking up on someone from behind.

And there you have it! Now you have all the information you need to go out there and Pavlov some Rumbleverse newbies into hating the word “Priority” just as much as you once did. Now get out there and drive some piles!

Rumbleverse Best Moves: Basic Moveset Guide

Before you can become a great Rumbleverse player, you need to master the basics. Superkicks and Giant Swings may look pretty and do some great damage, but you can never be sure which Skill Magazines you’re going to come across each time you launch into Grapital City. However, your basic moveset will always be available to you. By mastering each of these moves and learning which situations they’re best suited for, you’ll be ready for anything, even if you find nothing but Volleyball Dive Magazines. This is what separates the jobbers from the main-eventers, folks.

Rumbleverse Best Moves – Standing Attacks

Your Basic Strike is a Chop that does a small amount of damage. Striking two additional times will perform a combo that does moderate damage and knocks down your opponent, leaving them open to a follow-up Elbow Drop. Your combo can also be altered by pressing Vicious as the second or third input. Strike, Vicious will perform a roundhouse kick that knocks your opponent away *without* knocking them down. This can be useful for aggressive players who don’t want to give their opponent the brief moment of (mostly) invulnerability that being knocked down provides. Strike, Strike, Vicious will perform an overhead axehandle that launches the opponent up and behind you. This can be devastating when performed near the water’s edge or on top of a building, and the very skilled may even be able to catch them in the air for a follow-up attack.

Your Basic Vicious Attack is an unblockable Suplex that does a moderate amount of damage and knocks down your opponent. If a player keeps blocking all your Chops, this will break through their guard and make them a little less certain of how to defend against you. Be warned: Basic Strikes will override Vicious Attacks due to their higher move priority, so Vicious Attacks should generally only be attempted when your opponent is guarding, in a recovery animation, or unaware of your presence entirely.

Performing a Vicious Attack while in Superstar Mode and it becomes a Super Vicious Attack: an unblockable and devastating move where you grab your opponent, toss them into the air and then give them a spinning piledriver into the ground. Unlike Basic Vicious Attacks, the Super Vicious Attack cannot be interrupted by Basic Strikes or indeed any other move in a head-on collision, so feel free to press that button as soon as another player is in range. Try landing on a car mid-Super Vicious Attack to bounce back up for extra height and damage!

Best Charged Attacks

Your charged Basic Strike is a strong Chop that stuns the recipient for a significant length of time. Newer players tend not to be aware of this move’s hit-stun, so you can catch them off-guard fairly easily, leaving them open to one of your more powerful Skills or your Super.

Your charged Vicious Attack is a powerful ground pound that does unblockable knockback in a wide area. In theory, this should be a great attack for dealing with multiple opponents at once. Unfortunately, the low move priority of Vicious Attacks make this fairly impractical in those situations. Our advice: forget this move exists.

Jumping Attacks (Rumbleverse Best Moves)

Rumbleverse best moves: Jumping Attacks

Your jumping Basic Strike is a diving Elbow Drop. This move does more damage and hits a wider area when performed from higher up, making it excellent for surprising a group of opponents who are busy fighting each other. You can get additional airtime (and thus, damage) on your elbow drop by landing on a bouncy surface – like a car or a parasol – before landing on your target. The elbow drop is also one of the only attacks in the entire game that can hit an opponent while they’re knocked down, and for this reason alone it is an incredibly valuable weapon in your arsenal.

Your jumping Vicious Attack is an unblockable Suplex, the same as when done standing. The only real use for this move is attempting to catch an opponent after they have been launched into the air, or smashed against a wall. Not a move you’ll likely be using all that often, but worth remembering for those moments.

Rumbleverse Best Moves: Dashing Attacks

Rumbleverse best dash attacks.

Your dashing Basic Strike is a running Dropkick. This does a moderate amount of damage but more importantly, has extremely high move priority. Your Dropkick will defeat almost any other move in a head-on collision. Naturally this is an excellent attack to use when approaching an opponent, and you may be tempted to simply spam this attack over and over again. However, it’s worth noting that when successfully blocked or avoided, this move leaves you very open to a counterattack. Spam at your own peril.

Your dashing Vicious Attack is an unblockable Irish Whip: you grab your opponent and can then throw them in any direction, causing them to run on your chosen path for a short while until tripping over and receiving mild damage. Not a particularly impressive move on its surface, but it can be much more devastating when used to throw an opponent off of a tall building, or into a wall to set up for a follow-up attack. Experienced players who see you dashing towards them will likely expect a Dropkick and block, so the Irish Whip can be a great way to catch them off-guard.

Best Defensive Options

Your two main defensive options are dodging and guarding. You are completely invincible during your dodge animation, however you are left vulnerable in the moment that the dodge ends. This makes the dodge ideal for avoiding Vicious Attacks and singular Striking moves like the Dropkick or Superkick, but not a great option for avoiding basic Strikes and multi-hitting Skills such as the Sumoslap or Cyclone. Dodging also uses Stamina, so be careful not to get Winded and leave yourself open to a Stamina Break. When engaging with multiple opponents at once, be sure not to accidentally dodge into another attack.

Guarding is your most solid defensive option, protecting you from all Striking attacks. After successfully guarding against a Strike combo or Skill, your opponent will usually be left open to a counterattack. You also recover your Stamina faster when guarding, so it’s worth doing any moment you have time to catch your breath. However be careful: if an opponent glows red, that means they’re about to do a Vicious Attack, which cannot be guarded against. If you see that red aura, dodge immediately. And while your Stamina does recharge faster while guarding, successfully blocking attacks will still reduce your Stamina. If your guard turns yellow, that means your Stamina is running low. Continue to block too many attacks and it will deplete to zero, resulting in a Stamina Break that will leave you defenseless.

There is a third defensive option that many newer players may not be aware of: the move cancel. By pressing dodge and guard simultaneously in the middle of certain moves, your wrestler will cancel their attack and dodge backwards. This has a number of valuable uses, for instance if you’re charging up an attack and see your opponent dashing towards you for a higher priority Dropkick, you can cancel your attack, avoid the Dropkick and then counter while your opponent is still recovering. Likewise, if you start a Strike combo and your opponent successfully guards your first Strike, you can cancel mid-combo to prevent being left vulnerable after your final Strike is blocked. This is a tool that does not currently seem to be utilized by most players, so take advantage of their ignorance while you can.

Wake-Up Moves – Rumbleverse Best Moves

Your wake-up Basic Strike is a Backfist that does a small amount of damage in the area around you and knocks opponents back. This Backfist has the same high priority as the Dropkick, making it a fairly safe choice for a wake-up attack (it can also catch relentless players trying to Elbow Drop you while you’re down). However, wary opponents will attempt to bait out the Backfist, dodge or block and then quickly counterattack.

Your wake-up Vicious Attack is an unblockable Low Blow that does a small amount of damage and stuns your opponent in a similar way to your Charged Strike. If an opponent is guarding in anticipation of the Backfist, the Low Blow is a great way to catch them off-guard and open them up to a vicious follow-up attack. The Low Blow has a fairly limited range however, so it should only be attempted when the opponent is very close by.

Your wake-up dodge is, well, a dodge. The safest option if you want to completely avoid the chance of being attacked again, you can even quickly follow with a regular dodge to put some extra distance between yourself and whoever knocked you down. Go with this if you’re feeling a little outmatched or overwhelmed and want to retreat.

Now you have a complete understanding of the best Rumbleverse moves available to you and every other player. With this knowledge you’ll now have a better concept of what your opponent may be trying to do, and how best to counter their plans. And you won’t need a Chokeslam or Diamond Crusher to do it!

Overwatch 2: How to Play Hanzo (Abilities, Skins, & Changes)

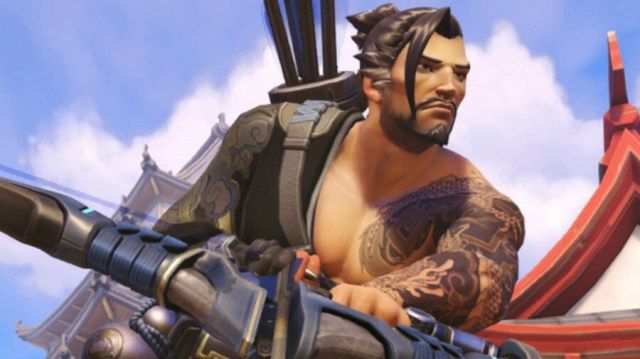
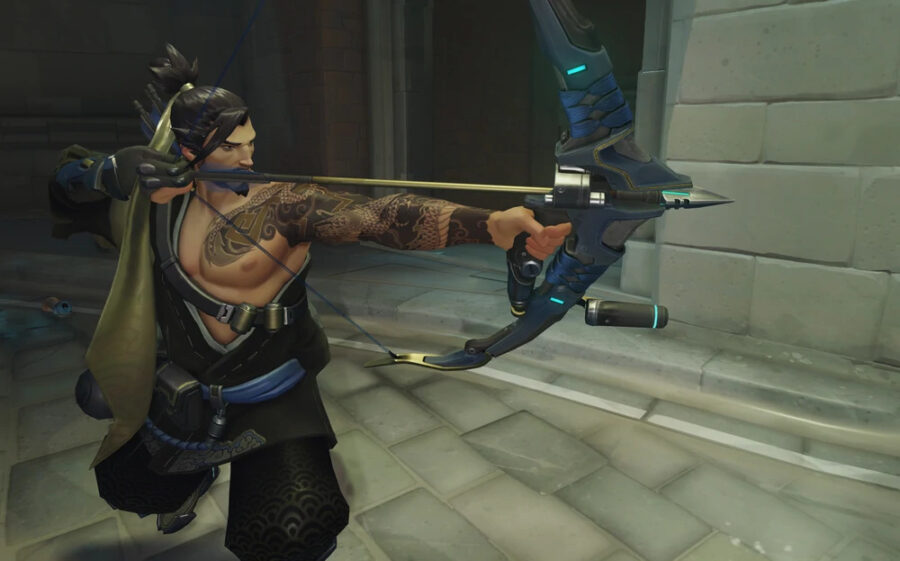
Hanzo has some family – he’s the heir to the Shimada crime dynasty, brother to Metal Gear Solid fanboy Genji and also grew up alongside one of Overwatch 2’s newest heroes, Kiriko. When it was time to assume the mantle of would-be crime boss, Hanzo was forced to kill Genji, and subsequently withdrew from the fulfilling career of racketeering and extortion, racked by guilt. 

Hanging up his sword for a bow, he’s been wondering the earth as a vagabond for years now, honing his murdering skills. And you can thank him for that, as he well and truly does shred with a bow. 

Let’s get into Hanzo’s abilities, how Hanzo changed for Overwatch 2, tips, and skins. 

Hanzo’s Abilities

Overwatch 2: Hanzo using his ultimate.

Storm Bow: Hanzo’s main weapon, which covers a good distance and hits for between 27.5 and 125, depending on how long you’ve drawn the arrow back and generated charge for. Max charge only takes about three-quarters of a second, so while this is practically no time at all, it does mean you have to be mindful not to just spam the fire button as you’ll be dealing less damage overall as a result – fully charged arrows also travel faster, so be sure to keep cool under pressure to deal it back. You can keep a drawn arrow ready for as long as you like too, allowing you to prep for a good shot or react as enemies approach you. You can also press reload or secondary fire to undraw a loaded arrow. 

Storm Arrows (Ability): Take five shots in rapid succession, travelling at the max speed the bow offers (110m/s) and hitting for 65 each. While the individual shots are a little weaker, their cumulative effect can be devastating if you land most or all of them, and is capable of taking down a fair number of Overwatch 2’s heroes even if they’re at full health. 

Sonic Arrow (Ability): Activating Sonic Arrow makes your next shot, whether from your primary fire or the Storm Arrows ability, carry a tracker that allows you to see enemies within a nine metre radius of where the shot lands for six seconds. If you hit an enemy, the radius follows their movements. It doesn’t affect the damage from your shot, and has a cooldown of 12 seconds. 

Lunge (Ability): Hanzo can double jump every five seconds, for a distance of just under eight metres. While it isn’t as nimble as Genji’s, it does allow you to change direction mid-jump, which can come in clutch dodging around something that takes you by surprise or misleading your opponents. 

Wall Climb (Passive): Surprisingly enough, this lets you scramble up walls for a vertical distance of four metres. 

Role: Damage (Passive): New for Overwatch 2, as a damage hero, Hanzo now gets a 25% reload and movement speed buff for two and a half seconds after each elimination. 

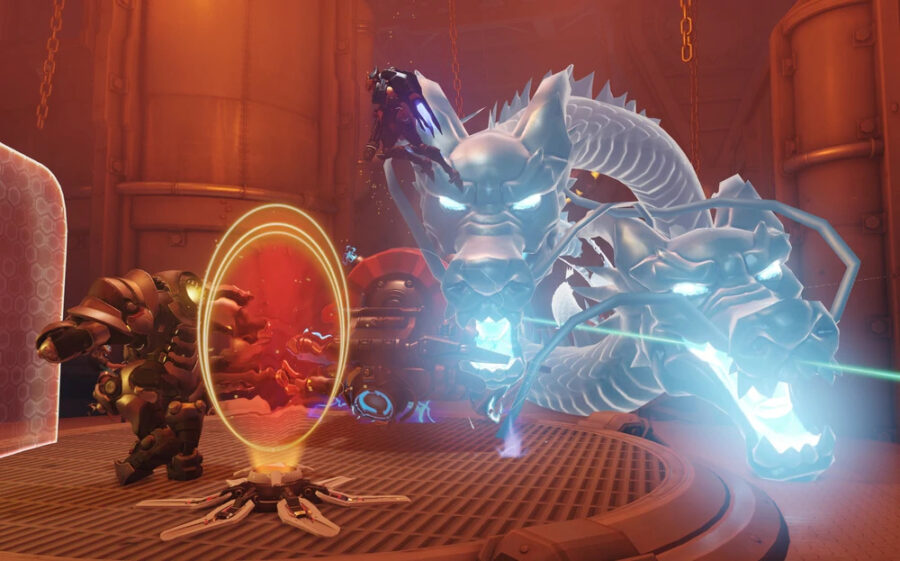
Dragonstrike (Ultimate): How To Train Your Dragon To Wreck Shit. Fire off an arrow that calls forth a pair of ghostly, swirling, blue spirit dragons that deal 150 damage per second each, over a radius of four metres, and with no maximum travel distance. The dragons pass through solid objects too, so no one in your line of fire is safe for the duration of this ult. 

How Has Hanzo Changed for Overwatch 2? 

Hanzo aiming in Overwatch 2

Players who main our favourite immaculately-groomed bow sniper will be pleased to hear that he hasn’t changed much between games, though there has been bit a slight nerf to his Storm Bow ability. These now hit for 65 each instead of 70, and while they may not seem like much, you’ll now need to land four arrows instead of three to hit for over 200, and take down heroes like Ana, Genji, or even an opposing Hanzo in one fell swoop. Tracer’s still getting done in by three, at least. 

Like all heroes, Hanzo also now has the added benefit of a new role-specific passive too, in the form of Role: Damage, buffing reload and movement speed by a quarter after each elimination. 

Hanzo Strategy

One of Overwatch 2’s handful of snipers, Hanzo is best placed at mid range or further, dealing damage out but keeping out of damage heroes range where possible. He’s particular well equipped to deal with the pesky Pharah that’s flying overhead too thanks to his range, damage output, and accuracy.

Make the most of Hanzo’s mobility by wall climbing and double-jumping your way up to vantage points that most heroes can’t reach, and get griefing while backing up your team. Sonic Arrow is also a great way to share any intel you get from your verticality, as you can effectively ping a group of enemies’ exact locations back to the rest of your squad if you land the arrow on a hero, and let your team chase them down. 

Equally, Sonic Arrow can reveal enemies’ locations to you if you get lucky with a hail mary shot in their vague direction, and you can pair this with Dragonstrike for a real bastard of a sneak attack. Remember too that Dragonstrike is perfect for area denial as well as racking up eliminations, so if you’re closing in on 100% on Control and the enemies are pushing, make it harder for them by blocking their entrance. 

The bow’s relative silence is also a real strength for Hanzo, as if you can’t track down enemies from your crow’s nest, you’re nimble enough to try and sneak in closer and do some damage without immediately alerting the rest of the team to your position. 

That said, if the opposition draws in a little too close, remember that Storm Arrows will do some serious damage if you land all of your shots – and that’s much easier to do in proximity. Treat it like a quick shotgun blast if you need to, and clear an opening to get back to safety on high.

Old Super-Hanzo does fall down somewhat against shields though, and lacks the range that Widowmaker’s hitscan sniper offers. But what he lacks here, he more than makes up for in overall versatility. 

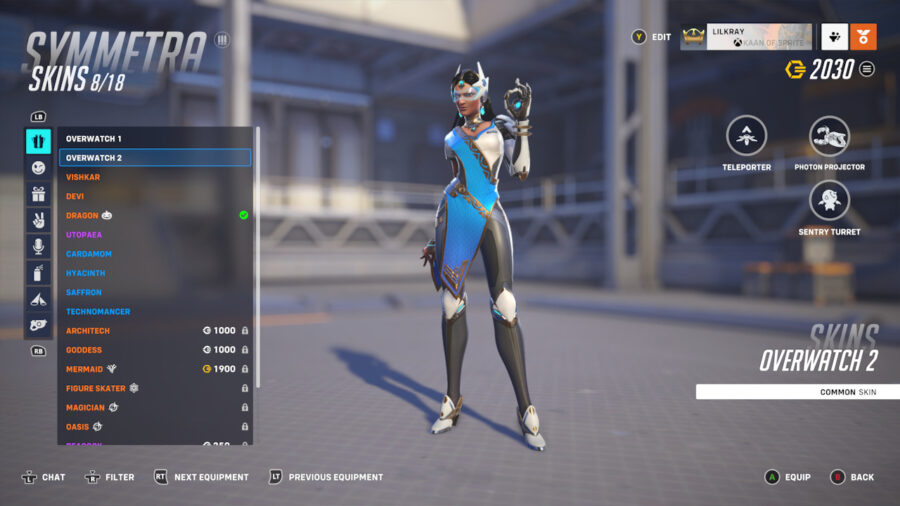
Overwatch 2 Hanzo Skins

Overwatch 2 Hanzo's skins.

Currently, Hanzo has 20 skins in Overwatch 2. And one of which lets him trade in that trademark aesthetic for a considerably more laid-back vibe – Wave is all beach shorts, Crocs, and abs. Surf is most certainly up, dudes.

Name Information 
Overwatch 1 Common skin

Free, unlocked by default

Overwatch 2 Common skin

Free, unlocked by default

Okami Legendary skin

1,900 Overwatch Coins

Also available in the Watchpoint Pack

Kabuki Legendary skin

1,900 Overwatch Coins

Young Hanzo Legendary skin

1,900 Overwatch Coins

Young Master  Legendary skin

1,900 Overwatch Coins

Lone Wolf  Legendary skin

1,900 Overwatch Coins

Wave Legendary skin

1,900 Overwatch Coins

Seasonal

Dai-Tengu Legendary skin

1,900 Overwatch Coins

Seasonal

Casual Legendary skin

1,900 Overwatch Coins

Seasonal

Huang Zhong Legendary skin

1,900 Overwatch Coins

Seasonal

Scion Legendary skin

1,900 Overwatch Coins

Seasonal

Cyberninja  Legendary skin

1,900 Overwatch Coins

Seasonal

Cloud Epic skin

1,000 Overwatch Coins

Dragon Epic skin

1,000 Overwatch Coins

Demon  Epic skin

1,000 Overwatch Coins

Seasonal

Azuki Rare skin

300 Overwatch Coins

Kimono Rare skin

300 Overwatch Coins

Midori Rare skin

300 Overwatch Coins

Sora Rare skin

300 Overwatch Coins

Overwatch 2: How to Play Genji (Abilities, Skins & Changes)

The cybernetic ninja Genji is a strong character that players can pick in Overwatch 2. His kit comes with the tools needed for you to become a silent and mortal assassin. Genji is an agile character for those who want to jump into action and challenge enemy players to face Genji’s blade.

Genji’s Abilities

Genji is extremely dependent on his abilities, so knowing what they do, learning the different ways to use them, and tracking their cooldowns are vital to play this character well. 

To keep up with Genji’s theme of a cybernetic ninja, he throws shurikens as his basic attacks. With his Primary Fire, Genji throws three shurikens linearly, reaching farther enemies with ease. It is, however, harder to hit depending on the hitbox of the enemy. On the other hand, Genji’s Secondary Fire is a medium-range attack in which he throws three shurikens horizontally. In contrast with the first, the Secondary Fire is easier to hit.

Genji’s first ability is called Deflect and once activated, Genji is capable of protecting himself from projectiles and redirecting them to an enemy. Even though this is not an effective source of damage, this is the ability that will help you run from complicated situations or during fights. To complement Genji’s kit, the cybernetic ninja has a second ability called Swift Strike. With this skill, Genji dashes forward and damages any enemy in front of him. This is a strong ability that has a cooldown that resets whenever you eliminate an enemy character with it. Besides using it to fight, it’s also a quick way to escape from an attack or reach higher places.

 In terms of Passive Abilities, Genji comes with two of them. The first is the Role Passive Ability: Damage, which grants Genji a boost in his movement and reloading speed after eliminating an enemy. Damage is not that important considering the rest of Genji’s kit, but it can be helpful. On the other hand, his second Passive Ability called Cyber-Agility is what adds more value to his kit. Thanks to this ability, Genji can double jump and climb on walls which makes him incredibly agile, especially together with Swift Strike. 

Dragonblade is Genji’s ultimate, a powerful move that stays up for 6 seconds. During this time, Genji attacks with his sword, causing a lot of damage, while his movement speed is also boosted. This is an important ability in Genji’s kit, but also quite difficult to be used since Genji becomes too exposed during his attacks. Timing and communication with your team are the secrets to extracting the most out of Dragonblade. 

Overwatch 2 Genji Changes

All of Genji's Overwatch 2 changes.

Genji is the same character from the previous version of Overwatch. Nothing in his kit has been modified, so players who are already familiar with him will find the same hero in Overwatch 2. Here is the only change for Genji:

  • Genji now has the Passive Role Ability: Damage, which boosts his movement and reloading speed after an elimination.

Genji Strategy and Team Composition

A good Genji may change the whole scenario during a match. At the same time, without a good sense of what to do as a Genji, players may become quite useless to their teams. 

As a Genji, you usually want to fight directly against one enemy, looking for those who are a little separated from the rest of the team or being ignored by your teammates. Genji has the potential to overcome any duel with a combination of his Secondary Fire, Melee attack, and Swift Strike. For example, if you see a Widowmaker shooting freely at your team, you can go after her and since she is a squishy character, killing her won’t be a problem for you. 

While every character has a melee attack, players should get used to always follow-up a dash with Genji’s melee attack as part of the character’s combo. Besides that, it can be used to cancel animations which is helpful when playing Genji. 

However, try to always consider whether it’s worth it or not fully committing to a duel. In some situations, you don’t need to go for a kill. Only chasing the enemy character and making them useless against your team might be a better option instead of trying to solo-kill them and dying in the process. 

Another important habit you must have as a Genji is to take advantage of your double jump and capacity to climb walls. This makes you hard to hit and gives you a good potential to escape from enemies. Together with that, do not stop throwing your shuriken. Genji’s ultimate is by far his most powerful skill, so farming it with your normal attacks is extremely important. Take advantage of narrow spaces to throw your Primary Fire which can be quite effective in case you hit headshots. 

In terms of team composition, Genji works pretty well with a Dive team, usually paired with D.Va, Tracer, and Lucio. Supports like Zenyatta and Ana can work well with him since Genji doesn’t need a lot of healing. 

Overwatch 2 Genji Skin

All of Genji's Overwatch 2 skins.

Since Genji is a favorite of many Overwatch 2 players, the character has at his disposal many skins. Not all of them are available, mostly because some are tied to seasonal events or the battle pass. Here is the list of skins for Genji: 

  • Overwatch 1 – Automatically unlocked
  • Overwatch 2 – Automatically unlocked
  • Cyber Demon – Available in the Battle Pass

Rare (75 credits)

  • Azurite
  • Cinnabar
  • Malachite
  • Ochre

Epic (250 credits)

  • Carbon Fiber
  • Chrome
  • Contenders Away – Given as the prize of an event
  • Contenders Home – Given as the prize of an event
  • Nihon – Seasonal event

Legendary (1900 credits)

  • Baihu – Seasonal event
  • Bedouin
  • Blackwatch – Seasonal event
  • Bushi – Seasonal event
  • Demon – Seasonal event
  • Genjiman – Seasonal event
  • Ice Wraith – Seasonal event
  • Karasu-Tengu – Seasonal event
  • Kendo – Seasonal event
  • Nomad
  • Oni – Seasonal event
  • Sentai – Seasonal event
  • Sparrow
  • Young Genji

Now you can enjoy your matches as Genji in Overwatch 2.

NHL 23: Crossplay & Cross-Platform Breakdown

With days getting shorter and temperatures getting colder, you know exactly what time it is. Yes, it’s time to go back on the ice and throw that puck in the goal. Many fans have been eagerly awaiting this year’s iteration of the classic EA Hockey franchise, and consequently, many can’t help wondering about whether NHL 23 crossplay will finally be a thing or not.

Why is the feature so important for players? Well, first because being restricted to matchmaking only with people playing on our same console is definitely no fun. But, more importantly, this restriction means that future multiplayer games might require a long waiting time, as the player base gets less and less populated, while cross-platform means more populated servers for a longer time. 

Everything we know about cross-platform features will be below, as well as the gameplay trailer for the game.

Does NHL 23 Feature Crossplay and Cross-Platform Matchmaking?

NHL 23 features cross-platform matchmaking.

NHL 23 will feature full crossplay and cross-platform matchmaking, it is the first time the feature is present in the series. This was first announced in the game’s reveal trailer, and it was also confirmed in the official, and slightly nostalgic, launch trailer. NHL 23 is out on Xbox One, Xbox Series X, Xbox Series S, PlayStation 4, and PlayStation 5.

Crossplay means that, indeed, that players who own the game on any of the previously mentioned platforms are free to play with friends on any other console the game is available on. By this we don’t mean you’re restricted to friendly competition, you can definitely play with people you don’t know as well! This means that, when player numbers start to dwindle, we – hopefully! – won’t be stuck waiting minutes for a game.

With NHL 23 now being released, players are free to play with whoever they want regardless of their platform of choice. It’s time to grab those sticks and score those goals!

MultiVersus Stripe Guide: Best Moves, Strategies, Perks

Stripe, the horrible Gremlin from the similarly-named movie, has just hatched his way into MultiVersus. He’s a fast, deadly Assassin-type character with a bunch of tricks to punish his chosen target. His general playstyle is straightforward rushdown, but the best Stripe players will be those who can use his moves creatively to torment the opposition. For a little help on causing the most havoc, here’s our MultiVersus Stripe guide.

MultiVersus Stripe Guide – Basic Attacks

For the first section of the MultiVersus Stripe guide, I’ll review his normal attacks. These are usually basic claw swipes, but there are some important exceptions. Almost all of Stripe’s physical attacks apply a Targeted debuff (shown above) to enemies that lasts a couple seconds. It allows him to follow-up with his gun, which will be explained in the special attack section.

  • Neutral Ground Attack: A chargeable buzzsaw throw. When it’s thrown, it crawls along the floor, including up or down walls. That makes it ideal for harassing players trying to recover with wall jumps. Throw one at a wall-hanging enemy, then intercept them when they jump away for an easy down-air dunk. It’s a fast, reliable projectile, but it’s limited by a cooldown and an ammo count of 3. Throw it out before moving into close range to start fights at an advantage. This is also Stripe’s only dedicated teamplay move. Hitting an ally with your buzzsaw makes it circle around them as a mobile hitbox. That could mess up your throws, but is mainly a good thing since it makes them a lot harder to avoid.
  • Side Ground Attack: Stripe’s ground combo has three parts. The first is two quick forward swipes. The second looks and feels like Wolverine’s Berserker Barrage: an advancing series of claw swipes. The third, Stripe leans forward and takes a big bite. This string is quick, and it covers a wide area in front of him. It’s easy to cancel between steps, and doesn’t leave him as vulnerable as other characters’ melee strings. It’s great to land whenever possible, doing good damage and easily transitioning into other attacks and specials (such as gun).
  • Up Ground Attack: Stripe does a handstand and kicks at the air. Its reach is a lot shorter than his side ground string, but you can substitute any of the side attack steps for this, then follow up with up special twice (and end with gun). It can’t be charged: unlike many characters, Stripe has very few charged melee attacks. That’s okay: it’s often not worth holding still to charge an attack.
  • Down Ground Attack: Stripe places a radio at his feet, then jumps backward a short distance while shooting it with a crossbow. The radio explodes, and the blast knocks enemies directly upward. This unnecessarily complex attack has very poor range, but Stripe’s backstep makes it useful for punishing enemies who are trying to rush you. It’s a projectile that also applies Targeted, so you can chain it into an air combo (or just use gun).
  • Neutral Air Attack: This is the chargeable buzzsaw again, but it behaves differently in the air. Stripe can aim up and down while charging, and his throw will travel through the air for a while before sticking to the ground and crawling along like normal. An airborne saw will bounce off struck targets. Stripe can actually attack a bounced-back airborne buzzsaw with his physical strikes, bouncing it back again and marking it with Targeted. He can then shoot the double bounced-back airborne buzzsaw to send it in even stranger directions. This could be used for some frightening ricochet action. Getting everything to aim correctly will take some effort, but Stripe has enough buzzsaws in reserve for it to be worth throwing them out often to see what they can do.
  • Side Air Attack: A quick forward swipe. This one’s chargeable, and makes a good approach option, as well as a useful combo tool (along with gun).
  • Up Air Attack: A chargeable, upwards bite. Harder to land than Stripe’s upward special, but doesn’t consume his air recovery.
  • Down Air Attack: Stripe swipes downward. It’s a standard dunk on offstage opponents (and can lead into gun). It also has good kill potential onstage (especially followed by gun).

MultiVersus Stripe Guide – Special Attacks

In this section of the MultiVersus Stripe guide, I’ll cover Stripe’s special attacks. They’re straightforward, most of them being attacks using different tools (such as a gun).

  • Neutral Special: This is Stripe’s signature ability: he channels the mystical power of the Mogwai and shoots his enemy with a gun. On its own, the attack is poor: it’s very short-range for a gun and has little knockback. But if an enemy is Targeted, the gun will automatically hit them at any range! That means Stripe can end ANY combo with a free extra attack. He even gets three shots! The best possible use of the gun is to seal the deal: any physical strike that almost pushes an enemy offscreen can lead into a final nudge with the gun. The three shots have a cooldown, but a bigger limiting factor is attack decay. If you use gun after every attack, it’ll decay quickly, and then it won’t have the little knockback it needs to secure kills when it counts. Managing the status of this attack will be essential in performing well as Stripe. I suspect it will be nerfed quickly.
  • Side Ground Special: A rush-style attack in which Stripe rides a skateboard into the enemy. It’s chargeable before releasing, which extends its range and power. It also includes a follow-up with a second press: Stripe will hop off the board and kick it upward. The hitboxes on this attack are somewhat strange. While it’s charging, Stripe will begin to roll forward, but this isn’t part of the attack. Stripe can accidentally roll forward into enemy attacks if he’s too close when he starts charging. The flipped board has an odd timing as well. Starting the flip makes Stripe cancel his skateboard charge, and then the flipped board hits the area a little ahead of him. It’s a decent attack (and it can chain into gun), but it’s best to understand its properties before using it.
  • Side Air Special: Instead of a skateboard, Stripe produces an entire chainsaw and lunges forward through the air! It has good horizontal movement, but it also falls quickly, so it won’t help with recovery if you’re already too low. Once the move begins, Stripe’s path through the air is fixed. Proper use of the attack means understanding where it will end up. One way to alter its path is to fastfall while the move is starting, which can surprise enemies on the ground. It’s slow, but powerful if you can catch your target, locking them into a chain of hits and ending with big knockback (and a chance for gun).
  • Up Special: An upward leap. It’s a poor recovery move, but a great follow-up to Stripe’s ground and air attacks. It also has a special property: it destroys enemy projectiles, even the big ones like Bugs’ rocket. When on the ground, it can be used twice in a row and chains into itself, but that consumes both of Stripe’s recovery specials. In the air, it can be angled to hit targets a little out of reach (and it can always lead into gun). There’s an oddity with this move: its description says it can latch onto enemies, but that doesn’t happen. It’s unclear whether the description is wrong, or if the move itself is broken.
  • Down Special: On the first use, Stripe takes out a bundle of dynamite. On the second, instead of throwing it, he bites into it, exploding himself. He takes six damage from the burn, but briefly becomes a fast-moving, hard-hitting projectile. It’s a risky setup, and not just because of the damage: Stripe drops the dynamite if he takes a hit, making the move useless (and then anyone can pick up the dynamite). But the move hits hard enough to be worth trying. Just having the dynamite in hand might spook an enemy you’re approaching. Don’t wait too long, though. It’ll explode on its own after a few seconds. Even that has a use, though: the automatic explosion counts as triggering the move normally. Let it fire on its own to cap off a long physical combo (plus gun as needed). It also has recovery applications if you don’t fastfall accidentally while using it.

How to Win Team Battles as Stripe

stripe win tricycle

For this section of the MultiVersus Stripe guide, I’ll explain some basic team strategies. Stripe is a simple guy: he hits and shoots. He can do a lot of damage very quickly, but he’s light and has poor recovery; typical Assassin qualities. He doesn’t have much teamplay besides his circling saws and his ability to move quickly to help his ally. Stripe’s job is to get kills.

A good teammate for Stripe is a Tank with low kill power that can take damage in Stripe’s place and get in the enemy’s face with saws, like Superman or Iron Giant. Another option would be a character who can augment Stripe’s poor defense, like Steven with his shields or even Velma with her bouncing projectiles. The best of all may be Wonder Woman, a frontline tank who can also provide armor.

How to Win 1v1 Battles as Stripe

Assassins are naturals at 1v1, and Stripe is no exception. He’s fast and deadly, and his gun can be extremely frustrating for everybody. His basic gameplan is to poke with buzzsaws while looking for an opening with side air attack. Once he’s in, he can tear up the enemy with his claw strings.

Although Stripe is quick, he’s punished hard if he puts a foot wrong thanks to his poor recovery. For this reason, it’s a good idea to mix riskier, stranger moves into his fighting to make the enemy nervous. His down ground trap makes a quick response for aggressive enemies, and his side air chainsaw makes a deadly counter against foes who think you’re in a vulnerable midair position – as long as your aim is right.

Best Perks For Stripe

multiversus stripe perks

For the last section of the MultiVersus Stripe Guide, here’s some info about his signature perks.

  • Boom, Boom, Bounce! (Level 8): This causes a second dynamite explosion if the first one knocks Stripe into the wall or floor. It’s a straightforward upgrade, but it applies to Stripe’s riskiest attack, and only when angled downward. It doesn’t benefit straight forward blasts, or midair interceptions. This could make the attack more reliable from certain angles, but takes some forethought.
  • He’s The Leader (Level 10): This lets Stripe leap off of his teammate’s projectiles as he can his enemies’, and gain a buff. This is the most potent Signature if you’re on a coordinated team thanks to the speed boost, but too difficult to take advantage of otherwise. It’s easier with teammates with large, slow projectiles.
  • Feeding After Midnight (Level 12): This extends the length of debuffs on Stripe, in exchange for letting him pass them onto enemies with his up special. (Its description says it requires Stripe to grab on, but there is no grab. Fortunately a regular up special hit triggers the effect.) The potential here is pretty interesting. For example, it applies to the self-inflicted burn damage from his dynamite, allowing Stripe to potentially end a dynamite attack with a lunge to give the self-damage to his target! This may be valuable against enemies that rely on debuffs, like Taz’s Hungry or Batman’s Weaken. The duration self-penalty, though, makes it a risky gambit.

Boom, Boom, Bounce! is the easiest Signature Perk to use in most situations.

For secondary perks, you may think to buff Stripe’s projectiles. An ice debuff from each gunshot using Ice To Beat You sounds good, right? Wrong. Stripe’s gun doesn’t benefit from projectile debuff perks. Only his saws and radio trap apply debuffs from Ice To Beat You and That’s Flammable, Doc. They’re still worth considering since Stripe has a lot of saws, but shouldn’t be a priority.

Instead, consider perks that strengthen Stripe’s weak recovery. Triple Jump is obvious, but Fancy Footwork (extended dodge distance) can both help Stripe avoid attacks and use his dodges for better recovery. Add I Dodge You Dodge We Dodge onto that for cooldown reduction, since Stripe’s best tools (gun, saw, dynamite) all have cooldown. That should make a solid all-around setup.

Overwatch 2: How to Play Tracer (Abilities, Skins & Changes)

Tracer is probably one of Overwatch 2’s most-known characters. Her speed and ability to get back in time are what make her so unique. On the other hand, she is not the easiest character to master and be effective with right after only a couple of matches. But, once you learn how to play as Tracer in Overwatch 2, you’ll become extremely powerful, disturbing the backline of the enemy team, and killing them so fast that they won’t even know what has hit them. 

Overwatch 2: Tracer’s Abilities

The concept behind Tracer is speed. Her whole kit is all about attacking, reaching enemies, or fleeing from their attacks as quickly as possible. Her skills are not difficult to understand, but applying them effectively during matches is pretty hard.

Her Primary Fire is a short-range attack with her Pulse Pistols which holds up to 40 rounds at a time. These pistols are pretty fast, so you’ll need to get used to Tracer’s reloading time after a few shots. Tracer’s Primary Fire is only deadly when it gets the enemy by surprise delivering a killing sequence of headshots. However, you can still farm some kills against squishy characters with it or meltdown the enemy tank’s health bar. 

Tracer’s abilities are her signature and to some extent the core of her kit. Without them, her Primary Fire nor her Ultimate would be as strong as they can be with their help.

The first skill is called Blink and she has three charges of it. Each charge has a cooldown of around three seconds. Using this ability you teleport to the direction you are moving to. Even in a situation in which you are walking facing the opposite side, Blink teleports you to the direction you are walking to. During the time of teleportation, Tracer becomes invulnerable.   

Tracer using her Pulse Bomb in Overwatch 2.

Together with Blink, Tracer has Recall as her second ability which has a cooldown of 12 seconds. Once used, it will take you back in time, getting back to the place you were a few seconds before with the exact amount of health you had at that time. Keep in mind where you were before using it, otherwise, you might find yourself in the middle of the enemy team.

As a damage character, she comes with the Damage passive ability. Because of it, every elimination you execute will grant you a boost in movement and reload speed. It’s a great addition to Tracer’s kit considering how many times you end up reloading her weapons during a fight. 

Tracer’s Ultimate is called Pulse Bomb and it’s one of the most difficult abilities to use correctly. The Pulse Bomb explodes after some seconds. It can be thrown on the ground or to an enemy on whom it will stick. Placing it on the right enemy character can be deadly. At the same time, it’s pretty common to just miss the target when you are still learning and hit no one with it.  

Overwatch 2 Tracer Changes

In general, Tracer has received a few minor changes that maybe only players who spent thousands of hours into this character will notice.

  • Tracer’s Pulse Pistols had their damage output reduced by 1 point.
  • She now has the Role Passive Ability Damage. 

Overwatch 2 Tracer Strategy and Team Composition

While mastering Tracer is not easy, mostly because of her Ultimate ability and positioning, she is an extremely useful character. The first thing you must have in mind when playing as Tracer is her ability Blink. This is a great skill, but you must learn when to use it. There are situations in which sneaking behind an enemy character is a better option than using Blink, which can be heard, giving your enemy the time to respond to your attack. 

A second important habit you must have when playing as Tracer is to keep one charge of Blink available. Most of the time, you will use Blinks to engage the enemy and avoid their attacks. However, if you spent all your Blinks, you won’t have a way out of any nasty situation you may find yourself in. 

Playing as Tracer is all about flanking the enemy team and trying to adapt in terms of priority. You can find space to attack the healers in the backline which can call the attention of the tank, disrupting the team’s defense.  You can also just have the role of annoying the enemies while protecting the flanks of your own team. Because of these possibilities, knowing the map is always helpful when playing Tracer.

The most difficult aspect of playing Tracer is using her ultimate effectively. Consider always blinking to place your Pulse Bomb, since you need to get really near to the target. Placing it on the ground among the team enemy may be an option, but the best way to use it is by sticking it to someone. Keep in mind that, for example, you can blink, place the Pulse Bomb, and then use Recall to get back to a safe spot. 

In terms of team composition, Tracer works pretty well in many situations. She is usually a key character for dive teams. However, whenever you see your team with a solid frontline, you can pick Tracer and try to create opportunities for your team to attack a point. Tracer works pretty well with a team that has D.Va as the tank for example or Winston. Lucio and Zenyatta are also great options to pair with Tracer.

Overwatch 2 Tracer Skins

All of Tracer's Overwatch 2 skins.

As one of the most iconic characters in Overwatch 2, Tracer has at her disposal a considerable number of different skins. Keep in mind that some of them are only available for purchase during specific events. 

  • Overwatch 1 – Automatically unlocked
  • Overwatch 2 – Automatically unlocked

Rare (75 credits)

  • Electric Purple
  • Hot Pink
  • Neon Green
  • Royal Blue

Epic (250 credits)

  • Lightning – Seasonal event
  • Posh
  • Rose – Seasonal event
  • Sporty

Legendary (1900 credits)

  • Cadet Oxton – Seasonal event
  • Cavalry – Seasonal event
  • Graffiti – Seasonal event
  • Hong Gildong – Seasonal event
  • Jingle – Seasonal event
  • Mach T
  • Nezha – Seasonal event
  • Punk
  • Sprinter – Seasonal event
  • Slipstream – Unlocked to those who purchased Overwatch: Origins, Game of the Year, or Legendary Editions.
  • Tagged – Seasonal event
  • T.Racer
  • Tagged – Seasonal event
  • Track and Field – Seasonal event
  • Ultraviolet 
  • Will-o’-Wisp – Seasonal event

This is all you need to know to begin your journey as Tracer in Overwatch 2!

Overwatch 2: How to Unlock All OW2 Player Titles (February 2023)

Overwatch 2 is filled with cosmetics to earn (and buy), including items for your career profile. A new addition to the career profile customization is Player Titles. These unique Titles appear with your username on your career profile and player card once unlocked and equipped, showing off your dedication, or denoting a specific accomplishment. Here is how you can earn Player Titles.

How to Unlock Overwatch 2 Player Titles

At launch, there are 25 Player Titles available to unlock in Overwatch 2. Player Titles are broken up into categories, at launch there are Overwatch, Competitive, and Battle Pass Player Titles. The majority of them are rewarded for completing challenges; however, some are unlocked by other means. And, undoubtedly more will be added to the game in future updates, like the upcoming Junkenstein’s Revenge Event. Sadly, the Player Titles tab under career profile customization doesn’t specify how to unlock each Title, but for those tied to challenges, you can view the Challenges tab to find out. Each Challenge that rewards a Player Title will be marked with a T in the bottom right corner of the Challenge card. Hovering over the Challenge card will reveal what Title is awarded for completion. 

How to Unlock Overwatch & Competitive Player Titles

A list of Overwatch 2 player titles.

Below is a list of all the unlockable Overwatch and Competitive Player Titles and unlock conditions:

Overwatch Player Titles

Stalwart Hero Lifetime Challenge – Stalwart Hero: Win 250 games in any mode
Tenacious Hero Lifetime Challenge – Tenacious Hero: Win 750 games in any mode
Unrelenting Hero Lifetime Challenge – Unrelenting Hero: Win 1,750 games in any mode
Partygoer Lifetime Challenge – Partygoer: Win 500 games in any Arcade mode, excluding Deathmatch
Executioner Lifetime Challenge – Executioner: Win 500 games in any Deathmatch mode
Shapeshifter Lifetime Challenge – Shapeshifter: Win 500 games in Mystery Heroes
Assassin Lifetime Challenge – Assassin: Win 250 games as any Damage Hero in Quick play or Competitive
All-Star Lifetime Challenge – All-Star: Win 85 games in each of the three roles in Quick play or Competitive
Medic Lifetime Challenge – Medic: Win 250 games as any Support Hero in Quick Play or Competitive
Vanguard Lifetime Challenge – Vanguard: Win 250 games as any Tank Hero in Quick Play or Competitive


Competitive Player Titles

Adept Competitor Competitive Challenge – Adept Competitor: Win 250 games in any Competitive mode.
Seasoned Competitor Competitive Challenge – Seasoned Competitor: Win 750 games in any Competitive mode.
Expert Competitor Competitive Challenge – Expert Competitor: Win 1,750 games in any Competitive mode.
Diamond Challenger Competitive Challenge – Season 1 End Diamond: End the season ranked as Diamond in Competitive Play
Master Challenger Competitive Challenge – Season 1 End Master: End the season ranked as Master in Competitive Play
Grandmaster Challenger Competitive Challenge – Season 1 End Grandmaster: End the season ranked as Grandmaster in Competitive Play
Top 500 Challenger Competitive Challenge – Season 1 End Top 500: End the season ranked as Top 500 in Competitive Play

How to Unlock Season One Battle Pass Player Titles

Overwatch 2's battle pass titles.

At first glance, Season One’s Battle Pass has 80 tiers to complete; however, that is actually false. The Season One Battle Pass has a staggering 200 tiers to complete. After finishing tier 80, a ninth page is unlocked. This page rewards Battle Pass Player Titles for completing additional tiers after tier 80. Completing all 200 tiers will take an additional 1.2 million Battle Pass XP after the grind to tier 80.

Below is a list of all the unlockable Season One Battle Pass Player Titles and unlock conditions:

Season One Battle Pass Player Titles

Nomad Complete Season One Battle Pass tier 85
Neogun Complete Season One Battle Pass tier 95
Streetrunner Complete Season One Battle Pass tier 105
Bytefixer Complete Season One Battle Pass tier 120
Netbreaker Complete Season One Battle Pass tier 135
Data Broker Complete Season One Battle Pass tier 155
Technoknight Complete Season One Battle Pass tier 175
Cyberdemon Complete Season One Battle Pass tier 200

Overwatch 2: How to Unlock Season 2 Player Titles

How to unlock the Overwatch 2 Season 2 titles.

At first glance, Season Two’s Battle Pass has 80 tiers to complete; however, that is actually false. The Season Two Battle Pass has a staggering 200 tiers to complete. After finishing tier 80, a ninth page is unlocked. This page rewards Battle Pass Player Titles for completing additional tiers after tier 80. Completing all 200 tiers will take an additional 1.2 million Battle Pass XP after the grind to tier 80.

Below is a list of all the unlockable Season Two Battle Pass Player Titles and unlock conditions:

Season Two Battle Pass Player Titles
Mortal Complete Season Two Battle Pass tier 85
Philosopher Complete Season Two Battle Pass tier 95
Argonaut Complete Season Two Battle Pass tier 105
Gorgon Complete Season Two Battle Pass tier 120
Daimon Complete Season Two Battle Pass tier 135
Demigod Complete Season Two Battle Pass tier 155
Olympian Complete Season Two Battle Pass tier 175
Titan Complete Season Two Battle Pass tier 200

How to Unlock Battle For Olympus Player Titles

How to unlock Overwatch 2 Battle for Olympus player titles.

The Battle For Olympus is a limited time mode with the first iteration beginning on January 5th, 2023. All of the available Player Titles are unlocked in the Battle For Olympus Arcade Game mode.

Below is a list of all the unlockable Battle For Olympus Player Titles and unlock conditions:

Battle For Olympus Player Titles
Zeus’s Favorite Child Event Challenge – Earn 300 final blows as Zeus Junker Queen
Pride of Poseidon Event Challenge – Earn 300 final blows as Poseidon Ramattra
Sentinel of Hades Event Challenge – Earn 300 final blows as Hades Pharah
Herald of Hermes Event Challenge – Earn 300 final blows as Hermes Lucio
Master of Minotaurs Event Challenge – Earn 300 final blows as Minotaur Reinhardt
Acolyte of Medusa Event Challenge – Earn 300 final blows as Medusa Widowmaker
Scion of Cyclops Event Challenge – Earn 300 final blows as Cyclops Roadhog

Overwatch 2 – All New Season 3 Player Titles

All of the new Overwatch 2 Season 3 Player Titles.

At first glance, Season Three’s Battle Pass has 80 tiers to complete; however, that is actually false. The Season Two Battle Pass has a staggering 200 tiers to complete. After finishing tier 80, a ninth page is unlocked. This page rewards Battle Pass Player Titles for completing additional tiers after tier 80. Completing all 200 tiers will take an additional 1.2 million Battle Pass XP after the grind to tier 80.

Below is a list of all the unlockable Season Three Battle Pass Player Titles and unlock conditions:

Season Three Battle Pass Player Titles
Peasant Complete Season One Battle Pass tier 85
Trickster Complete Season One Battle Pass tier 95
Disciple Complete Season One Battle Pass tier 105
Noble Complete Season One Battle Pass tier 120
Scholar Complete Season One Battle Pass tier 135
Sage Complete Season One Battle Pass tier 155
Fearsome Spirit Complete Season One Battle Pass tier 175
Legendary Beast Complete Season One Battle Pass tier 200

Overwatch 2: How to Play Symmetra (Abilities, Skins, & Changes)

Symmetra has been a playable hero in Overwatch since the beginning; originally a defense hero, Symmetra is now a damage-based hero in Overwatch 2. Symmetra can be challenging to use for inexperienced players since she has very specific uses and can’t be effective in every game mode. Regardless, Symmetra’s light-bending weapon makes her one of the most distinctive characters in Overwatch.

Overwatch 2 Symmetra Guide – Weapons & Stats

Symmetra has 100 health points and 125 shield – for a total health pool of 225. Her shields will recharge after not taking damage for a few seconds, making her more self-sufficient than some other damage heroes.

Photon Projector (Primary Fire)

Symmetra’s primary fire (RT/R2 on a gamepad) shoots a straight-lined beam that deals more damage the longer it hits an enemy. At first, this beam will deal 60 damage per second. After hitting an enemy, enemy turret, or enemy shield for 1.33 seconds, the beam will deal 120 damage per second. After another 1.33 seconds, the beam will deal 180 damage per second. If you fail to hit anything for a few seconds, the beam will return to dealing 60 damage per second.

Unlike the weapon’s previous iterations in Overwatch, this beam is more precise and doesn’t attach to enemies. This beam fires in a straight line and has a close-medium range use. The beam completely ignores D.Va’s defense matrix. 

Photon Projector (Secondary Fire)

The Photon Projector’s secondary fire (LT/L2) charges up a round projectile that can deal up to 90 damage once fully charged. A fully charged shot will consume 10 ammo. 

Symmetra’s projectiles have a faster firing rate than her previous iterations and move through the air faster. This change makes it possible to spam many smaller energy balls at enemies. In addition, the projectiles can pass through enemy barriers, like a Reinhardt shield, and damage enemies behind it.

Neither the primary nor secondary fire deals critical damage for headshots.

Overwatch 2 Symmetra Guide – Abilities

Sentry Turret

Symmetra has access to three mini turrets that can be stuck onto any surface and deal 40 damage per second each. These mini turrets are stationary and have only 30 health points, making them easy to take down. The turret’s fire beams ignore D.Va’s defense matrix, and these beams reduce every enemy’s movement speeds. 

Once Symmetra deploys a turret, it’ll travel through the air as a projectile, meaning it can be destroyed before activation. Since these turrets travel through the air, Symmetra can deploy them from the other side of the map. The cooldown to cast one Sentry Turret is 10 seconds.

Teleporter

Symmetra’s second ability allows her to create two teleportation devices that allies can travel between. One teleporter will deploy in front of her; the other will deploy wherever Symmetra is aiming, as long as it’s within a 30-meter radius. 

The teleporter will be open for 10.5 seconds, and the ability has a cooldown of 12 seconds. Enemies can destroy the teleportation pods as they have a health pool of 200. 

You can transport more than just allies through these teleporters. As Symmetra, you can deploy sentry turrets through the pods. D. Va and Junkrat can also throw their Ultimate Abilities through the teleporters, giving the enemy team a nasty surprise. 

Symmetra can also use a teleporter to escape Zarya’s Graviton Surge.

Overwatch 2 Guide Symmetra – Passive Abilities 

Symmetra using her teleporter in Overwatch 2.

Role: Damage

Symmetra only has one passive ability, and it’s the same as every other damage hero in Overwatch 2. Role: Damage boosts your movement and reload speed whenever you eliminate an enemy.

Overwatch 2 Guide Symmetra – Ultimate Ability: Photon Barrier

Symmetra using her ultimate, Photon Barrier, in Overwatch 2.

Symmetra’s Ultimate Ability allows her to deploy a massive energy barrier that cuts across the entire map. It acts as a shielded wall for your team that can take 4000 damage points and lasts 12 seconds. Allies can still shoot through the barrier, including Symmetra’s primary and secondary fire. 

Photon Barrier is best used to block an incoming enemy Ultimate. Symmetra’s Photon Barrier can nullify Ultimate Abilities from an enemy Pharah, Soldier 76, or Roadhog.  

Photon Barriers can also be helpful when you’re defending in an Escort match. Place the barrier in front of the moving payload, and you can contest the objective without receiving damage.

Photon Barrier has an ultimate cost of 1680. Ultimate charge is generated through damage, so Symmetra can deal 1680 damage to charge her Ultimate. All characters also generate ultimate charge automatically. At 1680, Symmetra’s Ultimate Ability costs relatively little, so don’t save Photon Barrier for too long, as it’ll charge quickly.

Overwatch 2 Symmetra Changes

Symmetra has changed drastically from her debut in the first Overwatch, but her changes in Overwatch 2 are a little more reserved. None of her abilities have been replaced or changed significantly; Symmetra has instead received a host of smaller, positive changes. 

  • The Photon Projector’s total ammunition has increased from 60 to 100.
  • Symmetra’s secondary fire shoots projectiles faster, but a fully charged ball is smaller and deals slightly less damage.
  • Deploying the teleporter and Sentry Turrets is now marginally quicker.
  • Bonus change: the new animations for the Photon Projector are beautiful.

Overwatch 2 Symmetra Guide – Strategy & Team Composition

The changes to Symmetra in Overwatch 2 are slight, but they make her a significantly better, more aggressive damage hero and a good defensive choice. If you’re defending a map with a significant chokepoint, like Eichenwalde, Symmetra is a deadly pick. Cover the chokepoint with Sentry Turrets, and hurl energy balls through the chokepoint. The Sentry Turrets will slow enemies passing through and leave them vulnerable to incoming damage. A shielded Reinhardt or Brigitte will struggle to push through as Symmetra’s secondary fire passes right through shields.

Symmetra’s faster teleporter makes her a more aggressive hero in pushing objectives. She can solo kill multiple support heroes this way too. If an enemy Zenyatta or Ana is isolated, you should use Symmetra’s teleporter to surround them with Sentry Turrets and close the distance between you. These support heroes will struggle to fight you off since they specialize in long-range combat. 

Lucio excels in his mobility and unpredictability. Since he’s always speedily moving across walls, he can be a hard target to eliminate. Symmetra’s Sentry Turrets can slow him down, and her primary fire doesn’t require much precision, making her a good counter for Lucio. 

Genji is the damage hero most vulnerable to Symmetra as he won’t be able to deflect the beams from her turrets or primary fire. Symmetra’s ability to slow down and lock on to targets will be useful when dealing with Genji’s erratic movement.

Overwatch 2 Symmetra Guide – Skins

All Symmetra skins in Overwatch 2.

Symmetra has 18 unique skins in Overwatch 2. Players can transfer their unlocked skins from the original game by transferring their accounts. You can unlock new skins by progressing through the Battle Pass or buying skins via the Shop with Overwatch Coins or Legacy Credits. You can acquire Overwatch Coins with real money or by completing weekly challenges. Players can transfer Legacy Credits over from the first Overwatch.

Skins Details
Overwatch 1
  • Common Skin
  • Automatically unlocked
Overwatch 2
  • Common Skin
  • Automatically unlocked
Cardamom
  • Rare Skin
  • Sometimes available in the Shop
Hyacinth
  • Rare Skin
  • Sometimes available in the Shop
Saffron
  • Rare Skin
  • Sometimes available in the Shop
Technomancer
  • Rare Skin
  • Sometimes available in the Shop
Utopaea
  • Epic Skin
  • Sometimes available in the Shop
Peacock
  • Rare Skin
  • Sometimes available in the Shop
  • 250 Legacy Credits
  • 1000 Overwatch Coins
Regal
  • Rare Skin
  • Sometimes available in the Shop
  • 250 Legacy Credits
  • 1000 Overwatch Coins
Vampire
  • Rare Skin
  • Sometimes available in the Shop
  • 1000 Overwatch Coins
Qipao
  • Rare Skin
  • Sometimes available in the Shop
Vishkar
  • Legendary Skin
  • Sometimes available in the Shop
Devi
  • Legendary Skin
  • Sometimes available in the Shop
Dragon
  • Legendary Skin
  • Sometimes available in the Shop
Architech
  • Legendary Skin
  • Sometimes available in the Shop
  • 1000 Legacy Credits
  • 1900 Overwatch Coins
Goddess
  • Legendary Skin
  • Sometimes available in the Shop
  • 1000 Legacy Credits
  • 1900 Overwatch Coins
Mermaid
  • Legendary Skin
  • Sometimes available in the Shop
  • 1900 Overwatch Coins
Figure Skater
  • Legendary Skin
  • Sometimes available in the Shop
Magician
  • Legendary Skin
  • Sometimes available in the Shop
Oasis
  • Legendary Skin
  • Sometimes available in the Shop

Stay Updated on The Latest Punk News

Get the latest punk news delivered straight to your inbox

We'll store and process this information to provide you our products and services. You may opt out of this at any time.