How to Buy a Car from a Car Dealership in GTA Online

Car dealerships are now available in GTA Online. That’s right, instead of zooming by Simeon’s dealership as you evade the police, you can now enter the building and have yourself a nice little shootout. You can also buy a car there. Because dealerships are such a new feature, here’s how to find and use car dealerships.

How to find a Car Dealership in GTA Online

There are now two car dealerships in GTA Online: Premium Deluxe Motorsport and Luxury Autos Showroom. Both have different selections of vehicles but neither one is difficult to find.

You can find Premium Deluxe Motorsport here in Pillbox hill in South Los Santos.

Premium Deluxe Motorsport Location

Luxury Autos Showroom can easily be found in Rockford Hills in Northern Los Santos across from the record studio.

Luxury Autos Location

How to Buy a Car from a dealership in GTA Online

You can easily purchase any vehicle at a dealership by simply walking up to it. Dealership vehicles are usually more expensive compared to the ones you’d buy on the car websites in-game due to the custom liveries they come with. These are the vehicles currently on sale at both dealerships:

Premium Deluxe Motorsport:

Stirling GT ($999,510):

  • Speed: 74.04
  • Acceleration: 75.00
  • Braking: 26.67
  • Handling: 71.21

Cognoscenti ($167,800)

  • Speed: 75.12
  • Acceleration: 65.00
  • Braking: 18.33
  • Handling: 63.64

Remus (1,390,520):

  • Speed: 78.77
  • Acceleration: 81.75
  • Braking: 30.00
  • Handling: 81.50

Nebula Turbo ($826,150)

  • Speed: 74.04
  • Acceleration: 60.00
  • Braking: 16.67
  • Handling: 59.09

Tornado ($30,000):

  • Speed: 69.75
  • Acceleration: 40.00
  • Braking: 8.33
  • Handling: 54.55

Luxury Autos Showroom:

Autarch ($1,955,000)

  • Speed: 86.38
  • Acceleration: 94.25
  • Braking: 40.00
  • Handling: 100.00


Torero XO ($2,890,000):

  • Speed: 86.52
  • Acceleration: 96.25
  • Braking: 38.33
  • Handling: 83.92

As you can see, there is a big difference between the two dealerships. Premium Deluxe sells cars that any player who isn’t poor can afford. Luxury Autos has faster, high-end vehicles that cost more. The selection at both dealerships will change weekly so by the time you read this, a completely different selection of cars will probably be available. The vehicle selection at both dealerships comes from the in-game websites.

Cars from Premium Deluxe Motorsports come from Southern San Andreas Super Autos while cars from Luxury Autos Showroom come from Legendary Motorsport. An advantage of buying from a dealership is that your car will be quickly delivered to your garage of choice within seconds. Purchasing from websites usually takes a few minutes. Dealerships are just another option to buy vehicles if you want to get a better feel for how they look and drive.

How to Test Drive and Inspect Vehicles

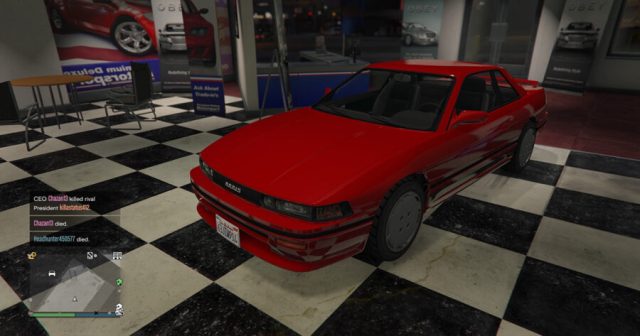
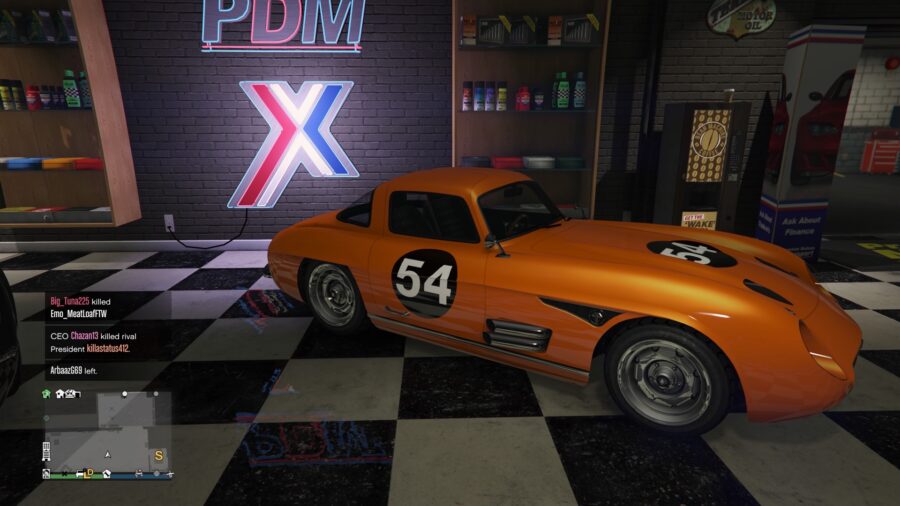
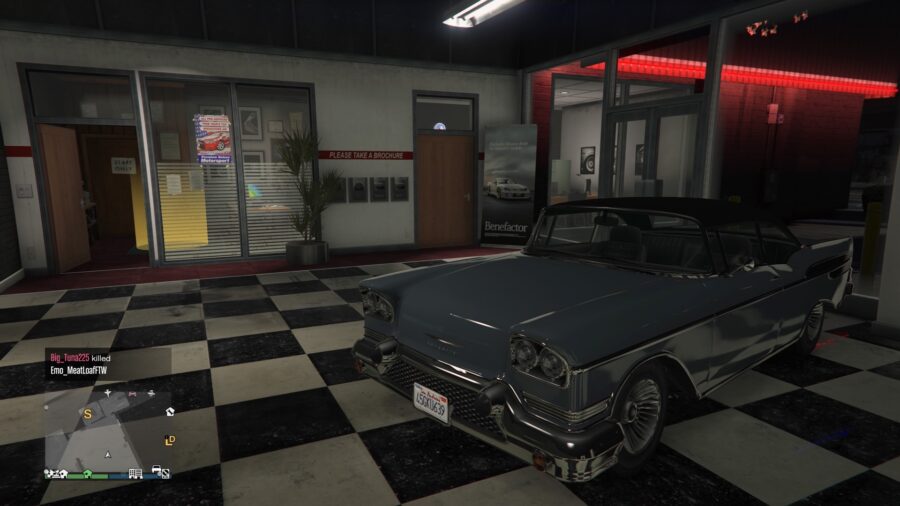
The biggest difference between both dealerships is that Premium Deluxe offers a test drive for each vehicle on sale. To activate this feature, simply approach the car you want to test drive, then choose the test drive feature. You’ll then be transported inside the vehicle and will be able to drive it until the five-minute timer expires. 

If you’d like to end the test drive before that happens, just hold down the triangle button on PlayStation or Y on Xbox. Beware that doing this will kick you out of the vehicle and transport you to a nearby location. You won’t automatically be returned to the dealership. If you die while test driving, the test drive will end and you will respawn where you died. You also have the option to return the vehicle to the dealership before the test drive ends. Doing so will trigger a cutscene where your character drives the car into the building.

While Luxury Autos doesn’t allow you to test drive vehicles, you can still inspect them. This allows you to zoom in on different aspects of the vehicle before making a purchase.

Other Things You Should Know

Inside Premium Deluxe Motorsport, you can refill your snacks for free. This is a great option for players who can’t afford to purchase an Agency which also gives the same option. There is also a vending machine in the dealership as well. If you get sick of looking at cars or eating snacks, you can partake in the pastime of humans everywhere: Sitting. That’s right you can now sit inside the dealership. Exciting isn’t it? 

If that doesn’t appeal to you, then you’ll be happy to know that a computer located inside the dealership allows you to browse the Southern San Andreas Super Autos website. Here you can buy any vehicle listed on the site even if it’s not currently available at the dealership. As mentioned earlier, the Premium Deluxe Motorsport car selection will come from this website so you can get a taste of what future vehicles will be available.  

How to Keep Students From Failing in Two Point Campus

When students are unhappy in Two Point Campus, it can negatively impact your profits. If students are unable to pass classes and are in danger of flunking out, you run the risk of losing out on your experience bonus that pads your budget. Luckily, there are ways to keep your students’ grades up and rake in the extra money.

The easiest way to raise your student’s grades is to progress through the first few levels by following the tutorials to unlock the Private Tuition classroom. You’ll need to earn at least one star in the first two levels, but you can easily do this by just following the tutorials and letting the years play out in your school.

Private Tuition is a room specifically designed to help tutor students who are having trouble with their studies. You’ll need to hire a teacher with a matching specialty to the student, but it’s a lasting investment that can be used repeatedly. As you get more students, you’ll need more of these rooms, but they don’t take up much space. 

Another easy trick is to make sure your students are happy by meeting their different needs on campus. If your students don’t have anywhere to rest, socialize, or relax outside of their studies, they will become upset and may refuse to pay their fees and eventually flunk out of your school. To keep that from happening, you’ll need to provide plenty of opportunities for fun on campus.

When your students have fun, their happiness will increase and so will their grades. You need to make sure you have rooms for them to relax like in the Student Union or the Student Lounge. However, keep in mind that you’ll need more of these buildings as you scale up. Once you have the required rooms, you can schedule the parties or events for those rooms.

To increase student happiness in Two Point Campus fast, consider hosting:

  • Student Union Parties
  • Student Lounge Parties
  • Funny Video event (requires Lecture Theater)
  • Competitions like Jousting or a Cook-off

You can schedule events through the calendar on the bottom right part of your screen by clicking on the book and then the calendar. From there, click ‘Create New Event’ at the top of the screen. You’ll see a list of events that your school can host and you can schedule one as long as you have the money to reserve the space.

 The Timetable showing the different scheduled classes throughout a year’s timeline

This can also mean having a variety of different clubs on campus or hosting parties in the different social rooms. Keeping students happy will also rely on your ability to keep the campus clean and sanitary, so make sure to use plenty of trash cans and hand sanitizing stations around your school. 

But where to put trash cans and hand sanitizers in Two Point campus?

It’s wise to have a trash can in every room, common area, and the most used hallways. Hand sanitizers are a good idea for any room that doesn’t have a sink in it, but it’s also smart to make sure you have plenty of Shower rooms so your students have an opportunity to properly clean themselves.

As long as you can keep your students’ happiness up and stay on top of those who need private tutoring, that’s all you need to know about keeping students from failing their classes in Two Point Campus. 

What to upgrade first in Two Point Campus

You gotta spend money to make money!

A large computer inside the Research room in Two Point Campus

A classroom in Two Point Campus is only as good as its equipment. However, when you unlock upgrades, it can be confusing to know what you should research first. To know what to upgrade, look at what rooms and equipment your students are using the most, as that will provide the most immediate benefit.

For instance, if you have a classroom in your main building that is always being used by students and one in a side building that doesn’t get used but twice a year, then you should upgrade the most used one first. The first image below is a great example of a location that should get priority upgrades, as the halls and common areas are full of students.

However, in this image, you see a building that’s not getting used that often except for a handful of students. It’s unwise to upgrade the rooms in this building first because it won’t provide the most immediate benefit to your college.

While it can come down to preference in some cases, what you upgrade will largely depend on which school you’re at and how much money you have. Here’s the best upgrades to get first in Two Point Campus:

  • Lectern II: Costs $15,000 and adds 25% Learning Power
  • Training Pod II: Costs $15,000 and adds 50% Improved Training
  • Research Hub II: Costs $15,000 and adds 7% Research Power
  • Omni-Cure II: Costs $15,000 and adds 15% Medical Power

It’s smart to upgrade these machines first because they will be the most widely used across all of your campuses. The Research Hub will allow you to learn new ways to upgrade your equipment and the Training Pod will allow you to teach new janitors how to perform the upgrades.

Considering you need to research new upgrades for the different machines before you can apply them, the Research Hub might be the most important investment in the game. You don’t need to spend all of your resources upgrading the Research Machine all the way, but it will help to speed up each project after that.

Considering Lecterns are used for every class, it’s smart to upgrade those because it will increase what students learn, which means better grades. The Omni-Cure station will help your students that inevitably get hurt and upgrading it will keep queues from forming outside of your clinics.

If you’ve already upgraded all of your basic tools, consider improving your campus-specific classrooms like the Cooking School’s Savory Kitchen or the Knight School’s Jousting Track. These are more specific upgrades per classroom and they generally cost $15,000 to upgrade and provide an additional 25% learning power to students for the first upgrade.

It’s good to know that your staff and students can still access these machines while they’re being upgraded, allowing your teacher to continue a class while the Janitor is hammering away. Doing all of this will ensure that your students are getting the absolute most out of their classes.

How to lower staffing costs in Two Point Campus

While not morally good, it will benefit your school’s wallet.

While everyone in real life deserves to have equal and fair pay, that doesn’t translate well when you’re looking to cut staffing costs in Two Point Campus. In this game you’ll quickly learn that your highest expenses are what you’re paying your staff. So put on your evil boss-man hat and get ready to lay off a couple people.

By going into the staff section of your menu, you can view different employees and their impact on your campus. You access this menu by clicking on the little icon of a person, and then on the first option on the left. This will bring up a full list of your current staff. Clicking on a specific member will bring up a detailed overview.

The staff list menu in Two Point Campus

In this menu, you can see a variety of information about what your staff is currently doing as well as their current mood and energy levels. Staff that isn’t happy and full of energy won’t teach well.. For staffing purposes, look under where it says “Status” and look for any newspaper or hourglass icons, which indicate a staff member is idle with nothing to do.

You can also see what you’re paying each staff member, and while you can’t cut their pay, you can fire them and hire someone who can do the same job for much cheaper. If you’re unhappy with the staffing costs, it’s wise to avoid the raise section altogether. That will only add to what you’re paying out to employees each month. 

To lower your costs, the first thing you can do is to get rid of any unneeded teachers or assistants. Sometimes the game will prompt you to buy new staff that you don’t need, so it’s wise to go into this menu and look at any teachers that aren’t actively on break or teaching a class. The same goes with any Assistants that are currently roaming your halls.

If you want to make the most out of your staff in Two Points Campus, you can teach them multiple disciplines and skills. The best skills to teach your staff include:

  • Happy Thoughts: Provides a 4% happiness buff to keep your staff’s spirits up
  • Aerodynamics: This skill is especially good for Janitors as it provides a 5% speed boost
  • Inspirational Thinking: Teachers can learn this skill for a 5% chance to inspire students
  • Comic Timing: This skill helps Assistants with a 5% chance to provide Comic Relief

These skills will keep you from having to hire a new teacher every time that another goes on break. Make sure you have one teacher per function and you’ll be on your way to saving money each month. Maintaining your staff and making sure they’re as trained as they can be will ensure that you aren’t spending more than you have to on employees.

Two Point Campus: 8 Beginner Tips

Getting to grips with the mechanics of Two Point Campus doesn’t take a college degree, but maximizing profits and keeping everyone happy takes work, and a little bit of hidden knowledge. Here are 8 tips to help you get started building the perfect college.

Two Point Campus, the spiritual successor of Two Point Hospital — an ongoing effort to keep the ‘Theme’ games alive by a studio comprised of ex-Bullfrog employees. Two Point Campus is a relatively slow-paced management sim that sees you creating and running a college campus for the ultimate academic goal; profit.

While the aesthetic and feel of Two Point Campus will be familiar to anyone who played Theme Hospital, there is more depth and a lot more content to get your head around when constructing a learning environment. Popping heads and sending your patients out the door is no longer enough to succeed; you’re now tasked with molding future generations of scientists, chefs, and… spies?

Running your college efficiently can be difficult, and managing the happiness of staff and students alike can seem like an impossible task. So with that, here are some beginner tips to help you create the ultimate campus.

Don’t Start the Year Until You’re Ready

Before you begin a new year of education, there is a period of time when no students inhabit the halls of your establishment. Make sure that this time is used as efficiently as possible – you’re under no constraints and have no new tasks populating your inbox. Rearrange rooms and plan as much as you like, as once you hit that ‘Start Year’ button, your students will begin flooding through those doors. 

It can be tough to know exactly how you want your campus to look before you’ve even started your first year, sometimes you’ll overestimate how large a classroom has to be, for example. The gastronomy course looks like it would need a ton of space to fit those giant burgers but in reality, it’s no larger than anything else. Thankfully, this planning time comes before the start of each academic year, so don’t get too hung up about getting it right the first time.

Keep Some Kudosh in Your Back Pocket

Kudosh is a form of currency in Two Point Campus that is used to unlock new pieces of equipment or pieces of scenery. The urge to spend your hard-earned dosh is always going to be there, but it’s always worth keeping a little aside in case a situation comes up where you have to unlock something specific for a quest. A lot of these quest items are things like benches that improve friendships or posters to spruce up your rooms. They don’t usually cost a lot — 20 or so kudosh each, so if you always had around 50 kudosh to hand, you’ll never be caught short.

Completing Quests Is an Easy Win

The inbox in the lower right corner of the screen is where you’ll receive all of your in-game messages. While there are usually updates on your budget, you will on occasion receive a quest from a student. These usually involve placing a certain item somewhere on the campus, and not only will these improve your student’s happiness and relationships, but net you some Kudosh for your trouble. 

Keep an Eye Out for Bookworms

Occasionally, you may notice curious little beings pop out of the ground around your campus. These are bookworms – literal worms that when clicked on reward you with either cash or Kudosh. You’ll have to be quick, mind, as these creatures only show themselves for a few seconds before burrowing back down below. Their location is random, except for the fact that they will only spawn on the outside of your campus buildings. While relying on bookworms for income is impossible, a few bucks here and there is never anything to pass up on.

Student Happiness Is Paramount

An entertained student is a happy student, and a happy student is a successful one. This can be easy to forget when you’re placing a large (small) hadron collider in the middle of your campus, but a good and profitable education needs to have balance. Early on you’re reminded that students need the three R’s – rest, relaxation, and a place to relieve themselves. So with that, ensure that in every building you build adequate toilet facilities, dorm rooms, and either a student union or a club stand.

The Copy Function Is Your Best Friend

You’ve built the best, most aesthetically-pleasing room. It meets all the criteria for keeping your students happy and you aren’t sure if you’ll ever be able to replicate such genius ever again. There’s a copy room function in the contextual menu of every room. Easy. You can also save room layouts to be used on different campus sites. That epic student union you built in England is most definitely transferable to Italy; partying is universal, and transcends all borders.

It’s more likely, however, that you’ll wind up building a very nice, very functional toilet. This toilet has plants for aesthetics, a framed painting on the wall, and a throne for your students to relieve themselves. While more interesting rooms may occasionally need to be bespoke for the building you’re in, toilets very rarely change, so having the perfect one in the copy menu is a great time-saver.

Don’t Be Afraid to Move On — Or Go Back

When you begin your career in Two Point Campus, it’s fairly easy to gain access to other locations. You’ll be tempted away to a more culinary-focused establishment after starting in England, for example. Don’t shy away from the new challenge – moving campus gives you access to a lot more building options and more opportunities to earn Kudosh. The beauty of this is, that you can always go back to a previous level and use the new equipment you’ve unlocked to achieve a higher star rating

Look After Your Staff

It’s easy to let that omnipotence go straight to your head. You will have to keep an eye on your staffing situation from time to time, however. Your staff are the people that keep your campus running, they teach your classes, serve your students food and clean up garbage. When you first start constructing a new campus, the amount of staff you’ll need will be minimal – a teacher for the singular course you’re teaching, a janitor to keep the place clean and an assistant for each specialized room you need. It’s worth keeping your staffing numbers tight at the beginning as it’s likely you won’t have a ton of money to play around with. Once the years roll by, however, and the number of courses you teach increases, you’ll have to flex up how many people you’re employing.

Ensure they have a well-stocked staff room to relax in, and that they are well paid (keeping within your means, mind). On the other hand, if you have a member of staff with negative traits, someone who is hampering rather than helping, let them go – use the trash can icon on the bottom of their contextual menu to fire them. It’s also worth noting that having staff members with overlapping job roles (several Janitors all assigned to cleaning, for instance) can be a waste of resources, use the staffing panel to assign each employee a specific role, creating an eco-system where everyone has their place.

Which Xenoblade Chronicles 3 Classes to Play

Xenoblade Chronicles 3 was recently released to fanfare from both critics and fans. The fourth entry in the Xenoblade Chronicles series adds a new class system to the franchise’s lauded combat system to create an even more rewarding experience.

There are a large number of classes in Xenoblade Chronicles 3, each with unique arts, skills, and roles. From weakness-exploiting Yumsmith to the party buffing Thaumaturge, Xenoblade Chronicles 3 affords many ways to tweak and customize your party’s composition.

However, so many options can feel overwhelming and it can be difficult to know which classes to prioritize for your preferred play style, especially if this is your first entry in the series. 

Luckily, this guide includes a brief overview and will give you the foundational knowledge needed to turn your team of Ouroboros into a well-oiled machine.

Xenoblade Chronicles 3 Class Guide

Before getting into the nitty gritty of 25 classes available for players to exploit in the game, it’s important to first understand the roles that they belong to. Xenoblade Chronicles 3 utilizes the “holy trinity” party makeup of Attackers, Defenders, and Healers.

  • Attackers: These are the classes focused on dealing damage to enemies
  • Defenders: Defenders focus on maintaining enemies’ attention and protecting allies by absorbing damage. These are the game’s tanks.
  • Healers: Healers prioritize a combination of maintaining party health and doling out buffs to party members and debuffs to enemies. 

Xenoblade Attackers Classes

Swordfighter:
Easiest class to pick up and play

Noah’s base class. Your first foray into the attacker role comes with an all-around, bread-and-butter approach to dealing damage that doesn’t have any glaring weaknesses but also doesn’t excel at much.

Ogre:
High but inconsistent damage 

Sena’s base class. This class utilizes a large hammer and focuses on high damage output while sacrificing speed and agility. When attacks land, it has some of the highest damage potential in the game. Luckily, it comes with an ability that makes attacks unblockable to help ensure attacks hit their mark. 

Yumsmith:
Good AOE damage but mostly situational 

A support hybrid class that emphasizes exploiting enemy weaknesses via area of effect debuffs. Unfortunately, while Yumsiths can deal respectable damage, they are outclassed by most of the other attackers and only excel in specific situations.

Full Metal Jaguar:
Extremely high damage during Chain Attacks

A class making a return from Xenoblade Chronicles X, Full Metal Jaguars use dual-wielded pistols to deal damage from afar. They bolster arts that help bypass defenses and deal increased damage with successive hits. Full Metal Jaguars are decent during regular combat but shine during the game’s Chain Attacks where they are capable of massive damage.

Stalker:
Low damage but good for supporting other attackers

Another long-ranged attacker. Stalkers sport bows to snipe their targets without drawing aggro thanks to aggro reduction arts. Stalkers are another situational class as they are outclassed early in combat encounters, but can pull their weight once targets are near death thanks to attacks that deal increased damage on targets under 30% health. They also have the ability to boost the rate of art recovery for other classes and pair well with Ogres.

Flash Fencer:
Offers high DPS via damage over time

The first non-starter class players will unlock. The flash fencer boasts twin sabers to quickly land attacks in rapid succession. The Flash Fencer emphasizes damage over time abilities such as Bleed. This results in one of the highest damage potentials in the game as Bleed is currently very overpowered. However, you may find yourself drawing aggro off of your tanks due to the high damage output. 

Martial Artist:
Good, consistent damage

Similar to the Flash Fencer, the Martial Artist’s strength is in its ability to dish out a rapid torrent of attacks. However, unlike the Flash Fencer, the Martial Artist emphasizes raw damage with its buffs that increase its attack speed. 

Incursor:
Some of the highest damage potential in the game

Another class with some of the highest damage potential in the game. Incursors boast large swords that gain an increase in damage with each successive critical hit. This goes hand-in-hand with abilities that increase the critical hit rate. Incursors hit big and their damage increases as fights continue. Players should always consider having an Incursor in their party.

Machine Assassin:
Low damage output but excels in specific situations

Machine Assassins are another debuff-focused attacker. They distinguish themselves by utilizing debuffs that cause enemies to take increased raw damage. While having relatively low damage output themselves, they can be very good in specific situations when paired with an attacker that would benefit from a 30% increase in damage to heavy hits such as an Incursor or Ogre.

Royal Summoner:
A great option for high damage output

Royal Summoners are a late/post-game class that prioritizes elemental-based attacks to reap substantially large damage output. While their damage is low at the onset of encounters, like the Incursor, they also increase their attacks’ potency as a battle progresses. Royal Summoners are great attackers, especially when there are elemental weaknesses to exploit.

Seraph:
High-risk, high-reward

Final Fantasy fans are sure to recognize the Seraph as being akin to the series’ Dark Knights. Seraphs are high-risk, high-reward attackers that deal more damage as they take damage. While Seraphs can deal massive amounts of damage, it may be difficult to orient a party around this due to how the game’s aggro system works. However, players that can thread the needle (likely by having the Seraph take on a defender-like role in a one-defender party) will see Seraphs output huge damage numbers. 

Xenoblade Defenders Classes

Heavy Guard:
Easy to use with respectable damage

This will be players’ first introduction to the defender role as it is Lanz’s starting class. A very basic tank class that focuses on grabbing the attention of foes with solid damage output and a high defense stat. Heavy Guards are among the most consistent of the defender roles and players will likely have one in their party through most of the game due to their lack of glaring weaknesses.

Zephyr:
Quick attacking evade tank

This is Mio’s starting class and the second defender that is unlocked. In contrast to the Heavy Guard’s role as a slow meat tank, Zephyr’s are an evade tank. Utilizing quick abilities to build arts faster, Zephyrs can gather and maintain aggro very easily while avoiding a lot of damage altogether. However, when they do receive damage, it will be much more deadly to them than other defenders.

Lone Exile:
High damage and solid survivability make this one of the best options

Lone Exiles are likely the best defender class in the game. Like the Zephyr, they attack fast and thus build their arts more rapidly than other tanks. They are also able to take a solid amount of damage and effectively maintain aggro but also deal out loads of damage relative to the other defenders thanks to abilities that boost damage to enemies targeting them. 

Guardian Commander:
Decent damage and survivability

Guardian Commanders are a decent defender choice that focuses on emergency aid to themselves and party members. While the party is taking damage, they will gain boosted recharging speed to their arts and increases in damage reduction when blocking.

Lost Vanguard:
The best defensive tank option

Lost Vanguards are the purest defender role in the game. They can return damage to attacking enemies by blocking or simply taking damage and also grant the entire party a passive 20% chance to absorb attacks. This is another potential best defender in the game. While they lack the offensive potential of other defenders, they far and away are the best at keeping themselves and the party alive.

Xenoblade Healer Classes

Medic Gunner:
Low damage, consistent 1healing

The first Healer that players will encounter is one of the most consistently useful ones. Medic Gunners dish out solid heals while also dropping AOEs that strengthen the survivability of party members that stand in them. However, they have very low damage potential which results in a safe, if effective class.

Tactician:
Lower healing that focuses on buffs and debuffs

A healing class that like Medic Gunners, has solid healing output. However, Tacticians shine at putting status ailments such as sleep on enemies, doling out small buffs to their party, and also reducing enemy defenses. They are also capable of doing decent damage to enemies.

War Medic:
Low damage but great healing potency

The first new healing class that is unlocked. They have low damage potential but War Medics are one of the better healers in the early to mid game because of their focus on potent AOE heals. This is also coupled with defense-boosting abilities to increase party survivability. 

Thaumaturge:
An aggressive healer with good damage output

Boasting some of the highest damage output among healing classes, Thaumaturges excel at being the party’s battlemage. Thaumaturges dish out great heals when performing bursts which further incentivizes aggression in this offensively focused healer. Thaumaturges are a great healer pick for parties that aren’t using big damage attackers. 

Strategos:
The Jack-of-All trades approach to healing

The Strategos seeks to be a very balanced healer that does all parts of the role relatively well. Capable of solid damage, good healing, and great buff/debut potential, the Strategos fits into just about any party setup, even if it doesn’t excel at one particular thing. 

Signifier:
Great buffs make up for low damage in certain situations 

Signifiers, while having some of the lowest healing potential among the healing classes but make up for this with a slew of party-supporting buffs. Signifiers can do well when paired with a class capable of higher healing output such as a War Medic, Medic Gunner, or Lifesage. However, their lack of damage and healing output makes them one of the weaker healer choices.

Troubadour:
Better damage than Signifier with similar strengths

Like the signifier, Troubadours are a buff-focused healing class. They can significantly increase the accuracy and evasion of allies, but unlike the Signifier, are still solid damage dealers and capable of great healing output. Troubadours are an excellent choice for encounters players are struggling with as their ability Endsong recharges all ally arts to max when they are incapacitated.

Lifesage:
The best healer overall, but you won’t get it until the post-game

Another one of the game’s post-game classes. Lifesage’s are the healer with the highest damage output. Unlike the Thaumaturge, they are also capable of extremely good healing as well as providing good buff support to the party. Boasting all-around excellent performance in every metric, Lifesages are likely the best healers in the game. Unfortunately, you will have to wait until the credits roll to unlock the class.

Soul Hacker

Soul Hackers are completely different from the other classes in the game as they do not fall within a specific role. Soul Hackers function very similarly to Blue Mages in Final Fantasy in that instead of gaining new abilities and skills by leveling up, they learn them from defeating unique enemies in the game’s world. 

This enables the Soul Hacker to act as an attacker, defender, or healer, depending on what abilities are equipped and how they are built. Soul Hackers start relatively weak but as you build them, they become increasingly strong and are capable of breaking the game open. 

Players will obtain Soul Hacker very late in the game, but those that decide to hunt enemies and learn their abilities will receive a fun meta-game and potentially very powerful class that gives them the freedom to use in numerous ways.

We hope this brief Xenoblade Chronicles 3 Class Guide helps you figure out the best build for your party. 

Guy Yelling About Snyder Cut Coming to MultiVersus

BURBANK, Calif. — Player First Games has revealed another fighter that will join the MultiVersus roster in the coming months: an irate man screaming about the Snyder Cut of Justice League

“When we open up the vault and look at all the iconic Warner Bros characters from over the years that would lend themselves to a violent fighting game, one person kept coming up in every meeting,” said Harold Grotsch, a lead designer with Player First Games. “The mob of people that wouldn’t stand down until they got the preferred cut of Justice League released. I don’t even think the Tasmanian Devil gets as angry as those guys were!” 

Guys that had formerly yelled a lot about the Snyder Cut reacted positively to the news, surprising many close to them. 

“This is actually pretty great,” said Grant Thornhill, a guy that was angry about the Snyder Cut for a good couple of years there. “I spent a long time really going hard for that cut of that movie, and frankly, I’ve been a little rudderless lately. It’ll be nice to find some flaws in the moveset they give us, or what class they make us. Shit like that. Oh yeah, that’ll be real nice.” 

“It doesn’t matter if the Snyder Cut lived up to my expectations or not by the way,” he added, unprompted. “That wasn’t even the point of it.” 

The Guy Yelling About the Snyder Cut will reportedly be coming to MultiVersus this winter. Possibly sooner if we all play our cards right here.

Shaggy 2 Dope Heartbroken Over MultiVersus Misunderstanding: “I Thought I Was in That Bitch”

DETROIT — Shaggy 2 Dope, member of the Insane Clown Posse, was reportedly heartbroken recently to find out he wasn’t included in the roster of MultiVersus as he had initially been lead to believe, juggalos close to the scene have confirmed. 

“Man, someone said I was in this bitch,” said the co-founder of the highly successful independent rap duo, a single tear streaking his makeup. “Me and [Violent] J have been in video games before, so I didn’t think it was so strange. I mean, movies, tv shows, you fuckin’ name it. So it didn’t seem that weird when one of the homies was like ‘Ay yo Shaggy they got you up in this MultiVersus shit.’ Fuck this!” 

Developers from Player First Games clarified that they never meant to cause any confusion as to which iconic Shaggy was being included in their game. 

“Sincerely, we apologize if we have upset Mr. 2 Dope, but we thought it was pretty obvious that the Shaggy we were referring to was Scooby-Doo’s buddy,” said Bruce Wormwood, an executive VP with the Warner Bros. Discovery conglomerate. “I mean, it’s one of the big franchises we have, even though we just canceled a 40 million dollar movie that was all but finished. But I mean, Velma is in there too, you know?” 

“Did someone tell Shaggy 2 Dope that Velma was in there?” he repeated. 

Despite the misunderstanding, many of the Insane Clown Posse’s fans are holding out hope that one day their favorite artists will appear in a contemporary video game. 

“Somebody ought to snatch them up, for real,” said Tonee L-Bowz, a juggalo who’s been down since The Joker’s Cards. “Put them in Smash Bros, Fortnite, muh fuckin’ Fall Guys. Let me get Shaggy 2 Dope in Assassin’s Creed and throw a 2-liter of Faygo off the fucking Sisteen Chapel, you know what I’m saying? Tell me a video game he wouldn’t make better. You can’t do it.”

As of press time, the Shaggy that sang “It Wasn’t Me,” was furious that he wasn’t in MultiVersus

Bugs Bunny’s Best Moves, Strategy, And Techniques: MultiVersus Guide

Let’s make this real simple: Bugs Bunny in MultiVersus is good. Like, really good. Like, if he’s not the best character in the game, then he’s almost certainly one of the game’s top tiers. With this in mind, he is very likely to be subject to some nerfs across the game’s lifespan. But, very little is likely to fundamentally change about the character. His moveset will always be the same, as will its applications – and his fundamental identity as a character will surely be untouched if the designers are as competent as they’ve shown themselves to be so far.

So whether he’s an undisputed top tier or something slightly lesser, ruining someone’s day and bombarding them with an onslaught of cartoonishly violent weaponry will always be on the menu. Let’s take a look at how you can really mess up your opponents online with the only fighting game character we can recall who uses kissing as a weapon. About time.

Essential Bugs Knowledge

Bugs is a Mage-type character, meaning he’s primarily intended to fight at long-range and keep opponents at bay with a variety of projectiles. He’s what a more typical fighting game might call “a Zoner”. Part of what makes Bugs so powerful is that while he’s very good at doing that, he also has some serious hands up close. To make a comparison for the many Smash Bros players out there who are yet to take a dive into MultiVersus, Bugs is a bit like Villager — if you made him way, way faster, and gave him Ike’s pre-patch Up Air. Yeah. 

Now that I’ve sold you, let’s talk details. Of all the many powerful moves Bugs has at his disposal, his Up Air attack (Swing Batta Batta!) stands out. Up Air is god. Up Air is love and Up Air is life. If any move is on the chopping block to get nerfed, it’s this one – and frankly, it’ll probably deserve it. Bugs’ Up Air is a powerful juggling tool that comes out fast, has a wide arc (this move can literally hit people on the ground) and deals some serious damage and knockback. It is — in my opinion — simply without flaw at the moment, and combined with some of his Specials we’ll talk about in a bit, can make getting back to the ground against Bugs a total nightmare. It sits in an elite tier of 2 moves that practically define Bugs as a character. The other being:

Down Air. (Downward Mallet Swing) This is an incredibly fast, non-committal spike that you can practically spam with impunity any time an opponent is off-stage. It’s very scary to be off-stage against Bugs because of just how recklessly he can swing with this move, and trying to dodge a dunking will get the blood flowing no doubt. 

Not only that, it’s also one of Bugs’ best combo starters. Down Air true combos into – you guessed it – Up Air very reliably, the window for this combo is very wide! And this little 2-hit combo can be set up by other combo starters. Now, let’s talk about that combo game, shall we?

Bugs Combos You Should Learn

Bugs primarily has 3 combo starters, and when you’re not firing off projectiles or spacing opponents out with Forward Air, these are what you’ll be looking for.

Down Air (Downward Mallet Swing) we’ve already covered. At varying % ranges this can combo into Neutral Air, Up Air, Grounded Up Attack into Neutral Air/Up Air and any other number of combinations. Bugs really has a pretty crazy combo game and trying to cover every possible combination would have us here all day, just play around with this Down Air a bit in training mode and you’ll immediately see what I mean.

Neutral Air (Helicopter Punch) has quite a small hitbox and is generally hard to open an opponent up with, I personally find myself using this move as a combo extender more often off a Down Air or something, but maybe you’ll have more luck getting in with this. If you do manage to hit this move, especially in the air, the possibilities are basically endless. Up Air, Down Air, another Jump Neutral Air, the world is your oyster if you hit this move, it’s practically designed to pop opponents up at the perfect angle for any follow-up your little heart desires. It can also be used in conjunction with Down Air for a very tight-to-input but very powerful “Nair Loop”, in which you can true combo repeating Down Airs and Neutral Airs on an opponent over and over again, give it a try in The Lab.

Grounded Side Attack (Why I Oughta!) is one of those grounded moves you wanna cancel before the final hit. Just using this move as the move list tells you will have it ending with a very underwhelming punch that sends your opponent away and has no combo potential. Instead, after landing the first hit in which Bugs spins his fists at his opponent (a hit that breaks armour by the way, and is thus very good against the likes of Wonder Woman and Superman), you pretty much get to use your imagination. I personally am partial to Grounded Side Attack into Grounded Up Attack (Rabbit Kick) into Down Air into Up Air – but again the possibilities are almost endless. Rabbit Kick is a great way to follow up that first hit and launch your opponent up for basically anything you want, though. You could get a Neutral Air off this baby, you could get a Down Air, hell you could probably get a cappuccino if you asked it nicely enough.

Special Attacks

Now we come to the real wacky stuff: Bugs’ specials. There’s a lot going on with these moves and a lot of applications for them that the game won’t even tell you, so fasten your seatbelt and get ready to learn about all the ins and outs of Bugs’ specials in MultiVersus.

Neutral Special (A Safe Investment) has Bugs place down a target, after which a few seconds a safe will come crashing down. You or your teammate can attack this safe to either launch it or send it rolling across the stage in a variety of ways, and if it makes contact with an enemy it’ll damage them and deal knockback relative to how fast it was travelling.

Opponents can attack and destroy the safe, but crucially they can’t make it move. If you do this move in the air, Bugs will paint the safe into existence and drop it below him instantly instead.

 A couple fun facts: firstly, the safe will sometimes spawn an item like dynamite after being destroyed that you can throw at your opponents and, even more juicy – if you spike the safe with a Down Air, it itself becomes a spike. So knock this sucker off stage gently with a weak attack, then Down Air it above some offstage opponents and watch them plummet. A classic.

Up Special (Special Delive-Rocket) Bugs spawns and launches a powerful ACME rocket upwards that he’ll initially be clinging to. You can wall jump on this rocket and if you use your Side Special in the air, you’ll also spawn and ride the rocket horizontally instead and can use your Down Special (Bunny Burrow) on it. A wacky one; if you Bunny Burrow on a horizontally travelling rocket and pop out at the head of the rocket, you’ll re-direct it into going upwards instead. This is an advanced technique that Bugs players call “Rocket Tunneling,” it’s hard to say if it’s intentional or a glitch waiting to be patched out – but for now it’s a pretty crazy, out-there technique that could seriously catch an opponent off-guard.

This rocket travels slowly but does a ton of damage and knockback if it makes contact with an opponent, and as you can ride it – also has some utility as a way to get back to stage if you’re being pressured and are otherwise out of resources like jumps or dashes. If you fire the rocket upwards and miss, it’ll come crashing back down with the same impact about 10 seconds later – listen out for a cartoonish whistling sound effect that signals that the rocket’s about to come back down in about 5 seconds. If you fire the rocket sideways, it never comes back. You will be missed.

I for one am partial to firing the rocket upwards after a juggle with an Up Air or Grounded Up Attack, if you read your opponent’s aerial movement or just get lucky – you can cheese out some seriously early kills with this thing. It hits hard. Also, another fun tip – the rocket can travel through the rabbit holes created by your Down Special! Try firing one up and make a hole right where it’s gonna come back down and watch the rocket roller coaster madness unfold!

Oh, if you try to use this move while it’s on cooldown, it becomes a very weak move in which Bugs gingerly uses his ears to helicopter upwards. This move is intentionally bad, but does have a hitbox, and could be used to really flex on some opponents if you’re feeling particularly evil.

Side Special (Ain’t I A Charmer) Bugs blows a kiss that Charms (stuns) your enemies and Enrages (buffs) your teammate. The stun lasts quite a while and can lead to some brutal punishes, but all told this is probably the worst of Bugs’ specials as it’s slow to start up and can only be done from the ground. There is a signature perk that can make this move very powerful indeed, however, and we’ll cover that in just a bit.

Down Special (Bunny Burrow) Bugs burrows underground and can move freely for a few seconds, creating a tunnel that he automatically pops out of a few seconds after. You can also cancel this and create the tunnel exit whenever you want by jumping at any point during the duration. Upon popping out, Bugs will lightly hit any opponent he makes contact with, and now he and his teammate can freely enter the tunnel and travel between the entrance and exit by walking over to either and crouching. Projectiles like your safe and rocket can also be dropped through the tunnel and will come out of the other side, creating some crazy mixups and onstage scenarios.

 Bugs is invulnerable whilst underground, and any attack that would hit him otherwise is considered to be dodged. If you do this move in the air, Bugs simply leaps straight into the ground from above.

Additional Bugs Tricks to Know

Bugs is far from out of tricks even with all this cartoon nonsense, though. Bugs’ Grounded Down Attack sees him equip a pie that can now be thrown with the same input. This pie is an excellent projectile and can be charged to increase its velocity both in the ground and air. The pie’s trajectory can be influenced by Bugs’ own attacks, and it heals any teammates it passes through and damages and slows any enemies it hits, which is a hugely useful debuff. Just be wary that you only get 2 pies before a cooldown, and that while a pie is equipped you also can’t use the almighty Down Air, as Bugs will just throw a pie whilst airborne.

Bugs also has a passive! When crouching, he automatically rifles through an ACME box that can generate random projectiles such as a stick of throwable dynamite or even Shaggy’s signature sandwich. These projectiles are – frankly, less good than pretty much anything Bugs can do with his regular moveset, but they’re good fun if you’re looking to engage in a bit of the ol’ tomfoolery.

Which Perks to Use for Bugs Bunny

Coffeezilla:

Finally, let’s talk about Perks. I’m not trying to tell you how to live your life, but I am trying to tell you that I and almost every Bugs player think you should absolutely use Coffeezilla as one of your perks if you’re using this character. Coffeezilla reduces the duration of your ability cooldowns by 10% and considering that Bugs quite literally has 6 moves with cooldowns (which is surely the most in the game? I haven’t checked that but like, that is a lot) then I struggle to see how this perk will ever be better on any other character than Bugs.

Deadshot/Make It Rain, Dog:

Other perks are more up to personal taste but I personally like ones that increase the potency of my projectiles like Deadshot and Make It Rain, Dog which increase your projectile damage and speed respectively. I have heard some rumblings of I Dodge You Dodge We Dodge however, which gives your team a 10% ability cooldown refund after dodging an attack because as you may recall was mentioned earlier – Bugs’ Bunny Burrow practically gives you a free dodge for every attack you burrow past whilst underground. A neat little idea.

Signature Perks

Signature perks are also down to personal taste but I’ve always favored Lingering Love as I think most Bugs players do. This perk makes it so that your previously underwhelming Side Special now lingers in the air for a few seconds at the cost of reducing its stun duration. This is a powerful effect and worthy tradeoff that allows you to control space and keep enemies out even more effectively than you already were. Comin’ Through Doc, which gives Bugs and allies a shockwave effect upon leaving his tunnel is not a bad perk at all, and can open up some combo opportunities with Bugs’ Side B, but I personally find it somewhat more situational and hard to reap the benefits of.

And there you have it! Congratulations! You are now a graduate of my class in the dark arts. I hope you’ve learned a devious new trick or two, and take to the servers of MultiVersus to terrorize some poor souls with all your kissing and creampies (not that kind). Best of luck, and enjoy ruining people’s days with all the many tricks this rabbit hides up his incredibly silly sleeves.

How to Get Better at MultiVersus

As early into its lifespan as it may be, MultiVersus is already a pretty complicated game. There’s armour and debuffs and stuns and all these other intricate mechanics to wrap your head around. Combine that with how starkly different it is to most other platform fighters in its genre (namely Super Smash Bros) and it’s easy to see how new players might struggle to feel like they’re improving at all.

Wonder Woman’s Down Special surrounds her and her teammates with armor.

But fear not, dear reader! Stick by us in this guide and we’ll have you scrapping The Iron Giant (figuratively) and unmasking the Batman (through violence) faster than Superman can run (very fast). Cast all those mind-boggling move effects aside and let’s talk about how you can improve in MultiVersus at the most fundamental level and see yourself rise on those rankings in no time. This is how you can git gud at MultiVersus.

Some Important Observations

For the sake of those of you who have at least some experience in this genre, there are a couple of platform fighters that MultiVersus can be compared to even if they’re hardly exact imitations — Rivals of Aether and Brawlhalla, for example. Much like these games, and much unlike the Super Smash Bros series, MultiVersus has no dedicated grab button, no shielding and a heavy emphasis on speed and movement, you can even wall jump endlessly on the sides of stages to aid your recovery in place of Up Specials that are almost exclusively designed to do that for you in Smash.

With this in mind, you need to come into MultiVersus expecting a far faster, more frantic experience that – especially in the game’s signature 2v2 mode – simply will often be hard to keep track of. Concepts like spacing and conditioning that may be more prevalent in Smash and traditional 2D fighting games are going to be far less important than your movement and your combo game. Perhaps the best way you can curb some of the inevitable confusion you may feel when first jumping in is simply having a good grasp of the capabilities of a lot of the characters because trust us – there is some crazy stuff going on there.

Make Use of Training Mode

MultiVersus’ tutorials are slick, well-presented and pretty in-depth. But they’re only gonna teach you what’s what in the game, not how to apply it. That’s where you’re gonna have to figure a lot of things out for yourself. Thankfully, the game has a pretty helpful training mode too — a.k.a. “The Lab”. It might be tempting to just hop into games right away and mash on every opponent in sight, but due to the sheer speed of the game, it’s gonna be hard to really learn what’s going on and eventually you’ll hit a wall where everyone is outclassing you and you’re left unsure of what to do.

By simply selecting a character in The Lab, pressing the start button and clicking on “Move List”, you’ll have a ton of information about every character revealed to you. This Move List explains everything the character can do, gives a good idea of the applications of each move and even explains every character’s “Passive Abilities” – some characters have multiple! Just having a look at these for each character will help make a ton of sense of what’s going on in your matches, but maybe you wanna take it a step further and mess around with them in gameplay? Traditional fighter or platform fighter, this rule remains the same: knowing your opponent’s moves and what they’re capable of will make you a better player. You’ll be able to envision “threat bubbles” at all times (i.e. the ranges at which character is and is not a threat to you) and develop counterplay to particularly powerful moves. If you can resist the urge to jump right into games and spend some time in training just learning what each character does, you’re already giving yourself a huge edge.

Training mode has another incredibly important application for beginners trying to improve, but we’ll talk about that in just a bit. First:

The Importance of Aerials

It’s an almost universal truth in platform fighters: by-and-large, aerial attacks are the most important part of a character’s kit. This is also true in MultiVersus where aerial combat and movement is such a crucial part of moment-to-moment gameplay. Specials are where you pull out your crazy tricks, and grounded attacks are quite unique in this game as we’ll discuss in a moment, but the hitboxes of your aerials are largely what you’ll be using to play “Neutral” (i.e. the game state in which neither player or team has a distinct positional advantage).

You’ll spend a lot of your time in MultiVersus using aerials to keep opponents out or threaten them. Get a good feel for your aerials in The Lab, understand their purpose and applications and notice how almost no high-level player in MultiVersus is ever staying grounded for too long. This is because they want access to their aerial attacks – which are typically more powerful than grounded attacks as often as possible and because by virtue of the game giving every character 2 aerial dodges (which can go in any cardinal direction), you technically have more options in the air in this game than you do on the ground. (You can dodge further upwards or down into the ground from the air, but can’t dodge upwards into the air from the ground, this will require a jump, which can make you vulnerable).

Get used to short hopping, air dashing and spacing hitboxes, and you’ll find your opponents in MultiVersus are suddenly way less able to get in on you than before. Of course, Aerials are great and all – but they’re a lot better when you learn to use them in tandem with…

How to Use Grounded Attacks and Combos

Grounded attacks and combos. Okay, here’s where things get a bit spicy. I come from a background of fighting games with grabs in them. With no grabs in MultiVersus, grounded options first felt really quite weak across the board. They’re generally committal, unsafe options that require you stay relatively immobile. However I’ve since come to realize their true application, and the very different way that MultiVersus treats them. 

A lot of your grounded moves in MultiVersus are intended as combo starters, particularly your multi-hit attacks. Let’s take Harley Quinn for example, see her Grounded Side Attack in the move list – Clown Combo? Well, if you simply finish this Clown Combo as instructed in the move list, you’ll perform a pretty underwhelming 3-hit combo that does 10 damage. Why would anyone ever use that?

Well, dear reader, this has potential. We can optimize it. Instead of pushing the attack button for the 3rd time to finish the combo, try doing 2 hits of this combo and then jumping and doing a Down Air. 13 damage. And guess what? This is a true combo, much like the full Clown Combo itself. How do we know? Thanks to our trusty old lab again. Back at the start menu in The Lab, tick the setting that reads “Show Hitstun Combo” and set your CPU opponent’s behavior to “Dodge During Hitstun.” This’ll make it so that the game tells you on-screen whether your combo was “true” (i.e. inescapable) and so that the CPU will dodge away from your attacks whenever possible.

Of course, no one can dodge out of a true combo, so keep practicing the first 2 hits of Harley’s Clown Combo into an instant Down Air until the CPU is unable to dodge away and the game tells you it’s a combo in the upper right-hand corner and that you just did a “Hitstun Combo” (true combo) of “x4”. 13 damage! Nice! And this can go much further, this Down Air has far more combo potential than the 3rd hit of Clown Combo, which knocks your opponent away. So you can now true combo an Up Air or Grounded Up Attack out of this Down Air for an even bigger combo of up to 19% damage. These are all pretty tight inputs and might be hard for newcomers to get used to, but that’s what The Lab and indeed this guide is for, and the training room’s numbers don’t lie.

A lot of MultiVersus’ grounded moves, especially the multi-hit ones work like this. Bugs’ Grounded Side Attack (Why I Oughta!) usually ends with an underwhelming punch as its final move, instead the player can cancel that punch and use his Grounded Up Attack (Rabbit Kick), this true combos into Bug’s Down Air (Downward Mallet Swing) which itself, combos even further into Bugs’ Up Air (Swing Batta Batta!) for a true 22% combo that the CPU will not be able to dodge out of provided you do the inputs right. This is a significant, objective improvement over the 14% dealt by Why I Oughta! If you just use the move as normal and don’t experiment with cancelling it part way through. Superman’s Grounded Side Attack (Kryptonian Combo) isn’t even actually a true combo itself! When you try it on a CPU set to Dodge During Hitstun, they dodge out before the final hit! What is true however is the first hit of the Kryptonian Combo into his Grounded Up Attack (Overhead Swing) which pops your opponent up at the perfect height and angle for some true aerial follow-ups. 

Of course not every character has combos like this, but a lot of them do, so experiment! Play around with your character’s grounded moves, see which ones you can cancel out of midway through for a better combo route and start dunking on some people online. It stands to reason that a lot of these combos work much better at the 0-30% or so range as your opponents will take less knockback, but some combos have incredibly generous windows, and are almost always viable. Being able to optimize every opening you get with properly practiced and input combos is perhaps the single biggest factor that will set you apart from the rest of the pack in MultiVersus. It’s the latest craze, all the top players are doing it. Get on board.

Some Final Tips

Avoid redundancy! 

If you’re playing the game’s 2v2 mode and your teammate is playing a “Mage” class character, try not to double up on Mages, otherwise you’ll both be serving the same role. Try and choose a character who can better support the Mage’s class archetype like maybe a better up-close fighter like a Bruiser or Assassin. Team composition matters.

Play to your strengths with the game’s perk system! 

If you are playing one of the more aggressive Bruiser or Assassin characters, you’re probably looking at the red, offensively oriented perks rather than the defensive blue perks. Because why would you use perks to make a character designed to score kills easily play defensive? That’s (hopefully) your teammate’s job! Min-maxing is key in almost every game at a high level, pick perks that further accentuate your strengths, don’t try and patch up weaknesses that are part of the character’s design and should be covered by your teammate.

Be cognizant of what perks your teammate is picking! Sometimes, a compromise is necessary. Perks “stack,” meaning when both teammates use the same perk, their ability is enhanced. One perk even gives both team members a permanent 3rd jump if they both equip it, which can be huge!

Finally, watch the best!

There are tons of good players tearing it up in MultiVersus right now, and many of them on stream too! And with EVO and many other big tournaments now in our rear view, there’s no shortage of footage of the best players — Mirrorman, Synume and VoiD, just to name a few.

Good luck, and happy climbing!

How to Unlock Every Character in MultiVersus Fast and Free

MultiVersus is the new platform-fighter by Warner Bros. Interactive Entertainment that has recently gone into open beta. With an eclectic roster filled with characters from across WB’s vast catalog such as Batman and Finn from Adventure Time – and a rapidly growing roster that has already added new characters such as the Iron Giant and Lebron James – it’s crucial to find the character that’s the best fit for you.

Batman and Lebron James square off in a solo game of MultiVersus

However, because the game is a free-to-play title, it doesn’t simply allow players to have immediate access to the entire roster. Instead, MultiVersus utilizes a system of free and premium currency that is used to unlock new characters in addition to a free rotating stable of four characters that changes biweekly. 

The problem players may run into is that they may spend time grinding to unlock a character that they end up disliking and this could lead to a long journey to find their main. Although all characters are accessible in the game’s training mode, The Lab, you are limited to playing against an AI.

Since it’s a free-to-play game, the fastest way is going to be by spending premium currency. However, this can be pricey as it costs about $10 per character. Many players will likely not want to break open their wallets just to find one or a few characters that they enjoy playing. 

Luckily, there are ways to accelerate the rate at which you unlock characters using the game’s free currency so that you can find the character that best suits your playstyle without breaking the bank.

Read on to find out how to unlock characters in MultiVersus fast and free. 

How to Unlock Characters in MultiVersus Fast and Free

Batman and Lebron James square off in a solo game of MultiVersus

Characters in MultiVersus can be unlocked in three ways:

1) Gold: the game’s free currency

Gold is the in-game currency that is obtained by completing a variety of challenges and participating in matches. 

2) Gleamium: the premium currency

Gleamium is the game’s premium currency that can only be purchased via real money, 

3) Character Tickets: from the Founder’s Pack

Character Tickets are only available from one of the game’s Founder’s Packs.

Luckily for players, even though characters cost 1,500 to 3,000 Gold each, MultiVersus is more generous with its in-game currency than some other free-to-play games. You can amass a nice supply of gold simply by playing the game, but here are the methods to prioritize if you want to unlock characters faster without spending money. 

In order of importance, here’s how to speed up your character unlocks:

  1. Playing With Friends
  2. Daily Missions
  3. First Win of the Day 
  4. Leveling Up
  5. Getting Toasted

Playing With Friends Is The Fastest Way to Unlock Characters

MultiVersus, unlike many other platform fights, has an emphasis on team-play. This is reinforced by the game giving you 30% more XP and 30% more gold simply by playing with your friends. 

The Gold earned from any game amounts to:

  • Match Bonus – 9 Gold
  • Victory Bonus – 9 Gold
  • Party Bonus (Playing with a friend) – 5 Gold

Make sure you’re partying up for the game’s 2v2 mode as often as possible to maximize your Gold income.

Daily Missions

MultiVersus has both a premium and free battle pass. The free battle pass will give you access to a guaranteed 500 Gold as well as five Toasts (more on this in a bit). The premium battle pass will net players an additional ten toasts. 

Daily Missions allow the battle pass to be progressed so doing things like getting four melee ring outs or getting three assists will help you progress either battle pass and increase your Gold accumulation. 

Not only that, but your first few daily missions will guarantee a supply of gold. You can get 400 Gold just from doing the first three. 

First Win of the Day 

This one is pretty self-explanatory. Obtaining your first win of the day will net you a whopping 100 Gold.

Leveling Up

Each time you raise your profile to the next level, MultiVersus rewards you with an additional 100 Gold. This can be sped up by completing daily missions and the utilization of rested XP.

Individual characters also level up and will provide 100 Gold upon obtaining level five. Even when using the free rotating characters, you can guarantee 400 Gold every two weeks. 

Getting Toasted

MultiVersus features something akin to a tip system wherein players use an item called Toast to other players. Receiving Toast automatically grants you 20 Gold. On top of receiving Toast from the battle pass, players receive a daily login bonus of five Toasts.

Toasts can be exploited by playing with friends to ensure that you toast one another. 

Hopefully, this helps you unlock characters in MultiVersus fast and free. 

MultiVersus Season 1 Patch Changes, Buffs, and Nerfs

MultiVersus, the platform fighter and unnatural amalgamation of creative properties, starts its first season today, and it’s coming with a hefty balance patch. Players have been eagerly anticipating MultiVersus patch changes, especially since being bullied by Finn’s lethal backpack spin and Velma’s unrelenting shower of speech bubble projectiles.

The patch notes clarify that, while most of the changes go into effect right away, some will take a couple more days to implement.

Firstly, the free character options rotate as expected. Similar to your favorite MOBA, Multiversus offers a handful of characters any player can use without spending gold, changing every couple of weeks. This time, the available characters are Arya Stark, Batman, LeBron James, and Steven Universe. Besides being a good example of how nutty the roster is, it’s an interesting selection because Arya and Steven are both considered “Expert” characters. What will happen when the average Joe gets to freely use complex characters?

New Free Characters after Season 1 MultiVersus patch changes :

  • Arya
  • Batman
  • LeBron
  • Steven

Two of the four freebies, Arya and LeBron, were big winners in the buffs lottery. Both characters received several upgrades to their air attacks to allow them to string combos together more easily. Wonder Woman and Harley Quinn also got some buffs: increased weight to help them live a little longer.

Superman and Shaggy get nerfed a bit

Superman and Shaggy took minor nerfs, both characters getting extended vulnerability on some of their strongest attacks. As expected, patch changes had Finn taking major nerfs, with increased recovery time on attacks and a weaker backpack spin that leaks coins on a miss. Velma was hit hard as well, losing weight, ammo, and recovery speed. Bugs Bunny, another character who’d been dominating, was given longer recovery on his otherwise-devastating melee strikes, and a fix to an annoying exploit that let him throw two massive missiles for the price of one. The Iron Giant took some hits as well, losing some of his bonus health and armor, and stopping his cannonball splash from hitting an infinite number of times.

MultiVersus patch changes for Taz had several changes in both directions. This character used to terrorize opponents with his high-powered tornado before it was weakened dramatically. In this patch, the tornado is given a seven second cooldown between uses, but it now spins for longer if it passes an ally. (Using the move on cooldown produces a tiny, 0.25 second long tornado.) He also had his chewing and projectile-spitting abilities improved, and a change to the effect of turning his opponents into a novelty roast chicken: the chicken effect wears off faster, but is larger and easier to hit.

The patch also reduces the potency of ice, makes some Battle Pass objectives easier to reach, and fixes the one tutorial mission that’s been bugged for weeks by slapping a wall into it. Lastly, the patch notes come with a reminder that Morty, of Rick and Morty fame, will be added to the game on August 23rd. He’s described as “our first Plumbus-wielding character,” which speaks for itself.

You can read all of the MultiVersus patch changes in detail from MultiVersus on their official site.