Genshin Impact Fane of Panjvahe Guide: How to Unlock

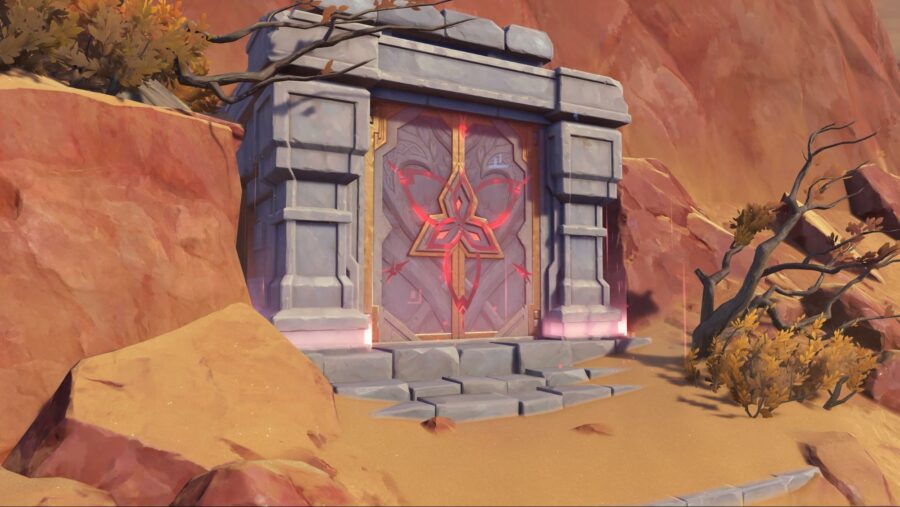
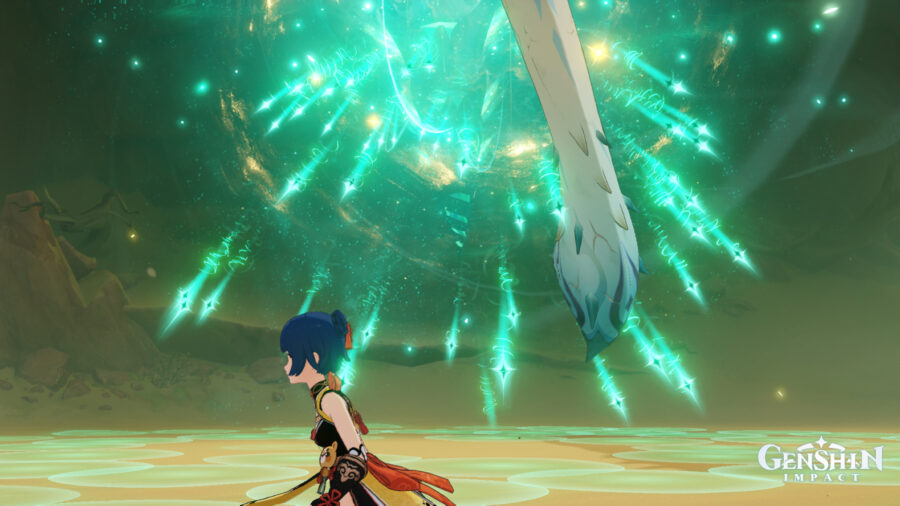
Like all the previously added regions, the recently added desert area in Genshin Impact brought tons of chest, quests, secrets, and domains. One such is Fane of Panjvahe domain, located north-east of The Sand of Three Canals. Completing it rewards with 40 primogems, 5 dendro sigils, 35000 mora, 4 weapon leveling materials, 2 guides to ingenuity talent books, 2 character upgrade materials, and a solitary desert pavilion artifact. 

To get all those resources, you will have to first unlock the domain, which isn’t as straightforward this time. There is a puzzle you’ll need to solve. Nothing too hard, though. 

How to Unlock the Fane of Panjvahe Domain in Genshin Impact  

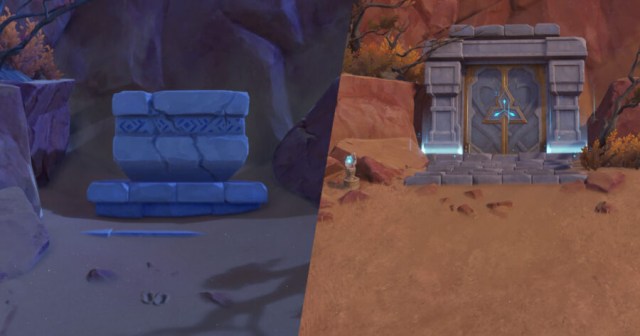
To unlock the Fane of Panjvahe in Genshin Impact, you just have to put two seelies in their courts that are located just at the front of the domain. As for where those seelies are, they are a few steps away—one at the left and the other at the right—from the domain. 

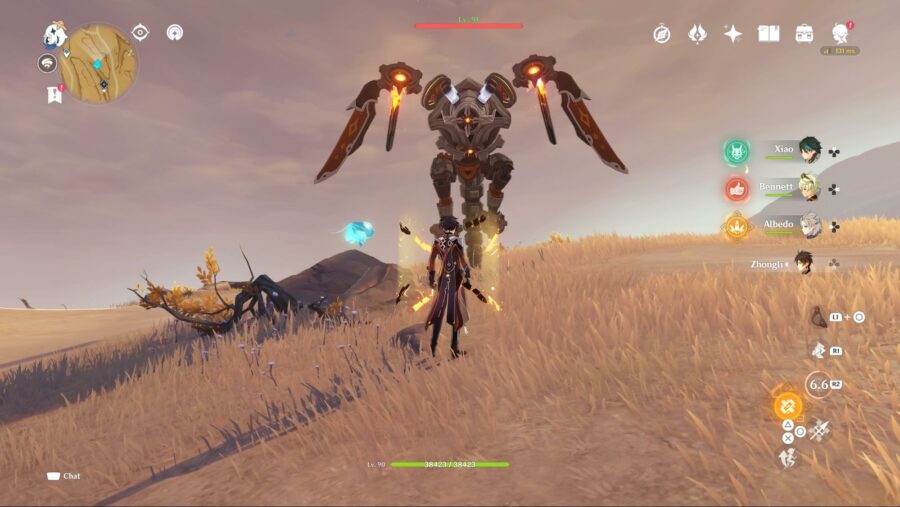
The one seelie, towards the west, is pretty straightforward. There is a Ruin Drake that you need to kill, and once done, it’ll be free. 

After killing the enemy, touch the seelie and it should head on its way.

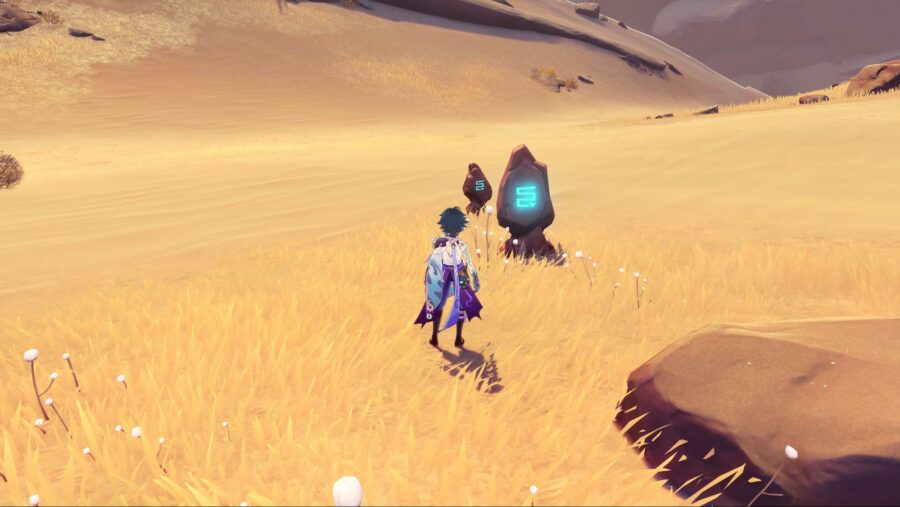
The other seelie should be hovering over a weathered obelisk puzzle. You’ll first have to complete the puzzle. 

The puzzle is simple, you just have to match the symbol on the inner stones with the one that is outside.

The symbols in the inner stones are the ones that are to be changed, and can be done by just hitting them. But, there is a catch. The seelie will float over it and change the symbol. You’ll have to, therefore, be quick and change the symbol before the seelie messes with it. Hit the stone quickly after the seelie hovers over it. This way, you should be able to match the symbols before the seelie completes the detour.  

Once all stones are matched, the seelie will be en route to the remaining court. That’s all you need to know about the domain. You can always check Minus World for more guides, including Genshin Impact guides like this one that has neat tips on leveling up your Genshin battle pass faster.

Fire Emblem Engage Amiibo Support Guide: How to Use Amiibo

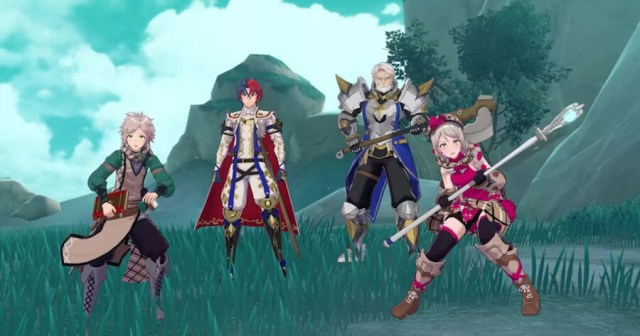
Fire Emblem Engage has introduced plenty of new mechanics in this iteration of the Strategy RPG series, but a returning Amiibo feature previously seen in Three Houses can net the player some pretty special rewards. Unlocking Amiibo support in Engage is pretty simple, it requires the player to play through Chapter 5 of the story, where the Amiibo Gazebo will be unlocked for use. 

You can actually find the gazebo earlier once The Somniel’s map is initially opened up to you in Chapter 3, but the function isn’t there yet at that point – in classic RPG slow-burn fashion, the game will force you to get to grips with the initial tutorial business first.

Fire Emblem Engage: Amiibo Gazebo Location and How to Scan Amiibo

Where to find the amiibo Gazebo in Fire Emblem Engage.

First off, open your map of The Somniel by pressing the X button, this will show you a list of locations you can fast travel to, then choose the ‘Orchard’ fast travel option. Once there, turn left and walk under the arch, the back of the gazebo will be right in front of you, it’s hard to miss. 

To use the Amiibo function, approach the pedestal and interact with it, and the Scan option will appear. Once chosen, you can then place any Amiibo you have in your collection over your joycon to scan it, make sure to hold it for a few seconds to ensure it’s read properly. If you use a Fire Emblem Amiibo, you’ll be rewarded with special outfits and music specifically associated with that Fire Emblem title. Should you scan a non-FE Amiibo, you’ll be given random bonus items and materials. 

You can only scan five Amiibo at a time in one 24-hour period, so make sure to scan the ones you’re most interested in first, as you’ll have to wait to rescan. 

For more Fire Emblem Engage content, make sure to check if there’s a New Game Plus!

FFXIV Mount Ordeals Trial Guide (Normal Difficulty)

Patch 6.3 of FFXIV released on January 10, 2023 and with it came a new eight player trial, Mount Ordeals! In this trial you face off against Rubicante, the Autarch of Flame, the Elemental Lord of Fire, and the final of Golbez’s four Archfiends.

The trial unlocks following the dungeon also released in Final Fantasy XIV 6.3, Lapis Manalis. Finish the dungeon, complete a few quest objectives, and you will gain access to Mount Ordeals. I’ll walk you through the fight so you can defeat Rubicante and move on to pondering what Golbez’s next steps will be…

FFXIV Mount Ordeals Trial: Phase One

Rubicante, the boss of FFXIV's Mount Ordeals.

As soon as the fight begins, Rubicante will use Inferno. This is a simple unavoidable raid-wide attack, damaging every player in the party. Since this is both the opening attack, and unavoidable, there is very little chance of it causing any players to be knocked out. Feel free to use a low level defensive cooldown if your class has one, like Third Eye or Tactician, and stick close to the healers so they can heal the party quickly with AoE heals. Nice and easy.

Next Rubicante will raise one arm, imbuing his hand with flames, and change one side of the background of the arena into a realm of fire. Don’t worry though, despite how the animation looks, this itself is not and attack. Rather it signifies the next mechanic, Ordeal of Purgation. The floor of the arena will be divided into 3 sections, a red center circle, a purple middle ring, and a red outer ring. Each section will have white lines running through it. The center will have a single line, the middle ring has multiple lines, some of which are straight and others which turn to the left or right before continuing to the outer ring, which has multiple straight lines. Each line in the outer circle will connect to a blue marker around the outside of the arena. The blue markers each have a triangle on them, giving you a clue as to what they do. A small fireball will start from the center, and follow whatever line goes from the center to the outside. The marker the fireball hits will do a large cone AoE across the arena. The first two times this happens in the fight, just follow the line to see what cone will activate, and move close to that marker, but off to one side to dodge the AoE. You will be locked in place just before the AoE appears, so make sure you move to dodge fast! The mechanic will be slightly different the next time he does it.

Following this, Rubicante will use Shattering Heat, a telegraphed tankbuster attack, hitting the main tank. If you’re tanking, just avoid the party, and use defensive cooldowns. Healers should be ready to heal the tank after they’re hit. And DPS just avoid the tank so you don’t get hit as well.

Rubicante will then cast Arch Inferno. During this the center of the arena, directly under the boss will be instant death, and a series of large circular AoEs will appear around the edge of the arena. There will be two sets of AoEs directly across the Arena from each other, and each one will spawn further AoEs moving in a clockwise pattern. There will be one safe area on each side between the sets of AoEs that will move as new AoEs spawn and old ones go off. You need to run clockwise behind one set of AoEs, and ahead of the other, rotating with the safe zone around the boss. Smaller circle AoEs will show up beneath players, simply dodge these as they appear.

The next mechanics happen during Arch Inferno. First is Conflagration. This is a line AoE going across the arena, targeting the safe zones. However, there will be enough room in the safe zones to dodge this. The easiest way is to keep right behind the AoEs you’re trailing, so you end up in front of the Conflagration line. He will now cast Radial Flagration. This will be numerous small cone AoEs radiating outward from the boss. You just need to be in one of the spaces between the cones. If, like with Conflagration, you stay close to the AoEs ahead of you, you will have plenty of time to dodge Radial Flagration before the Arch Inferno AoEs reach you.

Once Arch Inferno ends, Rubicante will alter the background again, signaling another set of Ordeals of Purgation. However, this time there will arrows on the middle ring. The lines in that ring will rotate in the direction of the arrows by one space. For example, if there is a straight line connected to the center line, when it moves there will be a line that turns. Just see which line will move into place and connect to the center, and then resolve the mechanic the same as you did the first two times. He will again use Ordeals of Purgation twice in a row.

Adds Phase

Rubicante will now move to the edge of the arena, and three Flamesent and one Greater Flamesent add will spawn. The Greater Flamesent will repeatedly use an unavoidable attack, which will give players stacks of a burn debuff, dealing damage to players over time. The smaller adds will use Ghastly Flame, a number of small circle AoEs, Ghastly Wind, cones aimed at players, and Shattering Heat, a tankbuster that is the same as before but targets a random tank. Healers will need to heal players through the raidwides and tanks through the buster, while the tanks should group the adds up to allow DPS to use AoE attacks to kill them quickly. It is recommended to focus on the Greater Flamesent first to stop the stacks of burn. During all this a meter will be filling. Once the adds are all dead or the meter completely fills, Rubicante will become targetable again as he uses Blazing Rapture. This is an unavoidable attack which deals more damage the higher the meter is filled. If it’s at 100%, you’ll wipe, but you should be able to kill the ads with plenty of time to spare.

Phase Two – FFXIV Mount Ordeals Trial Guide

As the second phase begins, there will be a small cutscene as Rubicante changes form with his cloak becoming a demonic wing. Once the cutscene ends, he will cast Inferno. However, in his new form Inferno instead puts circle AoE markers on each player. Just spread out so you aren’t overlapping your AoE with another player. Each player will get a bleed damage over time debuff as well as the damage from the AoEs themselves so healers will need to be prepared to heal through the damage.

He will then use Flamerake. A large symbol with two arrows pointing in opposite directions will appear in the center of the arena. This symbol will then spin. When it stops a line AoE will spawn across the arena in the direction of the arrows. After this AoE goes off, it will then repeat going outward towards the edges of the arena in a wave-like fashion. You will want to position yourself close to the edge of the initial AoE and move into it immediately after the AoE goes off. This will dodge the repeating AoEs.

Next up is Soulscald. Each player will be targeted with a line AoE radiating out from the boss which will follow the player. Spread out to avoid overlap, and make sure to leave space between the AoEs! Because immediately following this blue AoEs will appear where the line AoEs were placed, going all the way across the arena. Son long as you left enough room between the initial AoEs, you should be able to easily move into the safe spots between the blue lines.

After this Rubicante uses Dualfire. This attack is another tankbuster, but with very large cone AoEs. The tanks will need to go on the opposite side as the rest of the party, and spread out enough to not overlap each other. As with the Shattering Heat tankbuster, use defensive cooldowns to survive, and healers will need to heal the tanks while they and the DPS stay in the safe area across from the tanks.

The final new mechanic will be Sweeping Immolation. This will either be a stack marker or spread markers on each player, at the same time as an AoE covers one half of the arena. If it is a stack, the player targets with the stack marker will need to move out of the side of the arena being hit by the AoE, while the rest of the party groups up within the stack. If it’s spread, then each player will have to move out of the AoE and spread out to not overlap.

After this Rubicante will revert back to his normal, cloaked form. He will now begin looping through his mechanics again, until defeated by the party or, in the worst case scenario, he defeats the party. Simply resolve the mechanics just like you did previously in the fight and you should easily deplete Rubicante’s health and clear the fight! You can now finish the current chapter of the Main Scenario Quest, ready for the next patch.

The Extreme difficulty version of the trial can be unlocked in Old Sharlayan, like the previous
EX trials in Endwalker. If you want to go into that version, I recommend watching this video by Hector
Hectorson, as his strategies are the ones that have been widely adopted by Party Finder. Judging by my
experience, his guide should help you clear the EX without difficulty!

Aging Otaku Uses Body Pillow for Lower Back Pain

TOLEDO, Ohio — 39-year-old anime fan Shawn Spelman has reportedly discovered a new form of back relief after repurposing his otaku body pillow from a romantic object to a physical therapy aid. 

“I have long been a devotee of Japanese culture and the hikikomori lifestyle,” said Spelman in a Zoom interview from his mother and stepfather’s attic. “Unfortunately, cultivating my Tachi short-sword collection and playing dark, erotic dating sims for the past 20 years has left me with significant sciatica. It’s gotten so bad that I needed to put my waifu, my love pillow of Tifa Lockhart in her leopard print cheongsam, in between my knees. It was such a relief! I just don’t know how I’ll make it up to her.”

Physicians report that these ailments have become more common as American anime fans reach advanced age.

“Kids who played the first Persona game on the original PlayStation and watched the classic Toonami afternoon animation block are now entering their forties, and most of these individuals developed unhealthy habits and unsustainable lifestyles,” said Dr. Allison Garcia, Physical Therapist at Binghamton General Hospital. “These people have spent decades hunched over Mobile Suit Gundam models or slouching in gaming chairs, causing neurological, muscular and skeletal damage, especially in the lower back. I recommend a foam back wedge or an orthopedic knee pillow to treat these symptoms, but properly positioning a full-sized pillow depicting a cartoon school girl dressed as a bunny also works wonders and is often more readily on-hand for these unique cases.”

Vendors are responding to this change in their target demographic by quickly pivoting to fill the market’s need for orthopedically effective body pillows.

“For years, we’ve had basic rectangular pillows with standard filling, which hasn’t been our focus since it’s the imagery on the pillow cases that have driven sales: kawaii, furry characters, bishoujo, porn stars, and the like.” said Hiroyuki Tagame, owner of Discreet Dakimakura Pillows. “Lately, however, clients inquire about the material, support, and stability of the pillow filling itself. They no longer simply want a pillow depicting a woman in a maid cafe uniform groped by tentacles; now, they want a plush, responsive, shredded-latex-cored-and-down-layer-covered 100% cotton pillow depicting a woman in a maid cafe uniform groped by tentacles.”

With his back pain alleviated, Spelman has implemented other small lifestyle changes to be healthier. He stopped drinking Lychee Ramune Soda, switched from Sesame Chicken Doritos to seaweed snacks, and has started Naruto running on the treadmill.

At press time, Spelman reported he has finally gotten back in shape enough to fit in his old Majin Buu cosplay.

Photo via Nigel Munoz.

Self-Loathing Protagonist Can’t Ever Fast Travel Because His Greatest Enemy Is Within

THE WASTELAND — Local rogue protagonist and dystopian wasteland resident Gunner Mayhew reportedly had an epiphany Friday when he was unable to fast travel due to an enemy nearby — his own psyche. 

“I was trying to teleport to my next mission point, but I couldn’t due to a supposed enemy nearby,” Mayhew said. “I looked around and there wasn’t anyone there but me, when suddenly it hit me. I’m my own worst enemy. I sabotage my own happiness and career far more than any giant mutant spiders or deranged raiders ever could. I came to terms with the fact that it’s not about gaining levels and acquiring better gear, it’s about looking in the mirror and liking what stares back at me. I’m like a goddamn pop punk song but real.”

Mayhew’s frequent sidekick and leader of the wasteland resistance group The Hazmat Squad Brian Peyton said he was proud of Mayhew’s character growth.

“Before he was far too overencumbered to fast travel, not by weapons or trinkets, but by emotional baggage,” Peyton said. “It’s tough being the chosen one, the lone wanderer to save our world, and I could see it weighing on him. He would constantly ask me if he really was the one the prophecy foretold, and often lament how he doesn’t deserve it. I’m proud he finally decided to take some time and do some mental xp grinding for a while.

Local wasteland warlord and mortal enemy of Mayhew, Boss Johnson, said that he had seen this realization coming for years.

“Mayhew may thwart my evil plans at every turn, but even I could tell that he didn’t actually hate me and my nuclear arsenal, he hated himself,” Johnson said. “He was clearly doing all these lengthy missions and tedious side quests as a distraction, something to keep him busy so he doesn’t just have to be alone, truly alone, with himself. He’s constantly practicing new skills and adding new members to his party, but I’m glad he finally figured out that he himself is enough.”

At press time, sources close to Mayhew reported that the maverick wasteland survivor’s self-love had just unlocked a new ‘affirmations’ portion of his skill tree.

Brendan Fraser Has Heartwarming Reunion With Giant Sand Face From ‘The Mummy’

LOS ANGELES — Following a Golden Globe and a career resurrection, beloved actor Brendan Fraser shared a touching reunion with a past cast member from the iconic ‘The Mummy’ trilogy that put him on the map: the giant sand face from the film’s climax.

“Hey pal, how’ve you been?” a teary-eyed Fraser asked upon seeing the large CGI face backstage at the New York Critic Circle Awards. “It’s great to see you again; wow, how the years just fly by! Do you remember us getting drunk on set after shooting one day? Talking about everything, and nothing. I know my career has had a bit of a resurgence lately, but I can’t wait to see what you do in the following years. I heard through the grapevine you’re developing a sitcom for NBC? That’s so great.”

The sand face later gave insight into what it was like to finally reconvene with the actor years later.

“I was just there to present an award, but right before I went on I saw Brendan emerge from the stage left wing and I had to go say hello,” the sand face billowed. “I know what this guy has been through, and it’s so nice to see him looking healthy again. I may be just a groundbreaking special effect for the time, but I’m a sucker for a comeback story like Brendan has had. He looks healthy, and happy. That’s all I ever wanted for him. Well, that and to swallow him into my massive sand mouth in the climax of the first Mummy movie. I’ll get my chance one day.”

At press time, sources reported that Fraser sympathized with the sand face, who had also fallen off the Hollywood map due to overbearing alimony payments.

Genshin Impact 3.4 Boss Guide: How to Beat Setekh Wenut

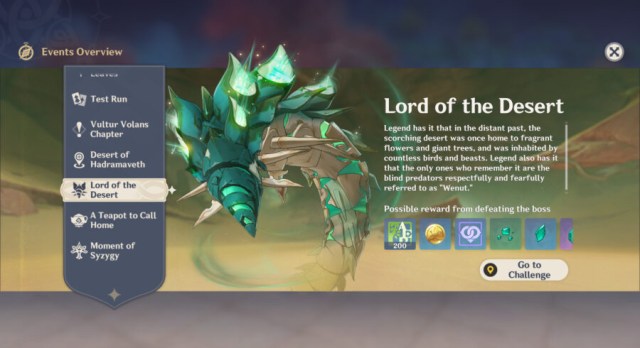
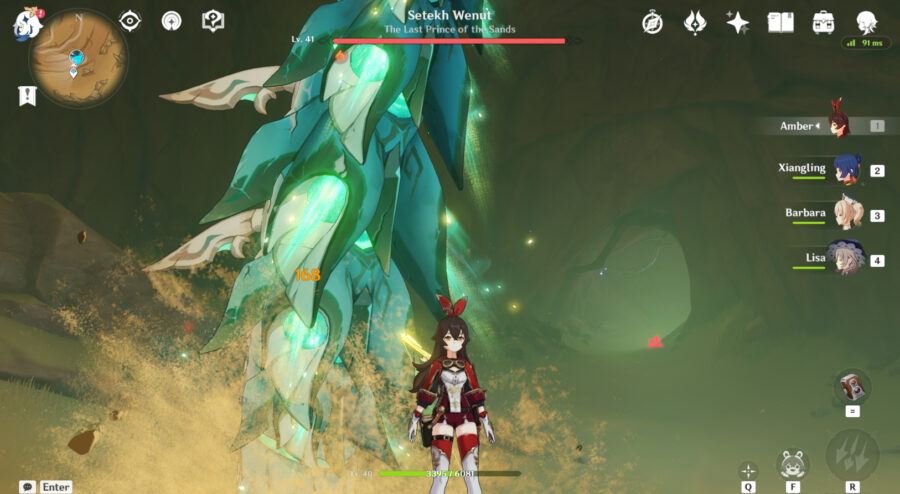
The Genshin Impact 3.4 Update is here and it’s filled with a whole lot of new content, inlcuding Setekh Wenut, a new boss. Setekh Wenut is a brand new boss in the Sumeru desert  that drops an exclusive Ascension Material for the new character Alhaitham. We’ve got you covered with all the Setekh Wenut tips you need to know to beat this boss, including the ideal team composition and details on each boss attack.

Genshin Impact 3.4: Setekh Wenut Boss Location

Where you can find Setekh Wenut in Genshin Impact 3.4

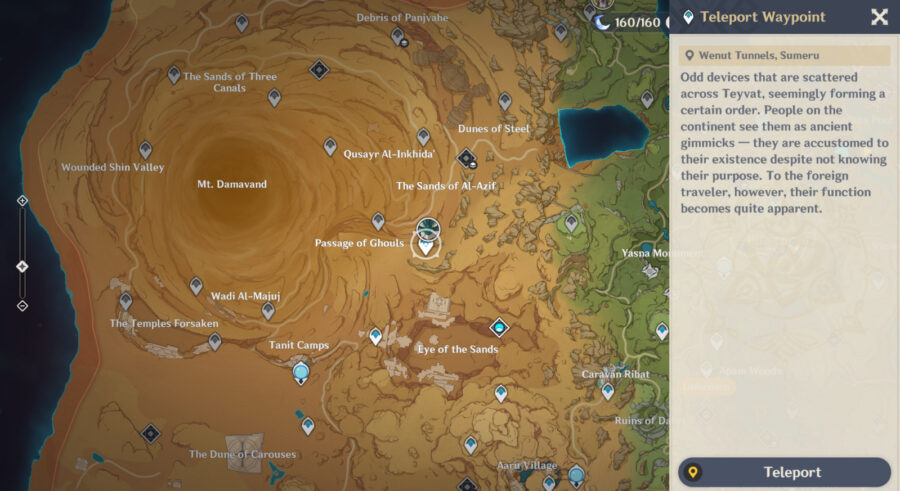
Thankfully, it’s not too difficult to reach this boss’ arena. If you’ve already explored the Sumeru desert area, the Wenut Tunnels waypoint will place you right in front of the entrance.

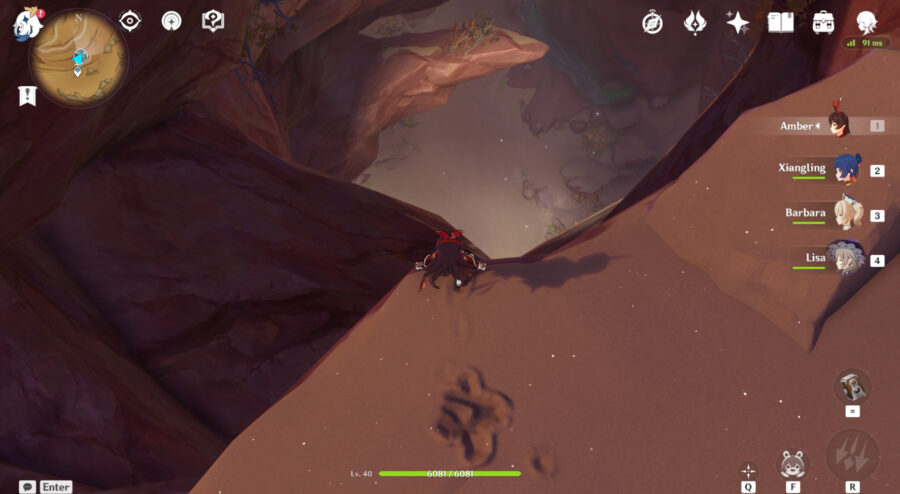
All you have to do is run forward and glide down. It’s pretty deep in, but you should be able to reach the bottom without losing all your stamina.

Setekh Wenut Best Team Composition

The best team comp to take on Setekh Wenut in Genshin Impact 3.4

Before we go over the fight itself and each of the attacks, we can briefly talk about team composition. A unique mechanic in this fight requires a bow user whose element will react with Anemo energy. As long as they can charge up a Cryo, Electro, Hydro, or Pyro shot, they’ll work fine. For those using a team of free characters, Amber fits this crucial role quite nicely.

The next important character you’ll need is one who shares the same Elemental type as that Bow user. They’ll have a chance to inflict a lot of damage with reduced resistance so it’s best that they’re the strongest damage dealer on the team. Any F2P players will be perfectly set with Xiangling filling in this role.

Both of those roles are essential and the remaining will be for support. Bringing along a healer or someone who can generate shields will be a great benefit in case you mistime a dodge, which you’ll be certain to notice if you get hit by one of Setekh Wenut’s attacks. Barbara and Noelle can support F2P players just fine here. 

That leaves us with the last role. What works best is a character whose element reacts well with the first two. Continuing with what works best for F2P players, someone who can cause elemental reactions with Pyro will fit. Using Kaeya’s Cryo abilities to trigger Melt or even Barbara to trigger Vaporize make the most sense, but if you’re worried about the timing leading to lower damage there’s always the choice of triggering an Overloaded reaction with Lisa.

Setekh Wenut Attacks, Abilities, and Strategies

Setekh Wenut is a boss that’s almost always on the move and out of sight. There simply isn’t a lot of time to capitalize with powerful setups because of how mobile it is, how far away it can be, or due to how often you’ll need to dodge. Each attack is detailed below along with how you can respond.

First up are two simple movement abilities which see it breaching out from under the sand and then diving back in. One compromises a very short distance while the other is a much more dramatic leap. Neither inflicts damage, so feel free to get in as many strong attacks as you can.

Moving on are two physical DMG attacks to look out for. One is an attack that comes up from directly beneath you, with Setekh Wenut shooting itself upwards and then sinking back into the sand. Anemo energy will surround the ground you’re on to telegraph the attack and let you know to dodge. Attack as soon as possible.

One of Setekh Wenut's attacks in Genshin impact is a tail whip.

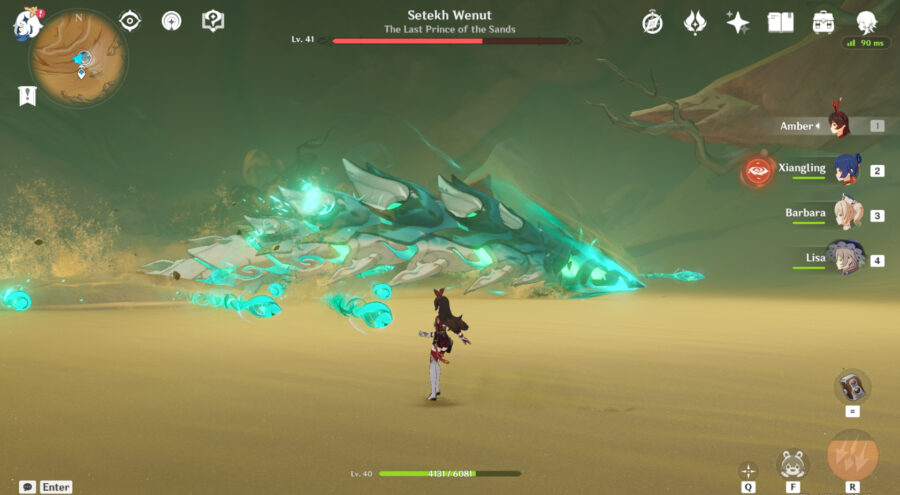
The other Physical DMG attack begins with the tail-end coming out of the sand and sweeping the area in front of it. Ranged attacks are best here, but don’t forget to dodge.

Next are four Anemo DMG attacks and the first three are similarly performed with the tail. Instead of sweeping the area, it’s possible for it to swirl around and charge up a burst of projectiles to throw your way. You’ll have a bit of time to sink some arrows in.

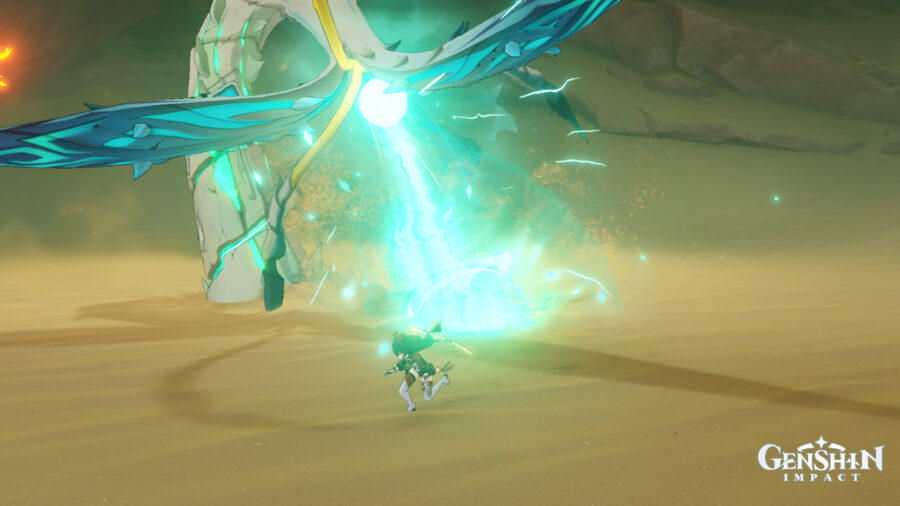
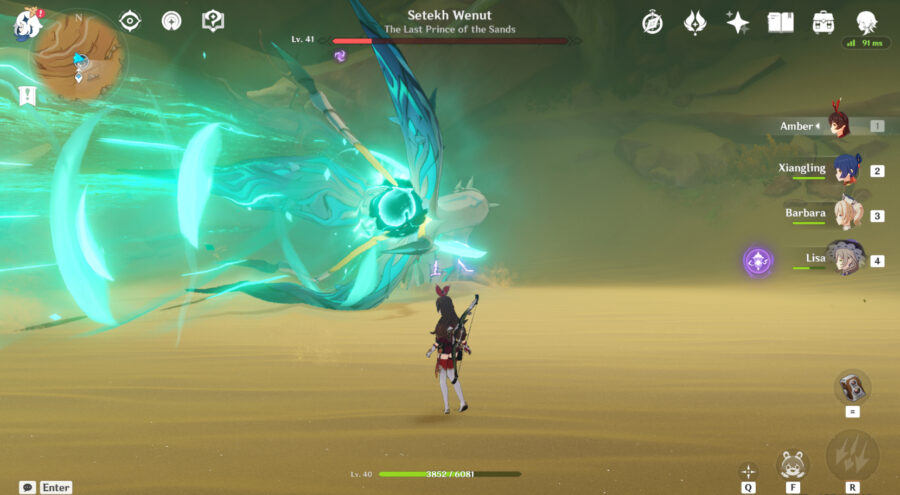
A lot more intimidating are the beam-based attacks. The first is a vertical beam and the second is a sweeping horizontal beam that covers half of the arena in front of it. Both are quick, but you can find time to attack right before and after the dodges. If you’re quick enough you can reach it for a few whacks before it goes under.

The final typical attack has it breach the sand and return to it like the initial move we talked about, only it’s a bit faster and many homing projectiles shoot out from the body. This one is better spent dodging than trying to attack.

That leaves us with the final and most damaging attack. Setekh Wenut jumps out of the sand and floats in the air, generating five Anemo energy balls called Windbite Bullets. They are absorbed after a while and lead to a hail of powerful projectiles all over the arena. This is where the previously mentioned unique mechanic comes into play.

Triggering a Swirl reaction can destroy these Windbite Bullets. Switch to your Bow user and charge up a couple of shots. Once two have been destroyed, the boss will enter a paralyzed state for 10 seconds. 

Equally important to know is that in this state the boss has a lowered resistance to whichever elements triggered the Swirl reaction. Switch to your strongest damage dealer with the same element type and let them enjoy their moment to shine. Repeat this routine a bit more and you’ll have it beat in no time.

Setekh Wenut Rewards and Item Drops – Genshin Impact 3.4

The rewards players are given for beating Setekh Wenut in Genshin Impact.

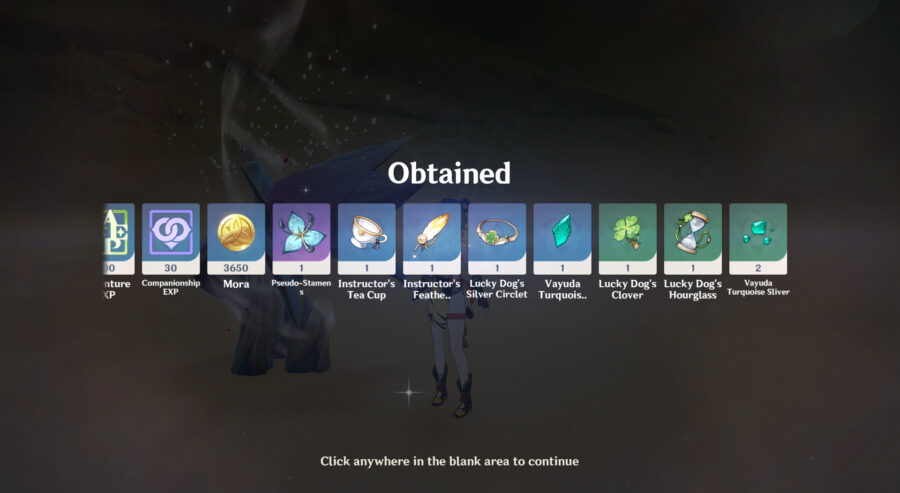
40x Original Resin is needed to claim the rewards from the Trounce Blossom that appears after defeating the boss. The exclusive drop worth grinding this fight for is Pseudo-Stamens, which can be used to ascend the recently introduced Alhaitham. Other drops include what’s expected after a boss:

  • Character EXP
  • Adventure EXP
  • Companionship EXP
  • Mora
  • Vayuda Turquoise Ascension Gems
  • Psuedo-Stamens
  • Bard Set
  • Berserker Set
  • Instructor Set
  • Lucky Dog Set
  • Gladiator’s Finale Set
  • Wanderer’s Troup Set

Genshin Impact 3.4 Best Characters Guide: The 5 Best Characters

Genshin Impact is a widely popular action RPG game set in the fantasy world of Teyvat. As with other RPG titles, Genshin Impact boasts a massive collection of characters, each with their own unique abilities and playstyles. 

In fact, Genshin Impact recently got its 3.4 update which brought a bunch of new characters. As a result, the playable character pool continues to evolve with the launch of the latest update. 

With so many characters to choose from, it can be a daunting task to figure out which ones are the best as per your play style. So whether you’re a new player looking for the best characters to start with or an experienced player looking to optimize your team, this guide ranks the top five characters in Genshin Impact 3.4.

5. Zhongli – Best Genshin Impact Characters (3.4)

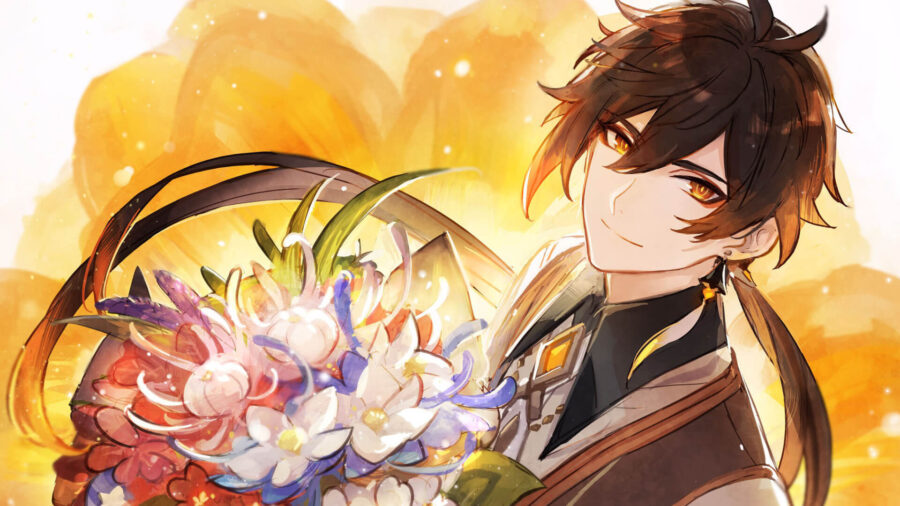
Zhongli is a five-star Geo character that excels in crowd control and area-of-effect damage. He is a versatile character who can damage multiple enemies at once, and his abilities allow him to stun and knock back enemies, making them vulnerable to attacks.

One of his main abilities, “Dominus Lapidis,” creates a large pillar that deals Geo damage to all enemies within its area of effect. This ability also grants a shield to Zhongli and his allies, making them more durable in battle. Another ability, “Rain of Stone,” allows Zhongli to create a large area of effect that deals Geo damage to all enemies and increases the attack power of Zhongli and his allies.

Overall, Zhongli is a powerful character that can deal significant damage and provide valuable support to his team. He’s a great addition to any team that wants to control the battlefield and deal with multiple enemies at once.

4. Hu Tao

Hu Tao, one of the best Genshin Impact characters as of update 3.4

Hu Tao fills out the damage dealer or support role in your team with the help of her five-star Pyro abilities. Hu Tao wields a spear, and her abilities allow her to deal massive damage quickly, making her one of the best characters for taking out bosses and high-priority targets.

One of her main abilities, “Guide to Afterlife,” allows Hu Tao to sacrifice a portion of her health to deal massive Pyro damage to enemies. This ability also increases her attack power, making her even deadlier in battle. Another ability, “Seven-Star Sword,” allows Hu Tao to perform a powerful spear strike that deals Pyro damage to enemies and also causes them to take additional damage over time.

Hu Tao’s abilities make her a formidable character in battle, as she becomes even more vital when her health is low, allowing her to take out enemies quickly. However, it’s essential to keep an eye on her health when using her abilities to gain their full potential.

3. Raiden Shogun

Electro character Raiden Shogun joined Genshin Impact‘s playable roaster long ago, becoming one of the best characters and a fan-favorite figure in no time. Raiden has the potential to take out large groups of enemies in a short amount of time with his overpowered abilities like Thunderclap Sword and Thundering Fury.

Using the Thunderclap Sword ability, Raiden can deal massive Electro damage to enemies. This ability also causes enemies to take additional damage over time, making it an excellent ability for taking out large groups of enemies. At the same time, Thundering Fur allows the character to deal heavy Electro damage to enemies and also stun them, making them vulnerable to attacks from other characters.

However, keep in mind that Raiden Shogun is a melee character, so it’s important to be aware of your positioning to avoid taking unnecessary damage.

2. Alhaitham

Debuting in the Genshin Impact 3.4 version, Alhaitham is a member of the Haravatat of the Sumeru Akademiya and the Akademiya’s Scribe. The game developers have introduced him as a 5-Star Dendro character who can deal substantial damage independently.

When it comes to Alhaitham’s elemental skill, he rushes forward, dealing Dendro DMG to nearby opponents when the rush ends, causing a Chisel-Light Mirror to form. However, holding this skill will cause it to behave differently. When this skill is unleashed, Alhaitham will generate 1 Chisel-Light Mirror. If there are no Mirrors, he will generate one additional Mirror.

Undoubtedly, Alhaitham is a phenomenal character to pull in Genshin Impact 3.4 version. To get the most out of Alhaitham, make sure to build the character for the Spread Main DPS role using the Gilded Dreams artifact set.

1. Ganyu – The Best Genshin Impact 3.4 Character

The best Genshin Impact character as of update 3.4, Ganyu.

The extremely powerful Cryo character, Ganyu, secures the number-one spot on our top five Genshin Impact characters list. Ganyu’s strength is primarily in her ability to deal massive area of effect (AoE) damage with her ultimate ability, “Celestial Shower,” and her charged attack. 

Although she may not have the same level of single-target damage as characters like Tartaglia, she still proves to be quite effective in dealing with single-target damage, thanks to her impressive AoE abilities. Similarly to Tighnari, Ganyu has the ability to perform two instances of charged attack damage, with the second one dealing high AoE damage, which serves as her primary source of damage output. 

When combined with Cryo buff and Melt reactions, she can effortlessly deal over 150,000 damage with every charged attack. Even without reactions, Ganyu is a consistent and reliable Damage Per Second (DPS) character who can inflict enormous damage at any distance.

Overall, Ganyu is a powerful character and a great addition to any team, especially when fighting with powerful bosses and enemies.

These are just a few of the many characters in Genshin Impact that we featured in the above ranking list. It is crucial to experiment with different characters and find the ones that best fit your playstyle. Remember that some characters are only available through the gacha system, so it may take some time and luck to get the characters you want.

Fire Emblem Engage Weapon Triangle Guide: How to Break

The weapon triangle that has been seen in most Fire Emblem games is now returning in Fire Emblem Engage, after skipping Three Houses. Generally, the Weapon Triangle is as it was in previous titles. However, there are a few new additions to this feature. We’ve got you covered with what exactly the Weapon Triangle is, as well as what the new Break feature is!

What Is the Weapon Triangle in Fire Emblem Engage?

The weapon triangle in Fire Emblem Engage.

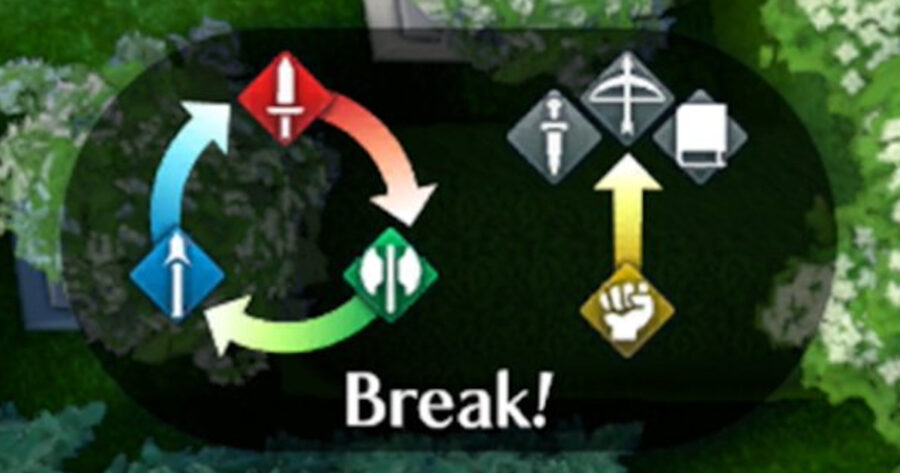
The Weapon Triangle establishes which weapons have an advantage against each other. When fighting enemies in battle, you must strategically utilize your troops to deal with enemies holding certain weaponry. In Engage, the Weapon Triangle is as follows:

  • Sword > Axe
  • Axe > Lance
  • Lance > Sword

Additionally, it is worth noting that enemies with other weapons (bows, magic, & daggers) are able to be overcome by using Body Arts. You must utilize this knowledge properly to ensure you defeat your enemies in battle. Failure to do so can limit your ability to Break enemies, which means they will consistently counterattack without any chances for you to take an upper hand.

What Is Breaking Enemies & How to Break?

How the break mechanic works in Fire Emblem Engage.

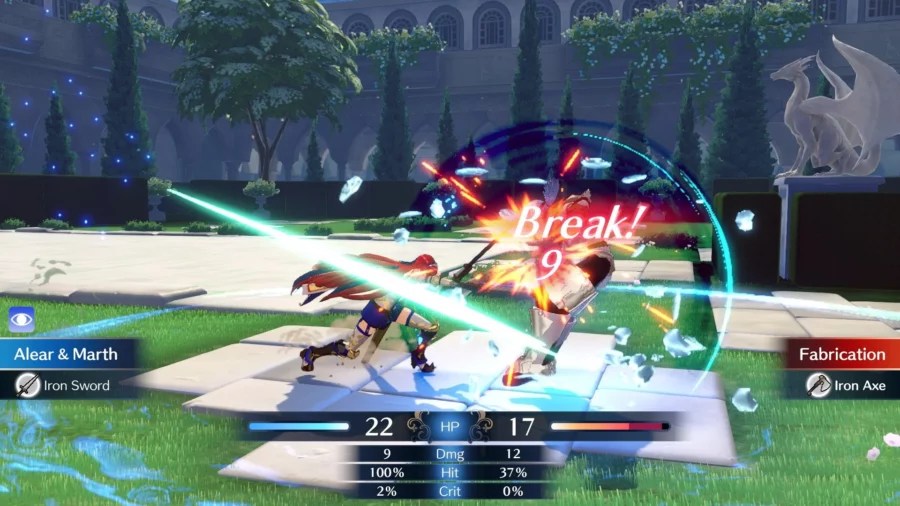
A new feature to Engage is called Break, which allows you to inflict “Break” on your enemies. Break is inflicted for an entire turn and prevents the enemy from counterattacking. The enemy affected will be unable to counterattack until their next turn, meaning you can utilize a different character from the one you inflicted Break with to deal massive unanswered damage.

To Break, you will need to attack an enemy with the right weapon. This means that you must follow the Weapon Triangle and properly inflict damage with the correct weapon. By doing so, you will be able to Break your enemy. When this is activated, the enemy’s sword, lance, or axe will fly off the screen, accompanied by big red letters stating “Break!”.

Do note that this Break effect can be inflicted on you if you’re not careful. While the Break status effect is not guaranteed to land each time, your only chance of inflicting it upon an enemy is to utilize the Weapon Triangle properly. Make sure to properly assess each battle to ensure that you are keeping the upper hand in combat.

Overwatch 2 Kkachi Echo Skin Guide: How to Get the Free Skin

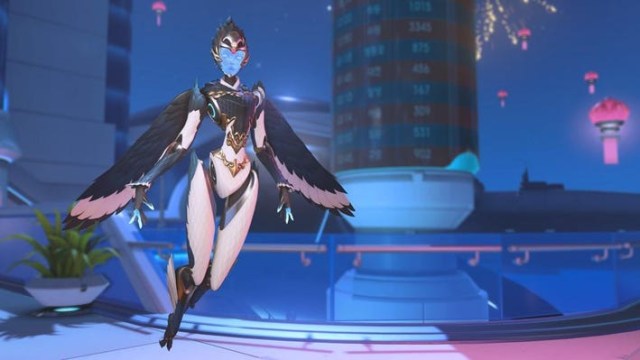
Overwatch 2’s Lunar New Year 2023 event is currently ongoing and ends on January 31st, 2023. The event has brought with it some returning game modes and many new cosmetics for players to unlock and purchase. One of those new skins is the Kkachi Skin for Echo. Here is how to get the free Overwatch 2 Lunar New Year Kkachi Echo Skin.

How to Get the Kkachi Echo Skin in Overwatch 2

The Kkachi Skin for Echo has been made available for the limited time event of Lunar New Year 2023 in Overwatch 2. It is a legendary skin that can only be unlocked by completing 4 of the 7 available Event Challenges. This is a completely new skin to Overwatch 2 and has not been made available previously. Even veteran players of the original Overwatch will want to unlock this Skin for free while they can. And this may be players only chance for a while to get this Skin for free as it is directly tied to the Lunar New Year Event. Of course, it is possible for this skin to appear in the in-game shop for Overwatch Coins at any point in the future.

Below is a list of all 7 Year of the Rabbit Event Challenges and rewards:

Year of the Rabbit Event Challenges
Lucky Pouch – Complete 2 challenges in Lunar New Year Lucky Pouch Weapon Charm
Good Fortune Kkachi – Complete 4 challenges in Lunar New Year Kkachi Echo Skin
Mark of the Rabbit – Win 10 games of Bounty Hunter Year of the Rabbit Spray & 1000 Battle Pass XP
Sixth Time’s the Charm – Eliminate the bounty target 6 times 1000 Battle Pass XP
Lucky Rabbit – Win 6 games in CTF or Competitive CTF Year of the Rabbit Name Card
Auspicious Victories – Win 8 games in CTF Blitz Hongbao Souvenir
Catch the Rabbit – Capture the flag in CTF or CTF Blitz 1000 Battle Pass XP

Stay Updated on The Latest Punk News

Get the latest punk news delivered straight to your inbox

We'll store and process this information to provide you our products and services. You may opt out of this at any time.