Tower Control is one of the four Anarchy Battle ranked modes available in Splatoon 3 that tasks each team with transporting a tower from the center of the map towards a goal near the opponent’s base. It’s an objective-based modes centered on harsh territoriality over a small tower, resulting in high-kill and intense matches.
This makes Tower Control one of the most difficult modes to master in Splatoon 3, which is what this guide seeks to help with. This explainer is here to tell you everything you need to know to achieve victory in this mode, from the very basics to the strategies key for victory and rising through the ranks.
What are the Rules of Tower Control?
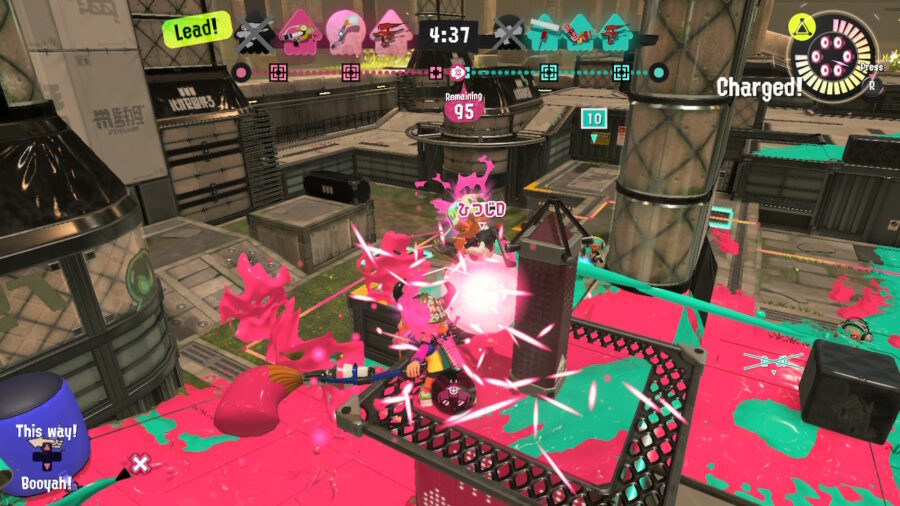
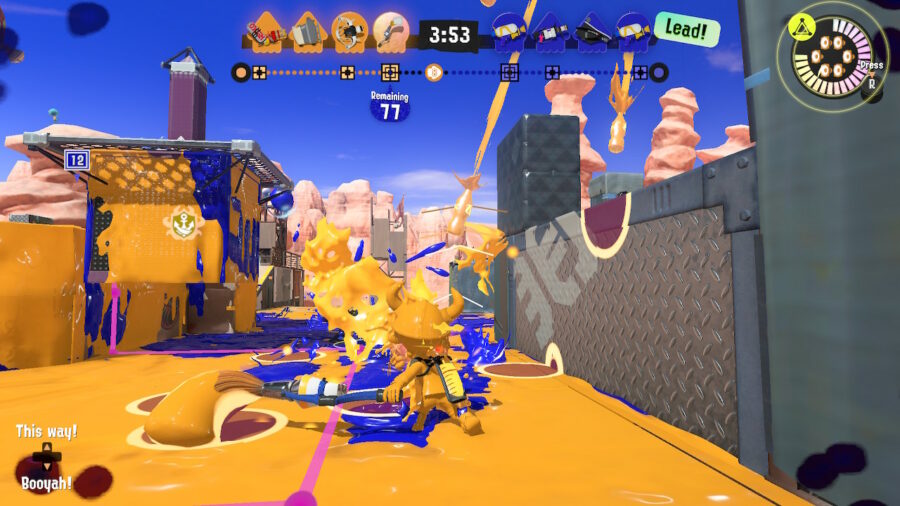
At the start of each match of Tower Control in Splatoon 3, each team will converge on a central tower stationary in the middle of the map. This is the objective, and victory is achieved either by transporting this tower to the goal in your opponent’s side of the field within five minutes, or the team that has gone the longest distance to transporting the tower when time runs out. The tower can only be moved along a set path when at least one member of your team is stood on the tower while none of the enemy team are on it.
If players from both teams are present on the tower at the same time, the tower will not move in either direction until only players from one team are stationed on the tower. Points are scored the further this tower travels along the path. Also, since you are less likely to paint the turf while standing on the tower, you will slowly increase your special meter the longer you stand on the tower.
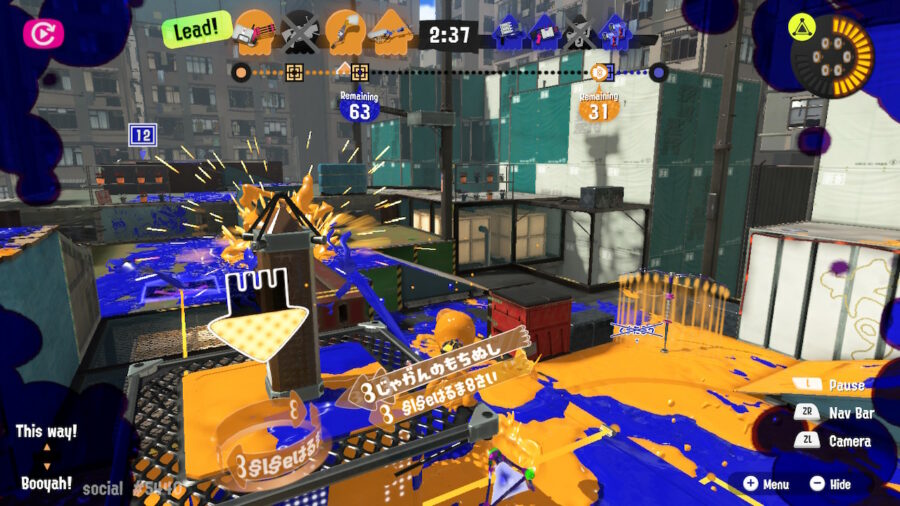
How do Checkpoints Work in Tower Control in Splatoon 3?
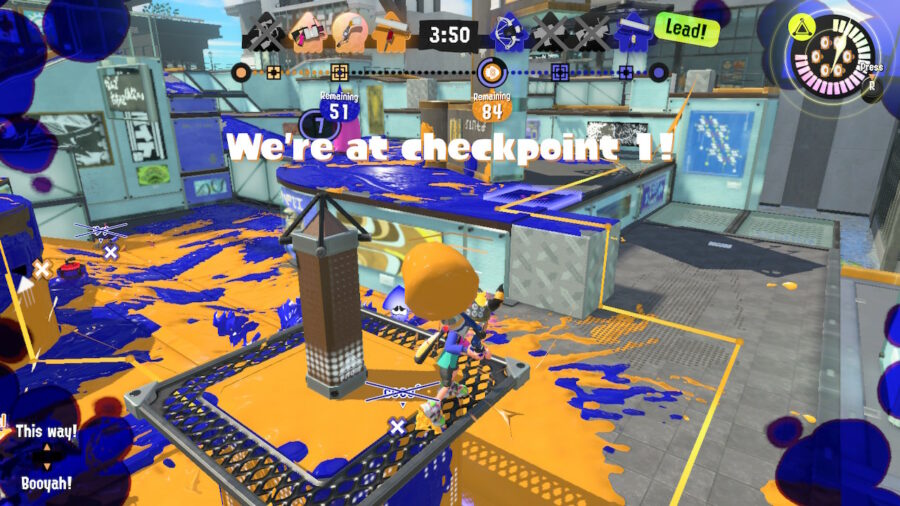
In Tower Control in Splatoon 3, rather than the tower moving at a consistent rate through the stage from beginning to end, the tower will stop at 2-3 checkpoints along the route. At these points, players from the team moving the tower must stand on and protect the tower until the counter for the checkpoint reaches zero. At this point, the checkpoint will be cleared and the tower will continue to move along the map.
If the checkpoint is not cleared and the tower returns towards the center of the map, no matter for how long, the timer on the checkpoint will reset and the time needed to protect the tower t the checkpoint will restart from the beginning. However, after this has been cleared, the team will no longer have to wait at this spot of the map in order to continue towards the enemy base as the checkpoint will have disappeared. Each checkpoint must only be cleared once.
Protecting the Tower in Tower Control in Splatoon 3
The best methods of protecting the tower in Tower Control in Splatoon 3 depend heavily on team composition and weapon of choice. For example, it is better that players with stronger, short-range weapons such as Brushes stand on the tower due to their ability to rapidly inflict damage upon anyone who approaches or joins them on the tower.
Even more important than this are the effective use of specials and bombs to keep enemies away from the tower. The Big Bubbler is a temporary spherical barrier that protects against attacks from outside the protective sphere. While it doesn’t stop players from entering the sphere, climbing the tower and attacking from the inside, it does make it harder to attack from a distance and protects the player stood on the tower.
It should also be noted that the Big Bubbler lasts half as long when placed on top of the tower, lasting just 6 seconds rather than 12 seconds. Placing the Bubbler alongside the tower so that the sphere covers the tower at a checkpoint, however, will not count as being placed on the tower, ensuring it will last the full 12 seconds.
Alternatively, weapons that inflict area attacks that can be aimed at the tower are effective offensive maneuvers to remove opposition players standing on the tower, but can also be used defensively. Using a Triple Inkstrike aimed at the tower can prevent a player from approaching it due to the damage they would take while doing so.
Beyond special weapons, even bombs can be a useful deterrent to keep players from approaching the tower, even if they won’t protect from distant assault from long-range Shooters, Splatlings or Snipers. A suction bomb is guaranteed to stay on the tower and inflict damage to any enemy still stood on it when it explodes, making it a useful subweapon in this mode.
What are the Best Weapons to Use for Tower Control?
The best weapons in Tower Control in Splatoon 3 are long-range weapons that can inflict damage on players stationed on the tower, as well as short range weapons for those stood on the tower. The best weapons fitting in these categories are those with the most effective special abilities for the mode, as described above.
For short-range weapons, we recommend the default Splattershot Jr. Its rapid fire rate and the inclusion of a Big Bubbler as its special weapon make it a threat when stationed on the tower. We also like the employment of the Inkbrush, thanks to its rapid fire rate on the tower and ability to attack from afar with its Killer Wail 5.1 special.
When it comes to longer-range weapons, an effective sniper such as the E-liter 4K can be a game-winning weapon when used to pick off any opponent that dares to make a break for the tower. Long-range shooters such as the Jet Squelcher or even the Dapple Dualies as weapons with some of the longer range of any Shooter weapon in the game. We would generally discourage the use of the Dapple Dualies due to their lower damage output and inability to be used on the tower effectively as they would be unable to use their primary advantageous mechanic, the dodge roll.
How to Improve at Tower Control in Splatoon 3
Improving at Tower Control in Splatoon 3 comes from effectively taking control over the tower at the right moment and protecting the tower from the enemy team. The tower acts as a central point for which all action will converge upon, and being the player stood on the tower leaves you directly at the center of the match, and the most likely target for enemy assault.
To win, you must know how to effectively defend your position on the tower, whether that be through effective short-range weapon choice and bomb placement or the use of protective specials. Similarly, when not on the tower, offensive specials that can effectively remove your opponent from the moving platform such as the Inkstrike are key to stopping them from scoring more points.
As with all modes, map control is key, as this makes it far easier to find the best vantage points for long-range assault or to quickly make it to the tower to duke it out for control directly on the action point. Ultimately, paying attention to where your enemies are and picking them off before they have a chance to control the tower is very important, as specials like the Big Blobber make it harder than ever to remove an opponent once they’re comfortably in control of the Tower.
Happy splatting!
