
The turbine-themed Mogawak Shrine introduces a battery charging puzzle mechanic to The Legend of Zelda: TOTK. This Zonai Shrine’s solution may take some basic science knowledge to complete, but we’ll cover each of the ins and outs of Mogawak Shrine in Tears of the Kingdom in the following step-by-step walkthrough, including the optional chest.
Where to Find Mogawak Shrine in Tears of the Kingdom

Mogawak Shrine is located within Zora’s Domain in the East of Hyrule, just underneath the bridge at the front entrance to the Zora homestead. If you’ve already got the map for this area unlocked at the Upland Zorana Skyview Tower, simply shoot up and paraglide your way eastward, you won’t miss the green glow of the Zonai Shrine.
Watch out for the falling sludge too, it looks like the Zora’s waters have been polluted – so if you’ve been following the Regional Phenomena main quest, the marker will also lead you straight to the Domain and Shrine.
How to Solve Mogawak Shrine: The Power of Water in Zelda TOTK
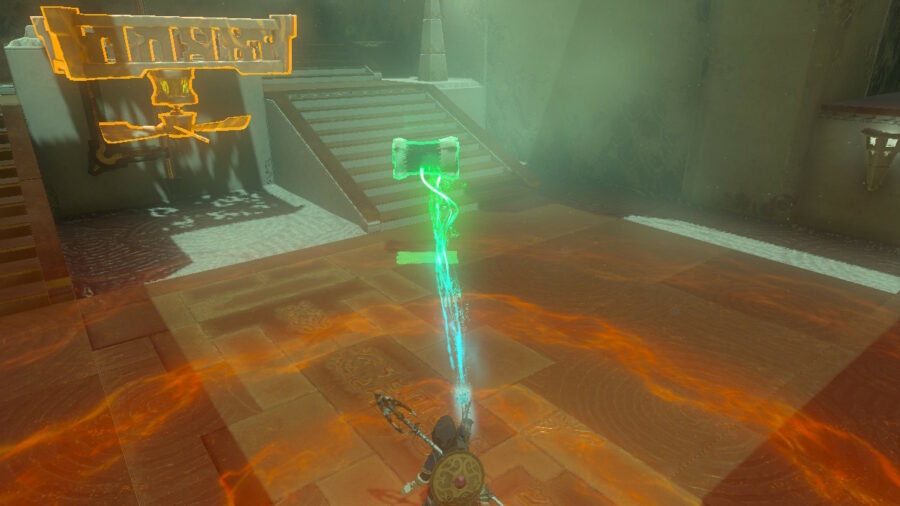
Upon entry, you’ll see your goal both in front and above you. Head down into the chamber and you’ll see a lift with a fan attached to the bottom, along with a suspiciously placed cylinder. You’ll notice it’s Ultrahand friendly, which means we’ll be finding a use for it.
How to Charge the Battery
We’re getting into some elementary science territory here, so first thing’s first:
- Pick up the cylinder with Ultrahand and take it over to the right side of the lift.
- Place the cylinder onto the charging port standing upright, and leave it there for now.
- Grab the square stone frame, flip and attach it to the top side of stone cylinder stuck to the wall, beside the running water spout.
- Once attached, simply pull one of the now obvious water mill paddles under the running water and let go.
- The makeshift mill will now spin perpetually, and provide energy to the cylinder you placed, charging it with electricity. “Science, bitch!” – Jesse Pinkman.
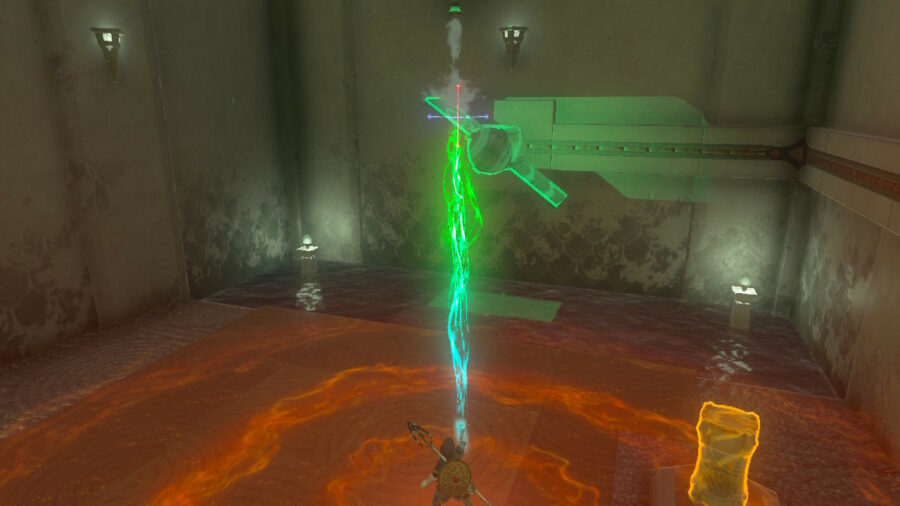
Mogawak Chest Solution
With a fully charged battery, the first thing you’ll want to do is pick it up and turn right around towards the opposite side of the room for the optional chest solution. Here’s what to do:
- Bring the battery over, but don’t place it on the port just yet, there’s only a little bit of charge in it and you don’t want to waste time.
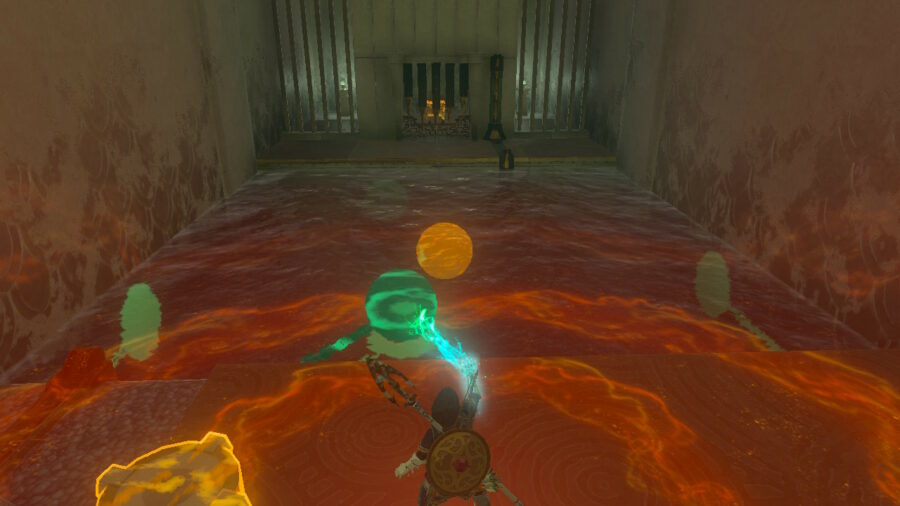
- Use Ultrahand to see the two chained metal balls in the pool of water in front of the shut gate.
- Grab the balls one by one and place them as close to each other underwater as you can.
- Once done, place the battery on the port and you’ll see the electricity pass through and conduct through the water and balls to reach the door on the other side.
- Quickly swim over while the door is open and grab the Opal inside the chest.
Mogawak Shrine Solution
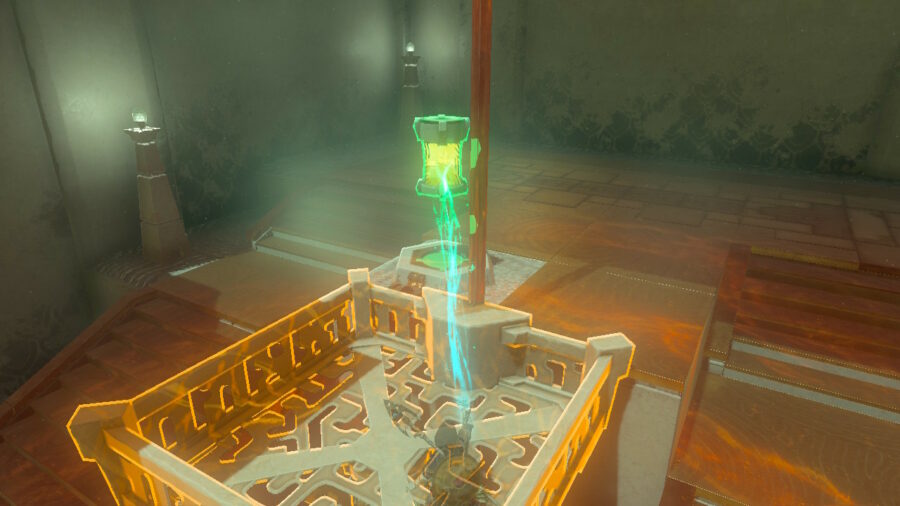
With the optional chest complete, all that’s left is the simpler, main solution of Mogawak Shrine – the lift. Firstly, though, you’ve likely got a dead battery in need of a recharge, so do the following:
- Using Ultrahand, bring the battery back over to your little turbine station where you first charged it and place it back down.
- Once recharged, bring it over to the lift but don’t place it on the port.
- Hop in the lift first, then grab and place the battery.
- You’ll zip up and be placed right in front of the Shrine statues and your goal.
As usual, you’ll net yourself a Light of Blessing to put towards reclaiming your lost hearts and stamina from a Goddess Statue, and that’s it for Mogawak Shrine in TOTK. For more Tears of the Kingdom Shrine walkthroughs, check out our Mayaumekis Shrine guide, or our Mayachin Shrine walkthrough.


