Overwatch 2: How to Play Kiriko (Abilities, Skins, & More)

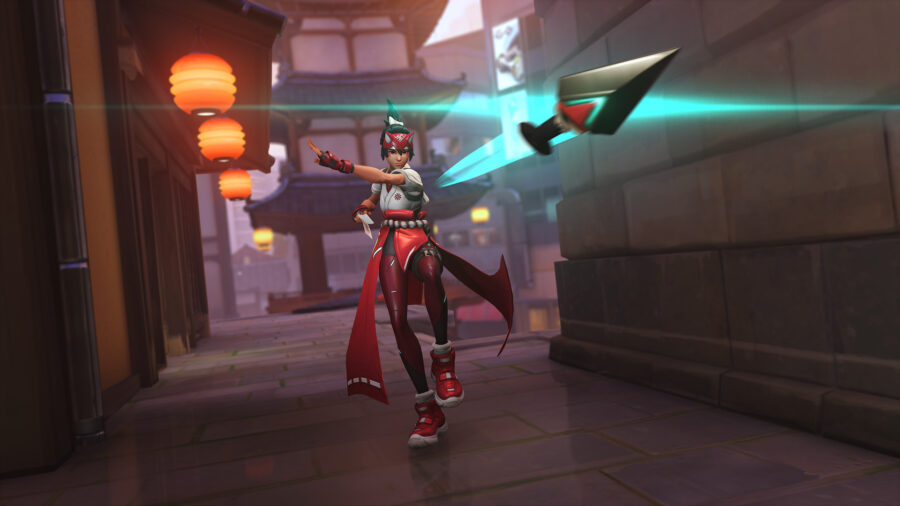
Overwatch 2 launched on October 4th with Kiriko as the newest support hero. Kiriko learned the deadly art of ninjutsu from her mother Asa. When the Shimada can fell, Kiriko’s father was taken hostage and Kiriko had to be moved to her grandmother’s home. After years of training in the healing arts, she has returned to take on her enemies.

Overwatch 2 Kiriko’s Abilities

Kiriko Overwatch

Kiriko’s Abilities in Overwatch offer a mix of offensive and defensive capabilities. She is primarily a healer, but her damage output is quite strong. Here is a rundown of all her Abilities.

Wall Climb (Passive): Her passive allows her to jump at walls and climb up them. It is the same passive as Genji and Hanzo, and it gives her added mobility and survivability. 

Healing Ofuda (Primary Fire): Her main source of healing is her Healing Ofuda. She can store up to 10 charges that rapidly refresh. You can burst heal by holding down your primary fire button or you can toss them at your allies one at a time. Each talisman heals allies for 13 HP each and throwing them out in a burst heals allies for 26 HP.

Kunai (Secondary Fire): Kiriko’s secondary fire does 40 damage per body shot and 120 damage per headshot and holds up to 12 ammo before needing to reload. Her secondary fire has pinpoint accuracy and can potentially two-tap most heroes in the game.

Swift Step (Ability): Kiriko’s first Ability is Swift Step which allows her to teleport to allies even through other characters. It has a short 7-second cooldown and allows you to traverse up to 35 meters.

Protection Suzu (Ability): Kiriko’s Protection Suzu is an arcing projectile that makes allies immune upon impact. It also cleanses all negative effects and heals allies for 50 HP. The Ability can be used to completely shut down certain Ultimates.

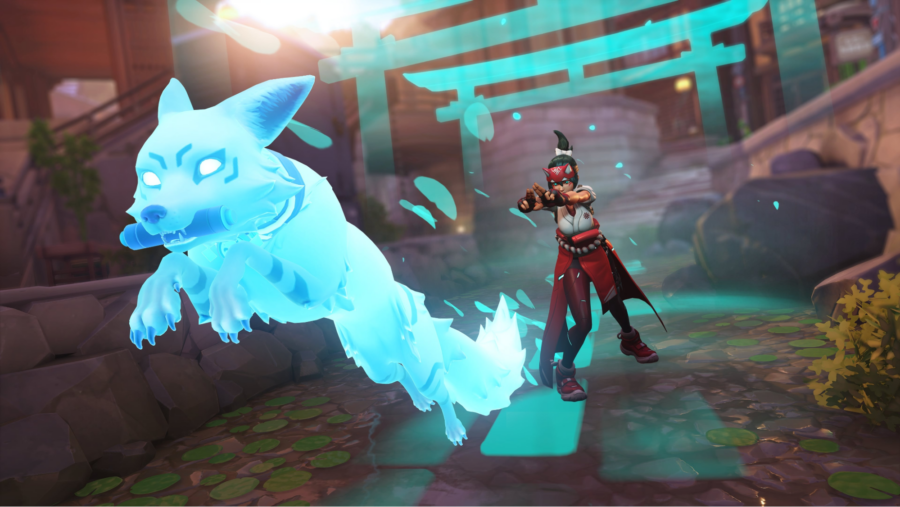
Kitsune Rush (Ultimate): Kiriko’s Ultimate Ability summons a fox spirit that rushes forward and buffs all allies. Kitsune Rush buffs movement speed by 50%, maximum range by 25 meters, rate of fire by 25%, reload time by 50%, and all allied Abilities have a 60% cooldown reduction. The buffs last for 10 seconds.

Overwatch 2 Kiriko Skins

Here are all of the skins available in Overwatch 2 for Kiriko: 

  • Athleisure (Legendary)
  • Sukajan (Legendary)
  • Hinotori (Legendary – Battle Pass)
  • Matsuri (Epic)
  • Ajisai (Rare)
  • Fuji (Rare)
  • Take (Rare)
  • Tanpopo (Rare)

Most of Kiriko’s skins can be purchased using legacy Overwatch tokens as well as Overwatch 2 coins. However, the Hinotori skin is exclusive to the Battle Pass. The Sukajan skin for Kiriko can be obtained for free as a Twitch drop from October 7th to October 16th by watching any Overwatch 2 stream on Twitch for six hours.

Overwatch 2 Kiriko Tips

Kiriko is designed as an aggressive support character. She can heal allies, deal tons of damage and buff her teammates. To truly master her, players need to figure out team synergies and develop an understanding of when to use her important Abilities. Here are some tips that can help you master Kiriko in Overwatch 2

Aim for Headshots: It is important to aim for headshots with Kiriko as she has a 3X multiplier to her damage. If you are caught out of position by an enemy or need to take out an important target, always aim for the head. Since your Kunai does increase critical damage you will be able to take most enemies out in just over a second. The hero is very mechanically demanding but she has pinpoint accuracy on her weapon, which should make it easier for you to master the most lethal component of her kit.

Combine Spirit Step with Protection Suzu: Supports can see when their allies have critical health and you can use your Spirit Step to run into allies who are in danger even through walls as long as they are in range. Your Protection Suzu will grant yourself and your ally in danger immunity and you should be able to recuperate from the situation.

Use Protection Suzu to Make Game-Winning Plays: Many Ultimate Abilities can be shut down if you time your Protection Suzu right. You can completely negate all damage from D.Va or Cassidy’s Ultimate or even shut down important Abilities. You should also identify Abilities that do not get cleansed by the Ability which currently include Junkrat’s Steel Trap, Reinhardt’s Charge, Roadhog’s Chain Hook, Sigma’s Gravitic Flux, and Zarya’s Graviton Surge.

You can also enable plays with Protection Suzu by setting up Abilities for your teammates. If we use Earthshatter as an example, Reinhardt is typically prone to getting his Ultimate Ability canceled by other heroes. By making Reinhardt immune for a short duration, he can pull off his Ultimate without any disruption.

Combine Kitsune Rush With Other Abilities: Kitsune Rush can make already devastating Abilities and Ultimates become even more lethal. Storm Arrows and Whole Hog receive a massive fire rate buff which allows them to deal increased damage in a shorter duration. However, there are some inconsistencies and abilities like Particle Barrier, Projected Barrier, and Sentry Turret do not receive  

When Should You Play Kiriko?

Kiriko is suitable for all maps but she works best in more aggressive team compositions. Her healing output is not that high compared to Ana or Moira but she can definitely hold her own. If your team’s other healer is a Lucio or Zenyatta, then it can be difficult to go up against enemy teams that have a lot of splash damage.

Her Protection Suzu can save your team in a pinch and she is hard to kill thanks to Spirit Dash which can get her away from danger. She is arguably on par with Lucio and Zenyatta in terms of utility and is a strongly recommended pick if you want to play her. However, the meta needs to settle down before we truly realize where she is positioned among the current roster of healers.

Wii U Web Browser Used One Last Time to List Wii U on eBay

MINNEAPOLIS — A local gamer unearthed his long idle Nintendo Wii U and used its web browser one last time to list it on eBay, sources have confirmed. 

“Wow, this is ironic,” said Troy McNeil, as he used his Wii U gamepad to take a picture of the Wii U system. “Not so much that I’m using it to post it on eBay with its own web browser, but I guess that I’m using it at all. Maybe ‘ironic’ isn’t the right word. It’s uh, it’s ‘weird’ to be using it. Maybe ‘annoying’ is the word. Oh god damn it, it’s making me enter my password on this awful tablet controller thing. I can’t talk and do this shit at the same time, okay?”

Roommates who thought they’d seen the last of the Wii U were shocked to hear of it once again. 

“Wow, fuck that thing,” said Simon Downs, a former housemate of McNeil’s. “For like a solid six months there he was trying to convince us it was a fun system with good hardware. What a rough six months, man. It’s pretty weird that he’s using it to sell itself, huh? This is like the time he drove his car across town to the guy that was buying it off of him.” 

“He had to walk home in the snow,” he added, laughing. 

As of press time, the console had been successfully listed for sale, in a post that simply reads, “For sale, Wii U, hardly played.”

Overwatch 2 Best Heroes – Tier List

Overwatch 2 just launched and Blizzard has spent months fine-tuning the abilities of all the characters and some of them even got complete reworks. With the game shifting to a 5v5 format instead of 6v6, a lot of heroes have seen a shift in their place in the meta. Here is our day-one tier list that tries to highlight where each hero stands in the current meta.

Overwatch 2 Tier List

Overwatch 2 tier list

  • S-Tier: Lucio, Winston, Zarya, Sigma, Genji
  • A-tier: Zenyatta, Baptiste, Brigitte, D.Va, Roadhog, Reinhardt, Wrecking Ball, Reaper, Soldier: 76, Tracer, Sojourn, Sombra, Ashe, Echo
  • B-Tier: Ana, Orisa, Hanzo, Bastion, Junkrat, Pharah, Cassidy, Torbjorn, Widowmaker
  • C-Tier: Mercy, Doomfist, Junker Queen, Symmetra
  • D-Tier: Moira

Kiriko has not been placed on this tier list as she was just released and a lot of players have not unlocked her yet. My current impressions of Kiriko based on my personal experience are very positive. She is arguably one of the strongest healers in the game and might be on the same level as Zenyatta in the A-tier. However, it is too early to tell as players are still figuring out her kit. We will have a better understanding of the hero soon.

Overwatch 2’s Best Heroes: S-Tier Hero Breakdown

Lucio is arguably the best healer in the game right now, but it might not be for the reasons you think. DPS heroes gain 25% increased reload and movement speed upon securing an elimination and it stacks with Lucio’s Speed Boost. This has enabled a much more aggressive playstyle and it synergizes perfectly with traditional “dive comps” that are still popular. 

Winston, Zarya, and Sigma are the three best tanks in the game and are capable of holding their own in fights. With one less tank slot in Overwatch 2, these three tanks are the premier options in most situations and you should master them if possible.

Genji is one of the biggest winners of the latest balance patch as he already had enhanced movement speed and it pairs well with the new DPS passive. With most forms of crowd control being removed from the game, he has fewer counters than ever before.

A-Tier Hero Breakdown

Zenyatta, Brigitte, and Baptiste are the best options among supports to pair with Lucio. All of them have their unique strengths and are better suited for fast-paced 5v5 combat compared to healers like Ana or Mercy.

Tanks are very strong in Overwatch 2 and D.Va, Roadhog, Wrecking Ball and Reinhardt find themselves comfortably sitting in the A-tier. All three options are great and might be better than our S-tier picks in certain situations. 

It comes as no surprise that several hitscan heroes have found themselves in the A-tier. With fewer shields in the game, DPS heroes are free to lay down damage on the enemy team, and very few do it better than our picks in the A-tier. Soldier, Sojourn, Ashe, and Echo are among the most consistent options available in the game right now. 

Tracer and Sombra on the other hand offer a lot of flanking potential in Overwatch 2. Reaper’s tank-busting potential is higher than ever with his Wraith Form pairing well with the DPS speed buff passive along with Lucio and Kiriko’s speed buffs.

Overwatch 2 B-tier Hero Breakdown

The B-tier is meant for situational heroes who can be very powerful provided you have the necessary synergy. Pharah is the best example of this as she is not as effective as other DPS heroes in the higher tiers on her own. However, if you pair her with Mercy, she can be one of the most powerful DPS heroes in the game as she gets constant access to a damage buff or healing at all times.

The same goes for Widowmaker, Junkrat, and other heroes in this tier. Some of them shine on specific maps while being mediocre in others. But in the right hands, heroes like Widowmaker and Cassidy can put in work. Your personal mastery of these heroes comes into play here.

Overwatch 2 C-tier Hero Breakdown

Overwatch 2 Best Heroes

Doomfist and Junker Queen received significant changes before Overwatch 2’s release and both of them feel like they do not have a place in the meta. Junker Queen was the number one tank and arguably the best hero in the game in competitive Overwatch for months. Pro players got to use her at her maximum potential, but it forced a stale meta and Blizzard was forced to nerf her. Doomfist on the other hand got reworked from a DPS into a tank and is just underwhelming compared to other options.

Mercy offers little utility on her own and only when is she paired with heroes like Ashe or Pharah does she offer more solid value. Other supports outperform in most situations. Symmetra received multiple reworks over the years and even in Overwatch 2, she is in an awkward situation where every DPS option outperforms her.

 D-tier Hero Breakdown

Moira is the only hero in this tier and it is because of several nerfs to her kit. The nerfs feel too aggressive and she offers no real value aside from her above-average healing and survivability. But if you enjoy playing her and want to take on the occasional DPS Moira role, feel free to use her.

Which Heroes Should You Play?

The tier list is designed as a subjective look into the meta. Your personal playstyle preferences and mastery of a hero dictate what you should play. While choosing the best heroes in the game might be the most obvious choice, you may have mastered other heroes or simply enjoy playing specific heroes more. The game is all about fun and you can most definitely make low-tier heroes work provided you put in the time to work around their weaknesses.

How to Improve at Using Stringers (Bows) in Splatoon 3

Stringers, sometimes known as bows, are the newest weapon type introduced to Splatoon 3 and making their debut in this new title. As a result, many players may not know how to use this new and unique weapon type, how to get the most out of its functionality, and what to partner this weapon with in order to get the maximum functionality from the bow and take down opponents.

This guide is here to help with that by offering everything you need to know to use Stringers in Splatoon 3, from the very basics of how these weapons work to which modes and strategies will maximum splats and victories.

How to Use Stringers (Bows) in Splatoon 3

Stringers or bows in Splatoon 3 function as mid-to-longe range weapons that acts as a precise bow offering a range of attack options against an opponent. Two bows are currently available for players to use in Splatoon 3, but both function similarly to one another.

Stringers have one of three attacks depending on how long you hold the ZR button to fire a shot. Tapping the ZR button essentially functions as a way to ink turf, firing a short-range wide triple-shot directly in front of you that inks the turn around you. This will not deal much damage to an opponent and should only be used in last-ditch short-range combat due to its rapid fire capability when the enemy is directly in front of you. To effectively use the bow you will want to fire from a distance and use the charged attacks, which vary depending on how long you charge the bow.

Holding the ZR button until the first circle around the aiming reticle in the center of the screen has filled up will fire a mid-range shot directly in front of the player. This will fire in a narrower radius to the initial shot fired by the bow, but will travel a longer distance. By holding the bow until the shot has charged fully, this longer-range attack will travel even further again, allowing you to attack enemies and ink turf that is even further in front of the player than even a partially-charged shot is capable of doing.

What are the Different Types of Stringers (Bows) Available in Splatoon 3

As of Splatoon 3’s launch there are a total of two stringers available for players to use. These are:

  • Tri-Stringer (Unlocked at Level 4)
  • REEF-LUX 450 (Unlocked at Level 10)

Both of these stringers function strikingly differently depending on the option chosen. The REEF-LUX 450 is designed for closer-range combat as a fast-charge, fast-firing weapon. This is supported by its Curling Bomb sub-weapon, which not only acts as a bomb that can travel along the ground but can also be used to push further into enemy territory by swimming in the bomb’s ink trail.

The Tri-Stringer is designed as a long-range combat weapon similar to a sniper, but with a different firing frequency and ink trajectory. While a sniper will fire a straight line of ink directly in front of the player from its initial firing location, the Tri-Stringer will fire an arked shot that will only minimally ink the floor on its journey. When the semi-charged or fully-charged tri-shot lands, however, the triple shot from the archery shot will explode in a small radius around the landing point, dealing up to 84 points of damage depending on how close an enemy is to the exploding shot.

This makes it a weapon that can act as a great counter to enemy snipers by forcing them to move from their position in enemy territory while firing from a distance, as well as being particularly useful in Tower Control as an explosive deterrent to opponents considering approaching the tower.

What are the Best Support Abilities to Use for Stringers (Bows)?

As you will spend much of your time using this weapon outside of the ink firing at enemies from a distance, we feel that Run Speed (Up) is the best support ability for Stringers in Splatoon 3. This allows the firer to remain agile while above ground to avoid enemy attacks and get into position to fire a shot of their own.

Similarly, the improved accuracy after jumping offered by Intensifying Action makes it an optional support ability we would recommend being used in a minimal capacity of 1-2 support slots in any clothing ability composition used to compliment the Stringer weapon.

As a mostly-distance shooter who will in theory rarely be splatted due to not appearing on the front lines, it is likely that you will regularly charge your special. The Tenta Missiles of the REEF-LUX 450 and Killer Wail 5.1 of the Tri-Stringer are both powerful special that, if using the weapon correctly, will be fired multiple times during a match. Therefore, we can strongly recommend the use of Special Power Up to your composition.

The Stringers in Splatoon 3, due to the small amount of ink fired with each shot and the little ground they cover with these shots, uses little ink per shot, while the Tri-Stringer is supported by Toxic Mist rather than a conventional bomb. With this in mind, we would not recommend the use of Ink Saver (Main) or (Sub), as well as Sup Power Up for this weapon type at this time as it is mostly unnecessary. If more weapons release in the future with different support abilities the use of Ink Saver (Sub) may be considered, but neither of these weapons will benefit much from their usage.

Explosive Arrows For Ranged Damage With Tri-Stringer

The Tri-Stringer in Splatoon 3 benefits from the addition of explosive tips when a charged shot is fired from the weapon. We recommend this is used to deal area damage to groups of enemies when firing from a safe distance, as well as fired near walls to damage enemies hiding behind them.

Depending on how close the enemy is to the shot these small explosions can deal up to 84 points of damage out of 100 needed to splat an opponent, making them deadly when used correctly as well as a deterrent that can control certain areas of the map by keeping opponents, particularly snipers, away.

This is particularly useful on maps with a lot of vertical terrain and maps with walls that can allow players to hide from your direct line of sight but may be hiding behind walls until they have charged their own weapon or are ready to fire a shot. A particularly good example of this style of map is on Scorch Gorge, which includes a large central platform and numerous high platforms at either side of the map’s center that guide players along a set path or a wall climb towards the center.

Firing charged shots towards the edges of these walls provides an opportunity for you to grab occasional splats from enemies who may think they are safely hidden behind the walls.

What Modes are Best Suited to Using Stringers (Bows) in Splatoon 3?

Due to the low ink coverage of Stringers in Splatoon 3, we do not recommend these weapons are used in Turf War, instead recommending these weapons in Tower Control or Rainmaker. These modes are best for the weapon as in each mode players are being guided towards a certain location by an objective and there is one singular focal point where quickly defeating an enemy before they reach a certain position is imperative in order to avoid defeat.

In Tower Control, the Tri-Stringer is useful for its explosive capabilities when fired directly towards the tower as a deterrent and damage output attack similar in strength to that of a bomb when exploding and hitting an enemy within its radius. In Rainmaker, attacking an opponent edging towards the checkpoint or goal on a set path could stop them from progressing by splatting them in their tracks or making it easier to pick off support players protecting the Rainmaker on its journey.

Which is the Best Stringer (Bow) in Splatoon 3?

Of the two Stringers currently available in Splatoon 3 we recommend the use of the Tri-Stringer, thanks to its longer range and explosive charged shots. This allows the weapon to better fit within its long-range support slot within a competitive non-Turf War team composition that can effectively crowd-control enemy snipers and opponents by blocking certain sections of the map from traversal with explosive-tipped archer shots.

This not only makes it possible for you to get splats from any player who chooses to ignore your controlling shots, it also makes it easier for opponents to know where enemies are going to be while not having to deal with snipers who could pick them off when making an offensive.

This is an all-new weapon type introduced with Splatoon 3, and as the game continues to be updated it is possible that the game could receive further updates that allow for greater variety in playstyles with this unique weapon type. Stringer weapons offer the opportunity to fire shots where it was previously impossible for other weapon types to reach thanks to its long-range arched shots, making it possible the weapon could evolve to further uses over time. As of now, its controlling presence makes ti a force to be reckoned with.

Happy splatting!

Jonathan Banks Shoehorns Monologue Into Shakespeare Production About Macbeth’s Past as a Philly Cop

NEW YORK — Audience members of a Broadway production of Shakespeare’s Macbeth were pleasantly delighted by the celebrity casting of Jonathan Banks in the title role, until the actor instinctively ad-libbed a monologue about being a cop from Philly.

“Back when I was on the force,” Banks began, wildly off-script. “We had a way of dealing with people like Banquo. Philly is a cold city. Real dark. Someone like Banquo or Fleance could go missing and nobody would bat an eye. Course all us cops were dirty back then; to a Philly cop the dirtiest thing is being clean. That’s what fellas like King Duncan just can’t understand, this world is all shades of gray, and even an ex-cop can’t be trusted as the Thane of Cawdor. Thou best not take half measures.”

The director of the production, Nicole Welsh, claimed the outburst was the best she could manage given the circumstances.

“Anytime he speaks for longer than thirty seconds, that just starts to happen,” Welsh said. “I found out that both his characters in Breaking Bad and Community were never supposed to even have much of a back story before he compulsively improvised a long-winded story about what he learned as a Philly man in uniform.”

Sources at the show reported that Banks also struggled with the crippling remorse Macbeth has for the men he kills.

“Ya know something, Lady Macbeth?” a reeling Banks stoically began in the second act. “These men had it comin’. They were in the game. I’m not gonna imagine a dagger or a severed head, because part of being a criminal is having a code. A dirty cop is no better than an honorable thief.”

At press time, sources noted that despite Banks having a breakdown and giving a career-shattering error, he never opened his eyes past halfway the entire three hour performance.

6-Hour YouTube Video Essay Doesn’t Have Time to Get Into That Right Now

NEW YORK — Popular YouTuber GTalksGames hit a snag in their latest video, the 6-hour long “Civilization: Beyond Earth In Hindsight,” finding themselves unable to cover all relevant material without taking the video to an exorbitantly long runtime.

“It’s a real shame,” GTalksGames explained across several jump cuts, “but with the bulk of the video, the two hours I spent explaining what a 4X game is, the hour I listed the best 4X games, and the 50 minutes going into the history of hexagonal tiles, I was left with so little time to get into MapGate, which is when the map switched from the bottom right to bottom left of the screen. I would love to get into this gripping story in another video, but it has to be one where I feel like I can dedicate the time that it deserves. MapGate isn’t some trivial matter, of course.”

According to Michigan State University journalism professor Dr. Jan Frunks, the issue of brevity vs. thoroughness is a constant battle for writers.

“When you’re writing a piece to be informative, there is an instinct to include every single detail you uncover, but if you do that, the piece will be bloated and unreasonable,” Dr. Frunks said. “I commend GTalksGames for finding the right balance, and completely agree that the extra segment would have put the piece over the line between robust and swollen. I watched their entire video on Civilization: Beyond Earth, and at 6:04:22, I think it hit the exact perfect length. I wouldn’t add or remove a second.”

Fan reactions have been mixed, with some appreciating the value placed upon their time and some mourning the loss of context and content.

“This is honestly horseshit,” viewer Tom Mudd said. “I watched this video specifically to hear about MapGate, and there was not a single thing about it. What was the point of talking about the game if you didn’t even bring it up? I spent nearly an entire work day just watching this thing at my desk and it just made the whole thing feel like a waste of my time.” 

At press time, GTalksGames was compiling notes on the subject for an extra two and a half hour long video to be released to his Patreon.

Splatoon 3 Collectibles: How to Customise Your Splashtag

You fancy playing a bit of Splatoon 3, and drop into a nice casual match of Turf War. You think oh, these players look cool, their little card dealios on the loading screen are all neon and edgy. Three minutes later, and you’ve been thoroughly routed by a team led by an Attention-Seeking Shirt Model and their Aspiring Sidekick. Aspiring. You’re furious. And there’s only one thing to be done – make a better Splashtag yourself.

Your Splashtag consists of three elements: badges, banners, and titles. These are accessible in the little terminal in the lobby, next to the entrance to the online modes. And now if you wanna make like Ash Ketchum and complete your collection – that is his catchphrase right? – then grab your reading glasses.. 

How to Unlock All Badges in Splatoon 3

Players have found over 250 badges in Splatoon 3 so far. That’s a buttload in both imperial and metric measurements. And here’s how to get ‘em all:

Turf War and Anarchy Battle Badges

 Tier 1 Tier 2Tier 3
Judd BadgeWin 50 Turf War matchesWin 250 Turf War matchesWin 1,200 Turf War matches. Ouch. 
Anarchy Battle Rank BadgeReach rank AReach rank SReach Rank S+
Clam Blitz BadgeWin 100 Clam Blitz matchesWin 1000 Clam Blitz matchesN/A
Rainmaker BadgeWin 100 Rainmaker matchesWin 1000 Rainmaker matchesN/A
Splat Zones BadgeWin 100 Splat Zones matchesWin 1000 Splat Zones matchesN/A
Tower Control BadgeWin 100 Tower Control matchesWin 1000 Tower Control matchesN/A

Splatfest Badges – Splatoon 3 Splashtag

 Tier 1Tier 2
Conch BadgeReach Fun Ruler rank in a SplatfestN/A
Tricolor Attacker BadgeWin one Tricolor Turf War match as an attackerWin ten Tricolor Turf War matches as an attacker
Tricolor Defender BadgeWin one Tricolor Turf War match as a defenderWin ten Tricolor Turf War matches as a defender

Salmon Run Badges

  Tier 1Tier 2Tier 3Tier 4
Grizzco Points Badge Earn 10,000 Grizzco PointsEarn 100,000 Grizzco PointsEarn 9,999,999 Grizzco PointsN/A 
Salmon Run stage Badges*Reach Eggsecutive VP 200Reach Eggsecutive VP 400Reach Eggsecutive VP 600Reach Eggsecutive VP 999
Salmon Run Boss Badges**Beat the boss 100 timesBeat the boss 1000 timesBeat the boss 10,000 timesN/A
Cohozuna BadgeBeat Cohozuna 10 timesBeat Cohozuna 100 timesBeat Cohozuna 1,000 times. Ugh.N/A
Hazard Level MAX BadgeFinish a shift at Hazard Level MAXN/AN/AN/A

*you’ll have to earn this on Gone Fission, Sockeye Station, and Spawning Grounds separately.

** and you’ll have to do this for each of the Salmon Run bosses: Big Shot, Drizzler, Fish Stick, Flipper-Flopper, Flyfish, Maws, Scrapper, Slammin’ Lid, Steel Eel, Steelhead, and Stinge. That’s 110,000 murders for your collection of gold badges here. 

Splatoon 3 Splashtags: Shopping Badges

 Tier 1Tier 2Tier 3
Marigold BadgeBuy 10 bits of food and drinkBuy 100 bits of food and drinkBuy 1,000 bits of food and drink
Shop Badges*Spend 100,000 at the shopSpend 1,000,000 at the shopN/A
Murch BadgeOrdered 10 things from MurchOrdered 100 things from MurchN/A
Catalog BadgeReach catalog level 50Reach catalog level 100N/A

*again, this is for each of ‘em: Naut Couture, Man-o’-Wardrobe, Crush Station, and Hotlantis.

Gear Badges

 Tier 1Tier 2Tier 3
Weapon Badges*Earn 4-star freshness with a weaponEarn 5-star freshness with a weaponN/A 
Brand Badges**Get 30 stars in a brand’s gearGet 100 stars in a brand’s gearN/A
Special Weapon Badges***Win 30 matches with a specific special weapon equippedWin 180 matches with a specific special weapon equippedWin 1,200 matches with a specific special weapon equipped

*yes, again, each. Read our best weapons tier list for their names.

**you know the score by now. These are all listed here.

***yep. each.

Tableturf Battle Badges

 Tier 1Tier 2Tier 3
Tableturf Battle Rank BadgeReach rank 30Reach rank 40Reach rank 50
Tableturf Battle Collection BadgeCollect 90 cardsCollect 120 cardsCollect 150 cards
Tableturf NPC BadgeBeat all level 3 Tableturf playersN/AN/A

Story Mode Badges

Mercifully, finally, there are only five more to tell you about from playing the story mode. They are:

  • DJ Octavio Badge: beat DJ Octavio at the end of the first major area.
  • Cap’n Cuttlefish Badge: complete the campaign. 
  • Callie Badge and Marie Badge: max out your hero level.
  • Mr. Grizz Badge: beat the secret kettle, once you’ve seen the credits roll. 

But we ain’t done yet – let’s get into finding the rest of your Splashtag drip.

How to Unlock Banners and Titles For Splatoon 3 Splashtags

Splatoon 3 Customizable Splashtags

There’s currently 99 banners, and well over a thousand titles. What’s the unit of measurement higher than a buttload? A life’s work, maybe? 

To get a quick one with some bragging rights out of the way, you unlock the title of Alternan World Champ for beating the story. Here’s the rest:

Catalog Level Rewards: Banners and Titles

As you may have seen in our guide on the subject, the catalog has a bunch of banners and titles up for grabs. These are the levels that Harmony will be handing out a banner as a reward:

1, 13, 26, 37, 44, 64, 78, and 97. 

And you’ll get a new title at these levels:

2, 18, 33, 38, 47, 54, 57, 67, 73, 85, 93, and 96.

The Shell-Out Machine: Banners and Titles

Right in between the food vendor and the locker room in the lobby is Splatoon 3’s very own bit of gacha, the Shell-Out Machine. You can trade in conch shells here for a prize, or pay for the privilege: 5.000 for your first go a day, and 30,000 for each subsequent go.  

The prizes are random, and not exclusive to banners and titles – you’ll end up with more food tickets than you can count – but they are in there. Honestly. 

Tableturf Battle Banners

For the real completionists, you need to get stuck into Tableturf, Splatoon 3’s in-game card game. It’s tucked away near the lobby, and if you play enough, you’ll net a banner for reaching level 10, 25, and 46.

Salmon Run Banners for Splatoon 3’s Splashtags

The last source of your Splashtag customisation comes from your labours at Grizzco. To unlock these though, you’ll need to keep reaching round 4 of Salmon Run, and collect bronze, silver, and gold scales by landing hits on the King Salmonid – though the odds of him spawning in are somewhat slim. Keep on grinding for gilded fish bits though and you’ll bag some banners for your efforts.

There you have it. Zero excuses for looking like a god-damn filthy casual.

Splatoon 3 Collectibles: Catalog Rewards

You’ll no doubt have seen that you now have two levels in Splatoon 3; one being your player level, and the new catalog level. This serves as a sort of free battle pass equivalent, as you earn experience towards it by doing pretty much anything in the game save for the single player, and each tier you reach nets you something or other, which we get into below. 

And much like a battle pass, this first catalog in Splatoon 3 runs until 7pm EST on November 30, 2022, at which point there will presumably be 100 new rewards to grind out, and writers everywhere will sigh at the labor involved in updating you all on them. 

Once you do bump up a catalog level, all you need to do to claim your prize is hop over to Hotlantis, the general store run by Harmony, who is… less than enthusiastic about her role. Hotlantis opens up to you at player level 4. 

Another thing to note is that for every catalog level you gain during a Splatfest Sneak Peak – the week or so in which you can sign up for your Splatfest team before the event actually kicks off – you’ll earn a conch shell, which you can use for a go on the Shell-Out Machine. As Ari says, gimme the loot. 

All Splatoon 3 Drizzle Season 2022 Catalog Rewards

As for what the things in the below table actually are: decorations and stickers go in your locker. Titles are unfortunately a mystery until you unlock them, as are (most) banners, so you’ve been robbed of quips by Nintendo there. You give Food/Drink Tickets to the food and drink vendor in the lobby for food, and drink, and Tableturf Battle Cards are booster packs for that surprisingly fun little side game. Emotes are your poses at the start and end of a match – and Mystery Boxes house either 10k cash, Tickets, or Ability Chunks. Everything else is equippable gear

So with that out of the way, here you go – all the Catalog Rewards for Drizzle Season 2022, painstaking notated from the Nintendo Switch Online app, where you could have looked this all up yourself:

1: Banner 21: Punk Pinks 41: Skipjack Work Boots 61: Cuttlefish Sandies 81: Blue Shrimpsiders
2: Title 22: Sticker – rad old school diving helmet 42: Food Ticket 62: Decoration – cute little model of Smallfry, your exploding pal from the campaign 82: Sticker – some Splatlandian letters in white
3: Emote – cross your arms and look moody af.  23: Tableturf Battle Cards 43: Tableturf Battle Cards 63: Drink Ticket 83: Drink Ticket
4: Food Ticket 24: Food Ticket 44: Banner  64: Banner 84: Tableturf Battle Cards
5: Studio Headphones 25: Mystery Box 45: Decoration – an absolutely horrifying adult human male looking squidling 65: Tableturf Battle Cards 85: Title
6: White Tee 26: Banner  46: Sticker – some indecipherable words in green and white 66: Sticker – an astronaut helmet, for the space cadets 86: Sticker – a fish having an X-ray; hope they’re alright x 
7: Pink Trainers 27: Decoration – target practise guy keychain 47: Title 67: Title 87: Tableturf Battle Cards
8: Tableturf Battle Cards 28: Sticker – some tasty fish bones 48: Drink Ticket 68: Tableturf Battle Cards 88: Food Ticket
9: Sticker – little windows dialogue box looking guy 29: Pilot Goggles 49: Fresh Card Pack – some shinies in here maybe?  69: Classic Straw Boater 89: Glassless Glasses
10: Decoration – target practise squid thing that you shoot in the lobby 30: Zink Layered LS 50: Mystery Box 70: Annaki Bracelet Tee 90: Distressed Vest
11: Food Ticket 31: Purple Hi-Horses 51: Emote – Rodin’s The Thinker 71: Red Hammertreads 91: Ink Black Clam Dunks
12: Tableturf Battle Cards 32: Drink Ticket 52: Sticker – another windows dialogue box dealio  72: Food Ticket 92: Decoration – target practise guy with his head blown off keychain
13: Banner 33: Title 53: Tableturf Battle Cards 73: Title 93: Title
14: Sticker – red squidling head graffiti 34: Tableturf Battle Cards 54: Title 74: Decoration – big red crab with a pure look of joy on his face  94: Sticker – some indecipherable words in blue and green
15: Emote – hands on hips,  also fairly moody 35: Emote – the moody crouch 55: Sticker – some kinda head and headphones in red, I think? 75: Mystery Box 95: Drink Ticket
16: Drink Ticket 36: Sticker – some indecipherable words in purple and red 56: Food Ticket 76: Emote – a decidedly less moody fist in the air 96: Title
17: Tableturf Battle Cards 37: Banner  57: Title 77: Tableturf Battle Cards 97: Banner – some morbid fish bone arrangement, which is not a secret for some reason
18: Title 38: Title 58: Tableturf Battle Cards 78: Banner 98: Emote – dab on them folks! 
19: Air Gills DX 39: Retro BluFocals 59: Beachcomber 79: Retro Framers 99: Mystery Box
20: Tentatek Tandem 40: Lime BlobMob Tee 60: Sudadera Celeste 80: Lime Battlecrab Shell 100: Triple Deck Specs


“Magic: The Gathering Is Like Crack” Says Man Who Has Never Been Addicted to Crack

LOS ANGELES — Local Magic: The Gathering player Doug Mullins has compared his enjoyment of buying and opening packs of cards to that of the high of crack-cocaine, despite the fact that he has never once been addicted to the hard drug. 

“There’s a gambling element involved in opening packs that just gives me such a dopamine rush,” said Mullins, who tried weed once in college but wasn’t a fan. “That’s why lots of people like to call it cardboard crack. It’s basically the exact same thing as that. Sometimes I see someone who’s clearly addicted to crack, and I think, damn. I know exactly how that feels.”

When pressed on this point, Mullins, who is nervous to take over the counter painkillers, doubled down.

“I mean it can totally be an addiction just like any other. I once spent $300 on Throne Of Eldraine Boosters trying to pull an Oko, Thief of Crowns,” Mullins explained. “Worst part was, I didn’t even get it.  If that’s not an addiction, then what is? I mean with crack, at least you usually get the thing you were trying to get. So that might not even be as bad as not getting Oko!”

However, many who have tried both Magic: The Gathering and crack, said that the similarities were only surface level. 

“I certainly see how one could compare opening packs to gambling, but to crack? I don’t know,” said local crack addict Mason Charles. “I tried Magic, and it was a lot of fun making pretend goblins fight each other, but it’s nothing close to facing an 8-ball in a rented motel room and then spending six straight hours masturbating. Magic players are grimier, sure, but it’s not the same.”

As of press time, Mullins, who thinks beer tastes “kind of gross,” was debating spending $20 on a Domina United Collector Booster, money that anyone who smoked crack, would have quickly exchanged for more crack.

Dr. Oz Mods ‘Fallout 4’ So He Can Kill Dogmeat

HARRISBURG, Pa. — Retired surgeon and political candidate Mehmet Oz allegedly modded the video game Fallout 4 so he could murder Dogmeat in cold blood, leaked game files confirm.

“This mod removes the ‘essential’ tag on your canine companion Dogmeat, so that you can torture him and then kill him. Or do experiments on him and then kill him. Or, heck, just whip out a pistol and do the deed right there at Red Rocket — whatever sick shit you want,” reads the NexusMods description for the mod, titled KILL Dogmeat!! (for science!!). “The mod comes with a lab coat for your character, so you don’t have to feel bad about it.”

Oz’s opponent for the U.S. Senate, John Fetterman, was quick to respond to the allegations.

“Personally, I love Dogmeat and would never harm him in any way. I even hunted down all the dog armor for him to wear, plus I always use a Stimpak to heal him in battle—even though there’s no risk of him actually dying,” said Fetterman, who released a full accounting of his Fallout 4 save files. “I just don’t want him to suffer. Unlike some people.”

The Oz campaign denied that their candidate was directly responsible for any harm to Dogmeat, claiming the mod was one of many he had installed.

“Dr. Oz just likes to use mods so he can roleplay as wacky characters. It’s true that his current character started out as a doctor who murders animals, but eventually he got bored with that and tried out some other mods,” said campaign manager Casey Contres. “Now, he’s playing as a radio host who also sells dangerous chems and is running for mayor of Diamond City. That one took a whole lot of mods, but he’s having fun — and that’s what matters.”

Further investigation showed that Oz’s character had sided with the Institute in the main quest, describing them as “morally impeccable” and “obviously the good guys.”

Stay Updated on The Latest Punk News

Get the latest punk news delivered straight to your inbox

We'll store and process this information to provide you our products and services. You may opt out of this at any time.